
The first Christmas in my own apartment, I walked into a home goods store with a budget of $60 and walked out with a bag that contained exactly four things: a single garland, a box of ornaments in a color I never ended up using, a candle that smelled like a pine-scented cleaning product, and a receipt that made me wince. My apartment looked fine, but it didn’t look like me, and it definitely didn’t look like $60 worth of effort.
The next year I decided to make most of it. I started with a bowl of dried orange slices, a roll of twine, and a pile of cinnamon sticks, and by early December my place smelled like a bakery and looked like someone with a real eye had decorated it. That’s the part I love about DIY Christmas decor: the handmade pieces carry personality that store-bought sets simply don’t, and most of them cost less than a single boxed ornament. If you want a bigger picture of making a compact space festive, my small apartment Christmas decor guide covers layout, lighting, and where to put the tree.
Below are 33 DIY Christmas decor crafts, from five-minute projects to a cozy weekend or two, with rough costs, difficulty, and the little finishing touches that keep them from looking like a craft fair. There are three tables, one for cost and time, one for kid-friendly projects, and one for a simple crafting schedule, plus safety notes and FAQs. Prices are rough and vary by store, and a few projects involve ovens, glue guns, or candles, so follow each product’s instructions and use your own judgment.
The Rules That Make Handmade Decor Look Polished
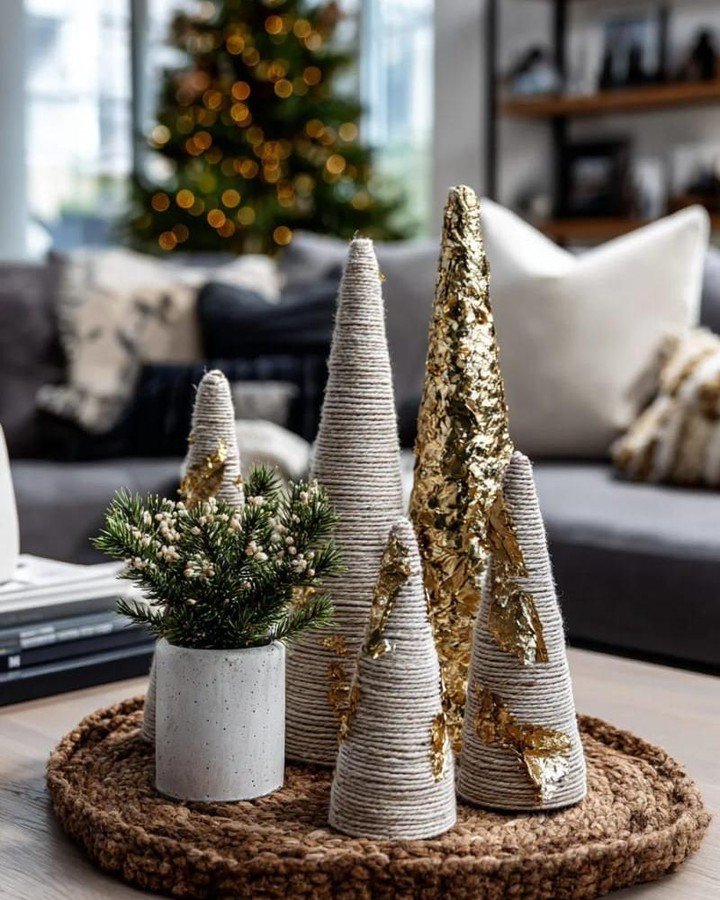
A few habits separate decor that feels designed from decor that feels improvised. Choose a limited palette of two or three colors plus natural elements like wood, greenery, and linen. Repeat materials in different places, so the same twine or gold shows up on the tree, the table, and the gifts. And finish neatly, since clean edges, trimmed glue, and even spacing make a bigger difference than expensive supplies.
Pro tip: Make a few of the same item in different sizes, instead of one of everything. A cluster of three paper stars looks like a deliberate collection, while one lonely star looks like a leftover.
1. Salt Dough Ornaments
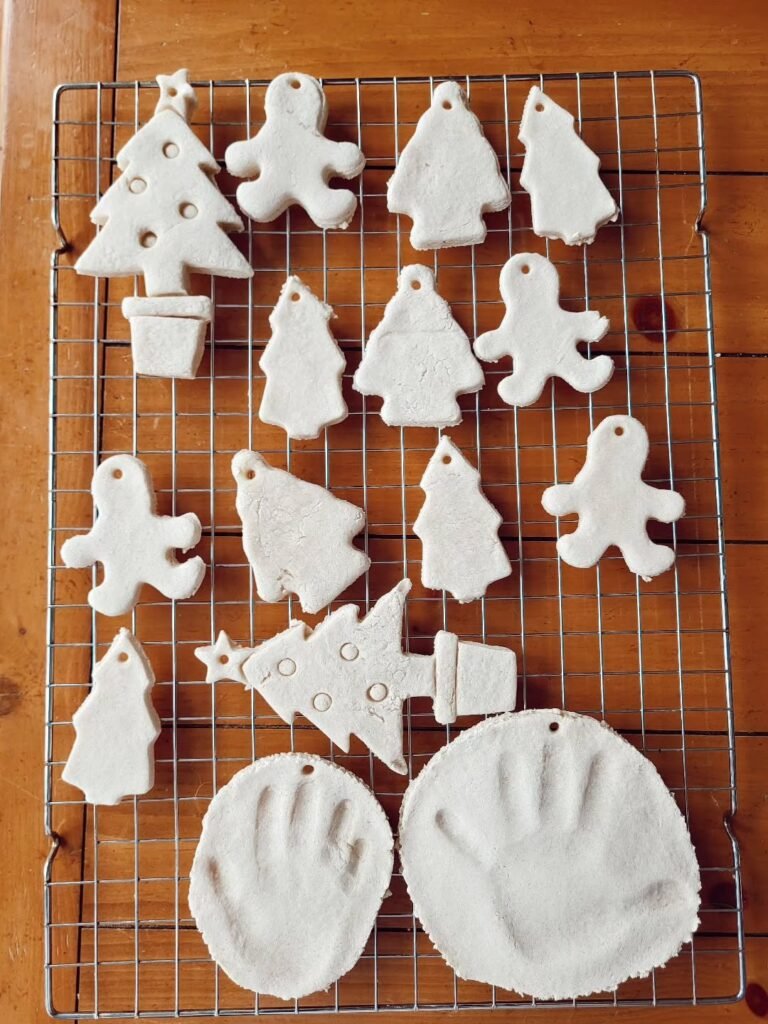
Salt dough is flour, salt, and water, and it’s one of the cheapest, most forgiving craft materials around. Roll it out, cut shapes with cookie cutters, poke a hole at the top, and bake at a low temperature until fully dried. Paint them white or leave them natural, and add a twine loop.
They look like handmade pottery, and they make lovely gift tags or keepsakes. Salt dough is not food, and the salt can be harmful to pets if eaten, so keep them out of reach of dogs and cats. Cost is about $3-6 for a whole batch.
2. Dried Orange Slice Garland
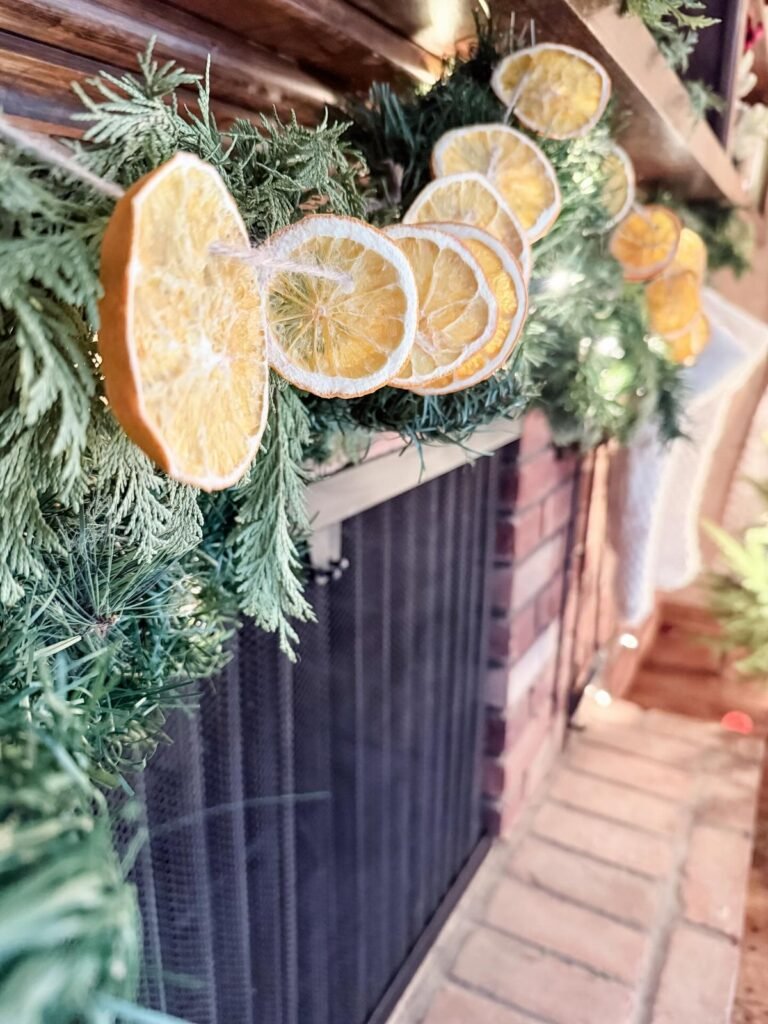
Slice oranges thinly, pat them dry, and bake them at a very low temperature for a few hours, flipping once, until they’re dry and slightly translucent. Thread them onto twine with cinnamon sticks and small pine sprigs. The result is warm, fragrant, and beautiful when light shines through.
It costs a few dollars and makes the whole room smell like the holidays. Store them in a dry spot, since moisture makes them moldy, and keep them away from candles.
3. Cinnamon Stick Bundle Ornaments
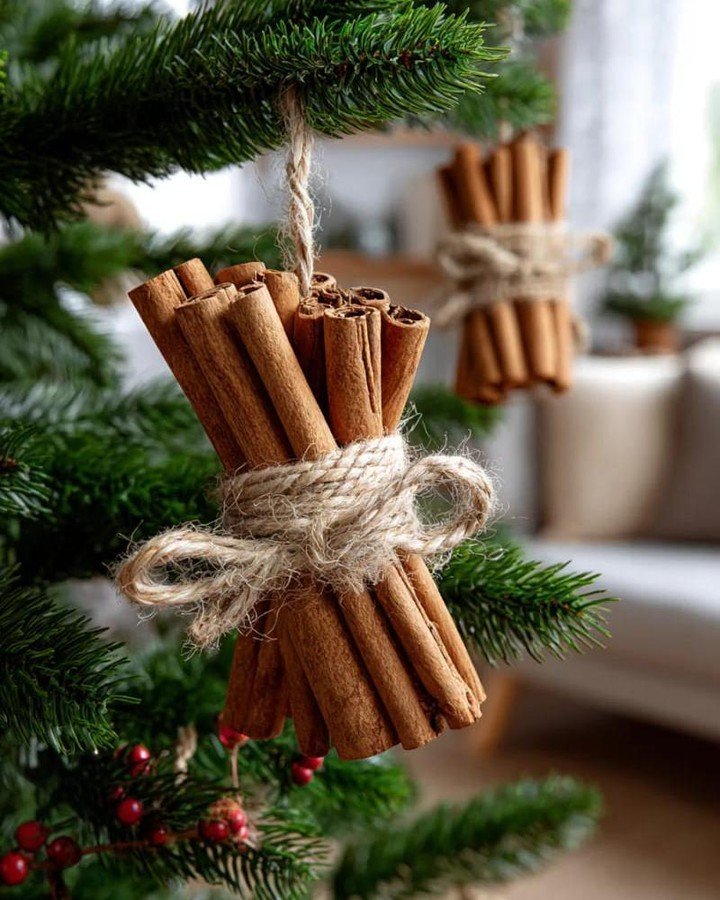
Tie three to five cinnamon sticks together with twine and a small sprig of greenery, add a loop, and hang them on the tree or tie them to gifts. They smell wonderful and look rustic and neat. A pack of cinnamon sticks makes a dozen or more bundles.
Choose sticks that are a similar length, and trim the ends evenly. Cost is around $5-8, and they last for many seasons if stored in a sealed container.
4. Stamped Air-Dry Clay Ornaments
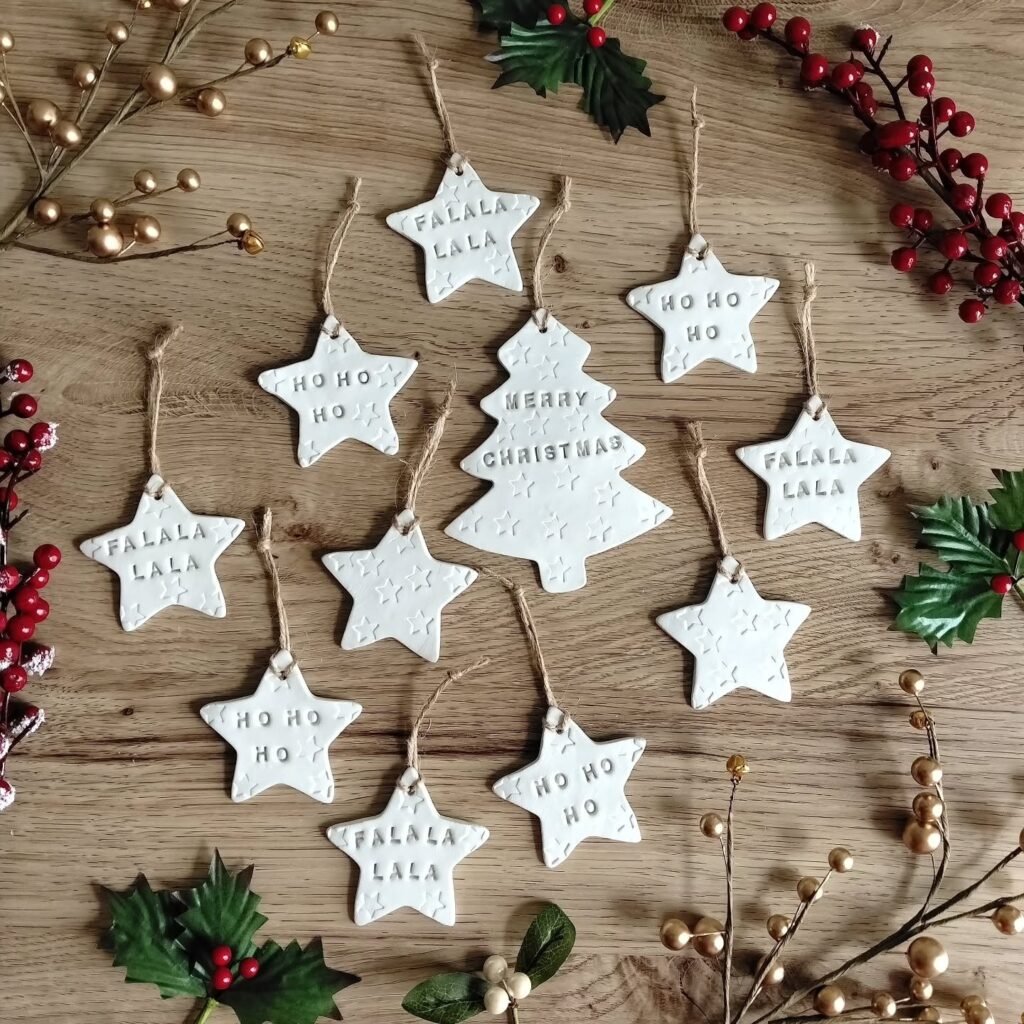
Roll air-dry clay, press in a pine sprig, a lace scrap, or a rubber stamp, and cut around the pattern with a cookie cutter or a knife. Let dry fully, then brush on white or gold paint to highlight the texture. They look like ceramic ornaments from a boutique.
Sand the edges lightly once dry, and seal with a matte finish if you want them to last. Cost is about $6-12 for enough clay to make dozens.
5. Felt and Yarn Pom-Pom Ornaments
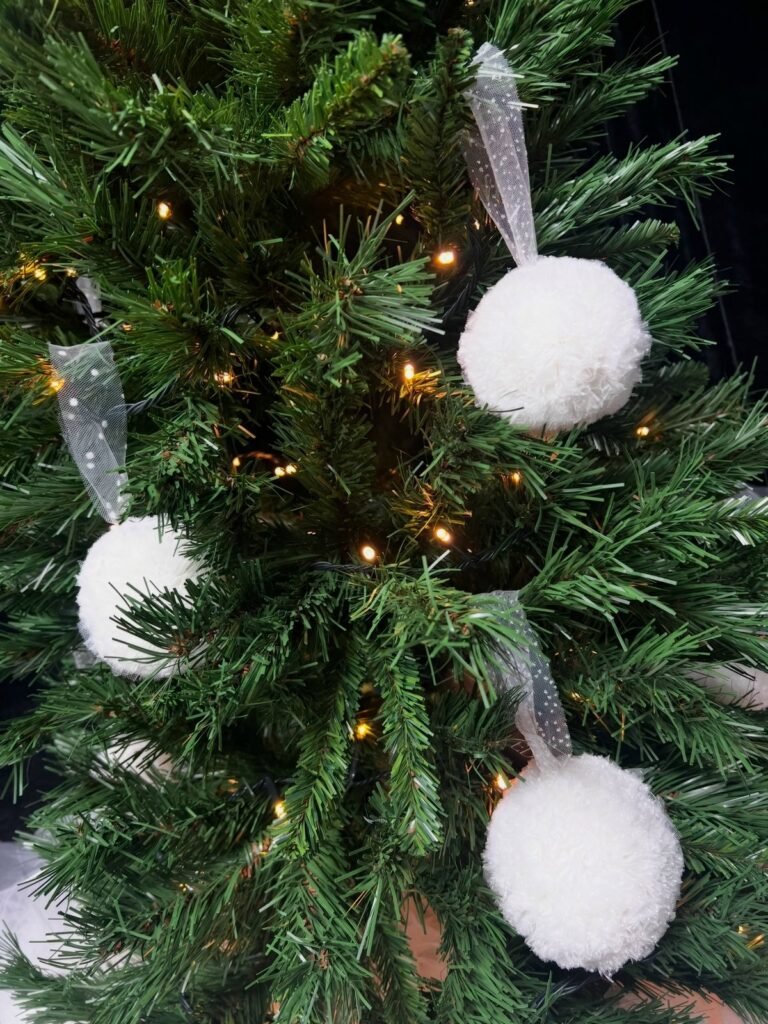
Wrap yarn around a pom-pom maker or a fork, tie it off, and trim into a neat ball. Group them in different sizes and neutral colors, or add felt circles and a loop. They’re soft, safe for kids, and surprisingly elegant on a tree.
Use cream, tan, and deep green for a classic Scandinavian look. Cost is under $10, and they’re a good project to do while watching a movie.
6. Layered Paper Stars
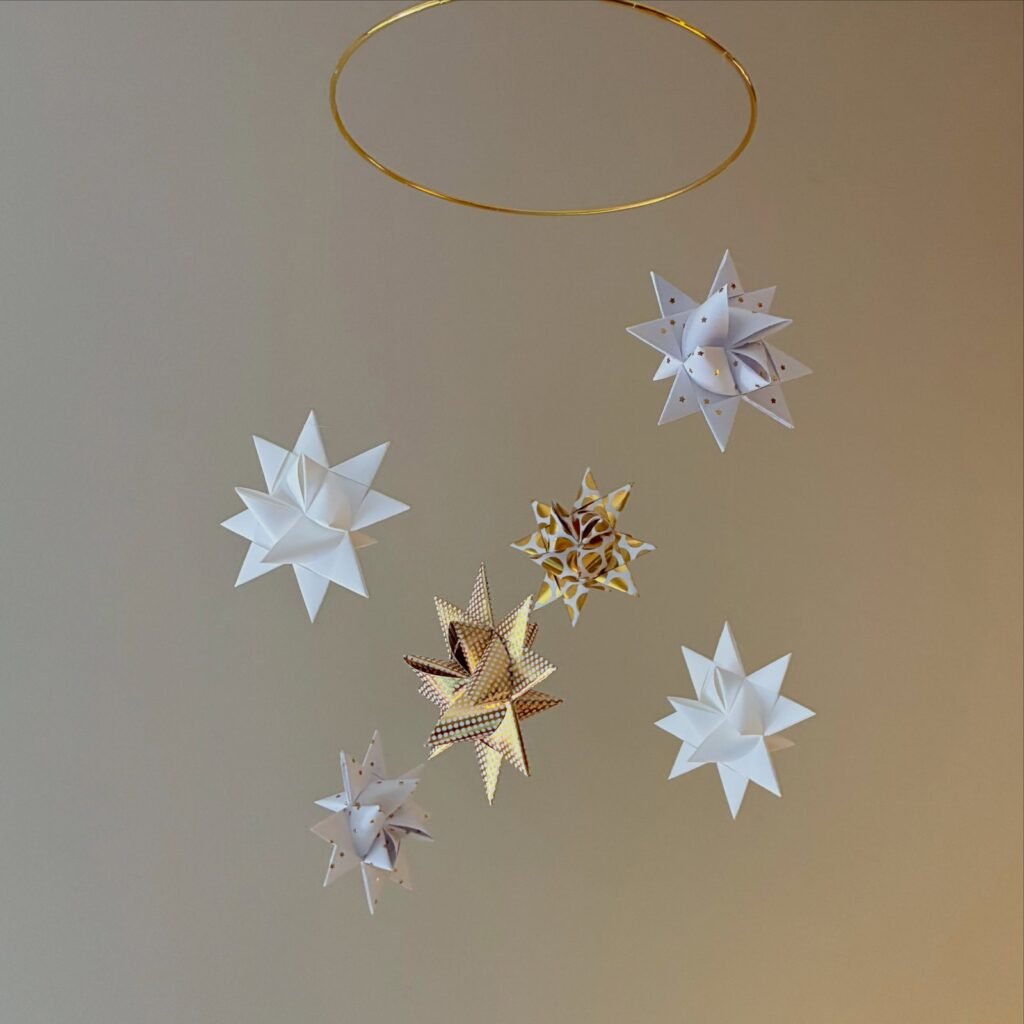
Cut the same star shape in several sizes from cardstock, fold each in half, and glue them together at the folds to create a 3D star. Hang them from the tree or in a window. Use white, kraft, or gold paper for a clean, modern look.
Take your time with the folds so each point lines up. A set of five costs about $4-8 in paper, and they’re lightweight enough to hang almost anywhere.
7. Popsicle Stick Snowflakes
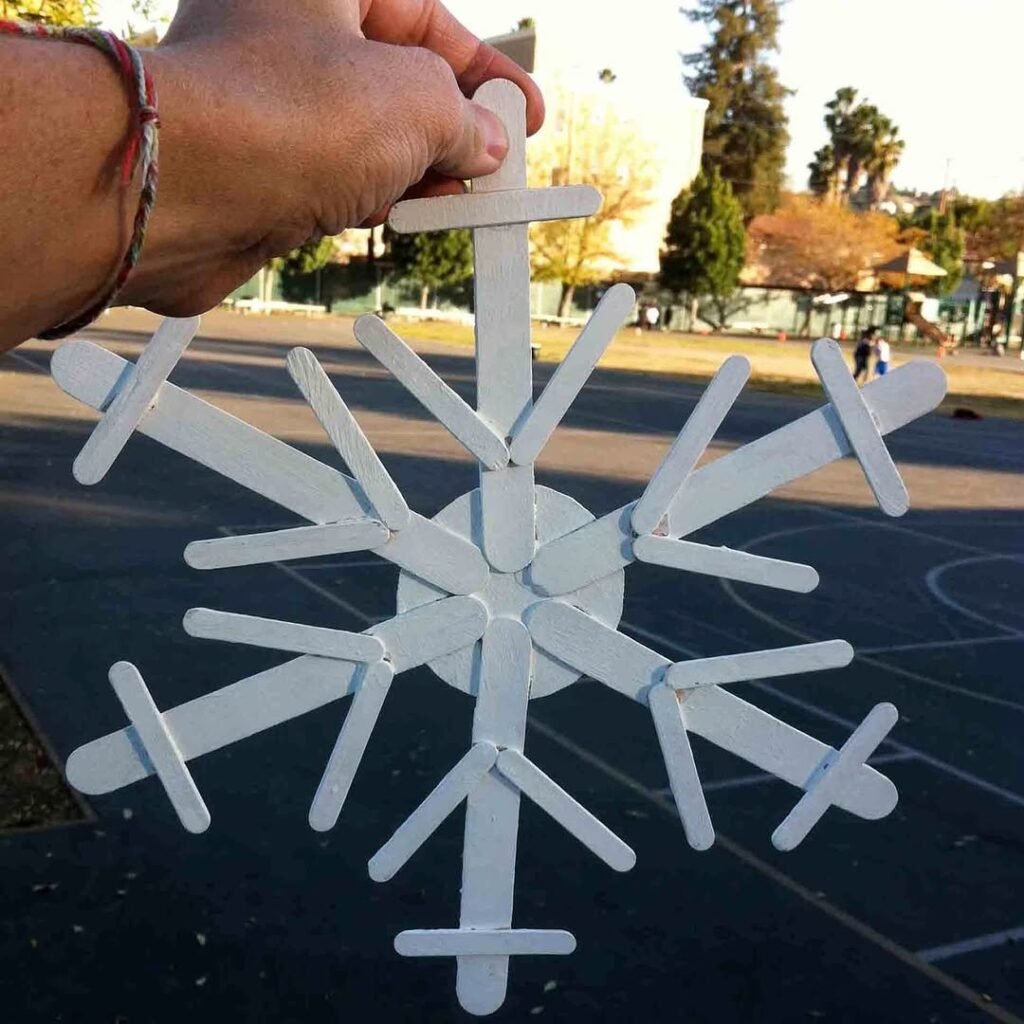
Glue craft sticks into a six-pointed star shape, then decorate with smaller sticks, beads, or glitter. Paint them white or silver for the best snowflake effect. They’re simple, durable, and great for kids and teens.
Use a strong craft glue and let each layer dry before adding the next. They cost a few dollars, and they stack flat for storage.
8. Clear Ornaments Filled With Dried Flowers or Faux Snow
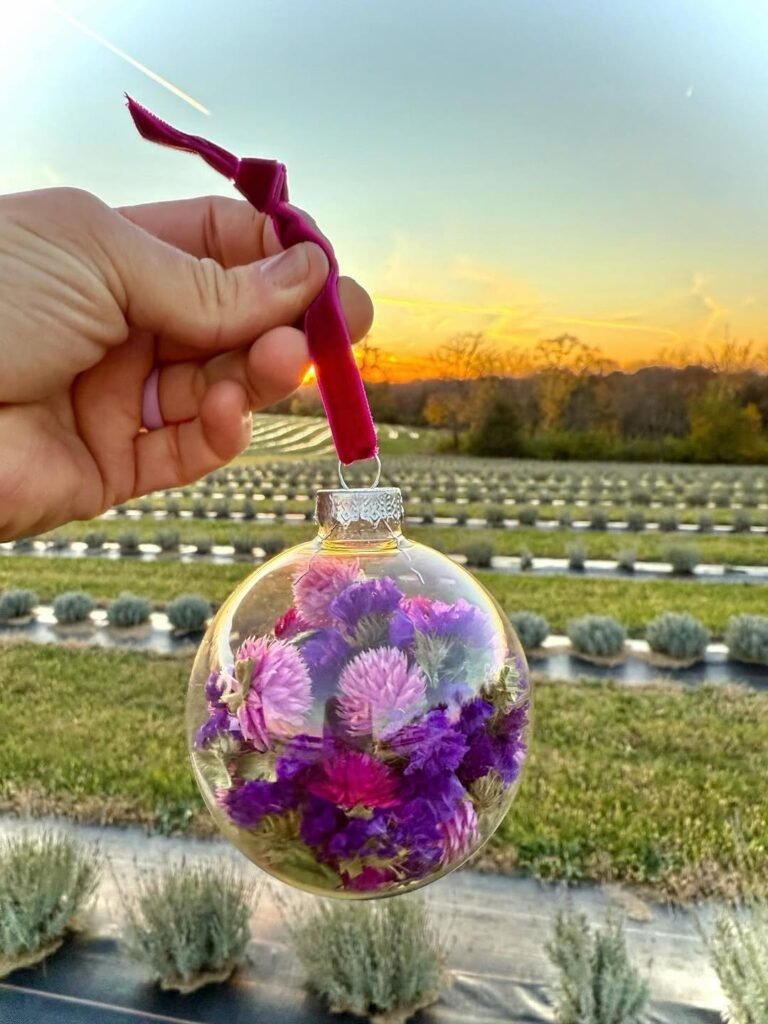
Clear plastic or glass ornaments become keepsakes when you fill them with dried flowers, small pine needles, faux snow, or tiny paper stars. Add a little clear glue to hold things in place, then close the top and tie on ribbon.
Choose a theme, such as winter botanicals or silver and white, for a cohesive look. Plastic versions are a safer choice around kids and pets. Cost is about $8-15 for a set.
9. Painted Wood Slice Ornaments
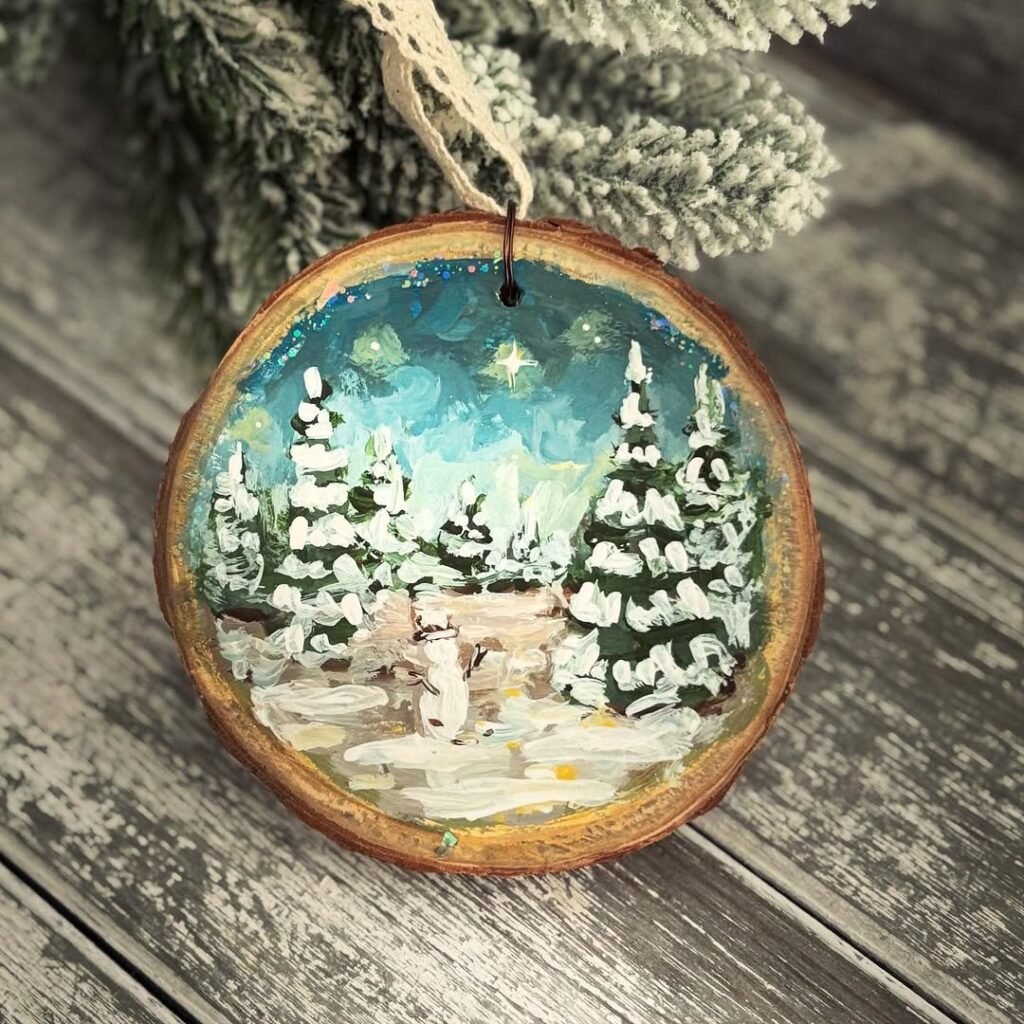
Wood slices from a craft store make charming rustic ornaments. Paint a simple design, like a tiny tree or a snowy hill, drill a small hole at the top, and add a twine loop. You can also write names on them for gifts or place settings.
A few thin coats of paint look better than one thick coat. Cost is about $5-12 for a bag of slices and a few paint colors.
10. A No-Sew Tree Skirt
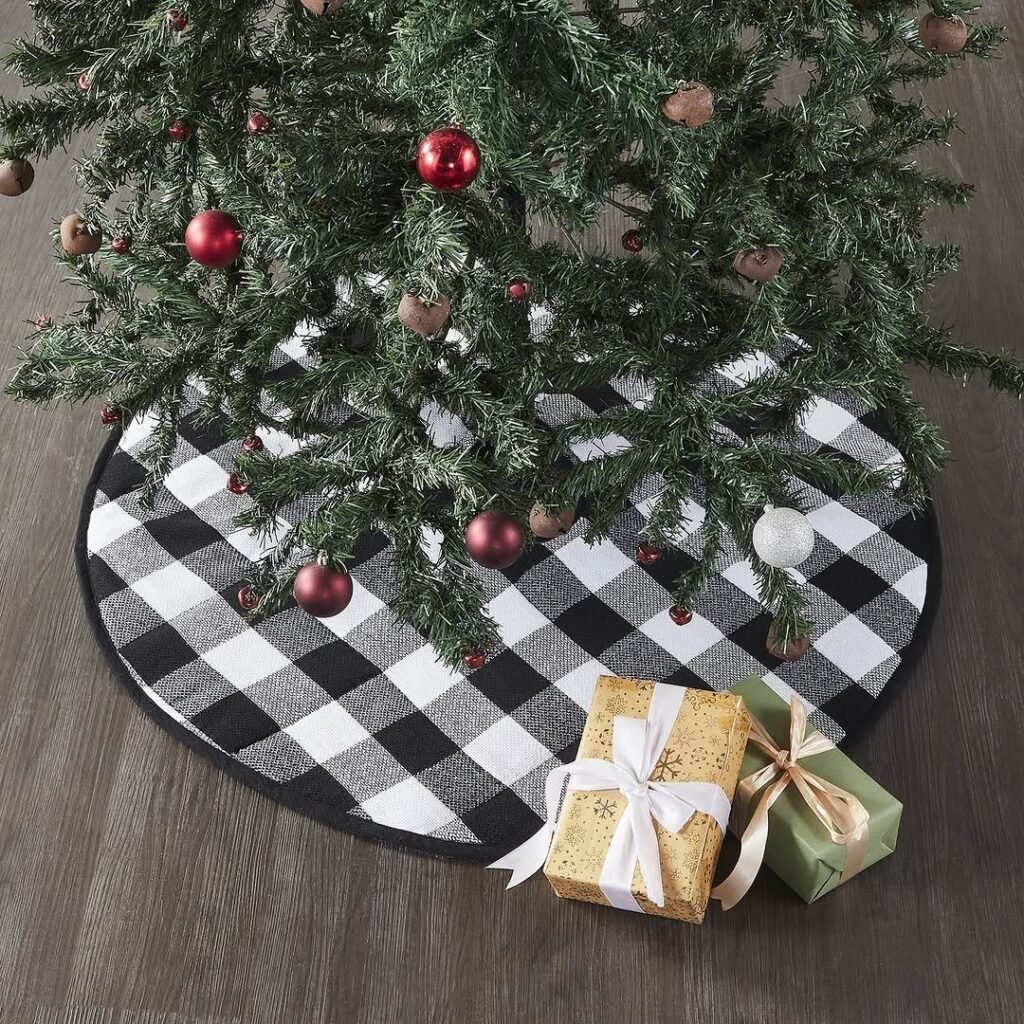
Cut a large circle from a piece of fabric, add a slit to the center, and trim the edge with fringe, pom-poms, or ribbon. Use fabric glue or iron-on hem tape instead of a needle. A buffalo check, a linen, or a faux fur makes a great base.
It hides the tree stand and instantly looks polished. If you’re short on space, a smaller skirt or a woven basket works just as well. Cost is about $10-20.
11. A Fresh Greenery Wreath on a Wire Ring
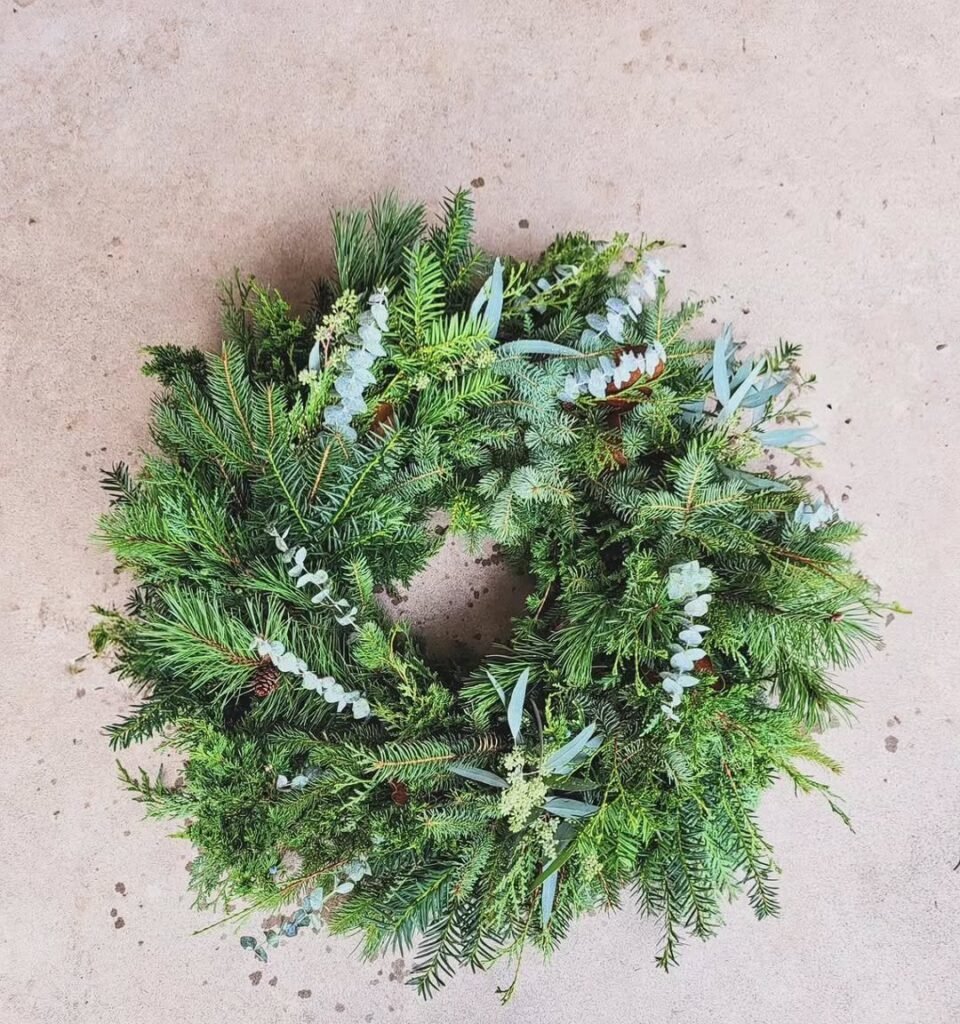
Gather small bundles of pine, cedar, and eucalyptus, and secure them to a wire wreath ring with floral wire, overlapping each bundle to cover the stems. Add a few dried orange slices or a velvet bow. It smells amazing, and it’s far fuller than most store-bought wreaths.
Fresh greenery dries out over time, so keep it away from candles and heat sources, and mist it lightly. If you’re hanging it on a door, you’ll want a method that doesn’t damage the finish, and my guide to apartment renter mistakes explains which hooks and strips are safest for doors and walls. Cost is about $10-20.
12. A Pom-Pom Yarn Wreath
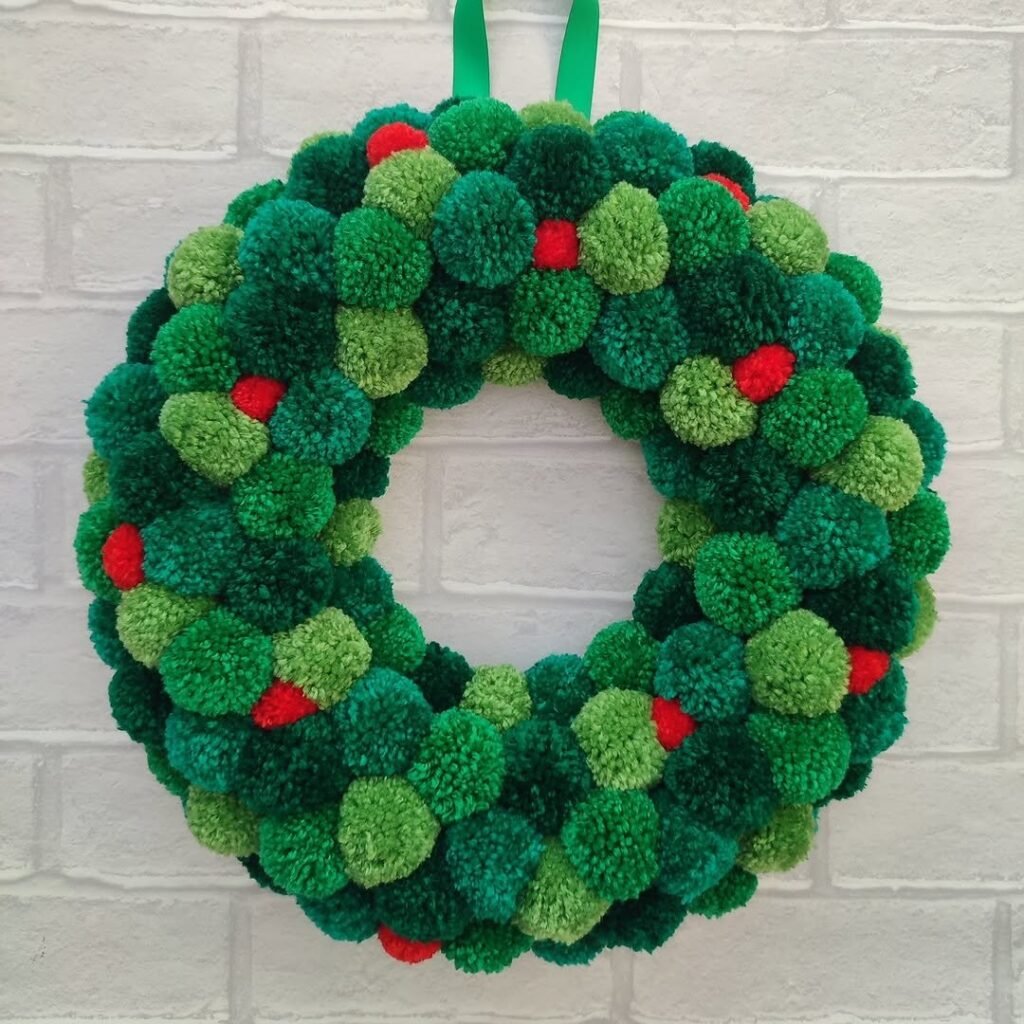
Wrap a foam or cardboard ring with yarn, then attach pom-poms in a few shades of the same color family. A white, cream, and gray scheme looks calm and modern, while red and green feels more traditional. It’s soft and washable, and it won’t dry out.
Secure the pom-poms with hot glue, and leave a little space between them so the base shows. Cost is under $15.
13. A Book Page or Paper Cone Wreath
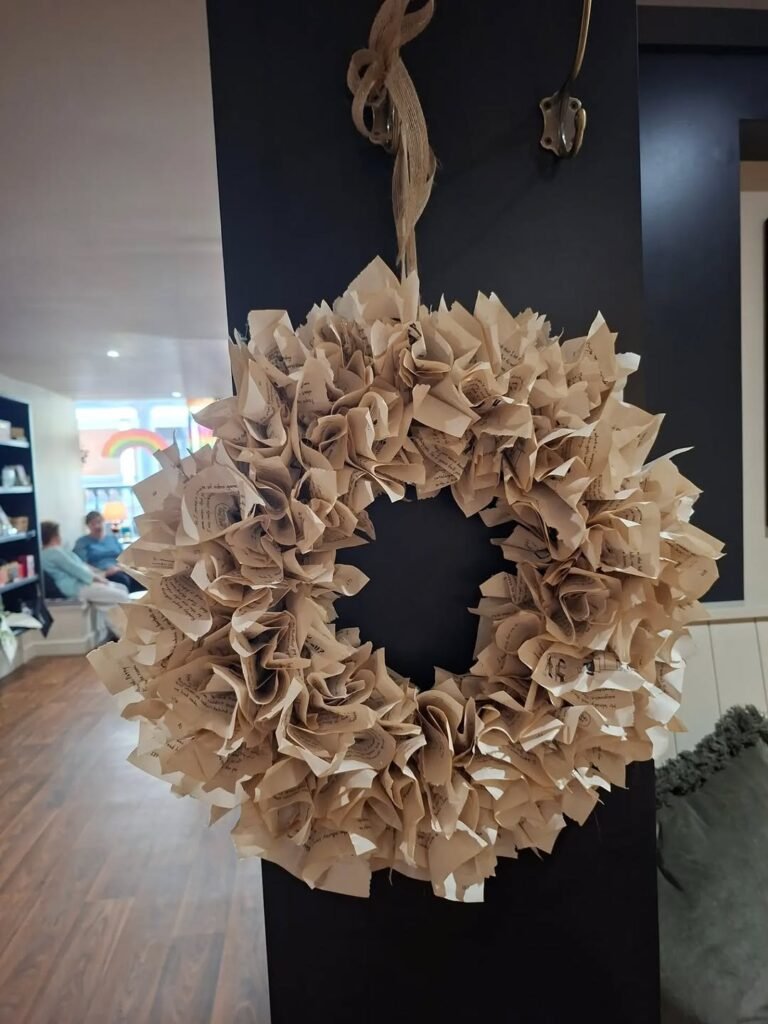
Roll old book pages or sheet music into small cones, glue them in layers onto a cardboard ring, and finish with a bow. The overlapping cones look like a feathery pine wreath, and the printed pages add a vintage feel.
Spray lightly with a matte sealer if you want a longer-lasting finish. It costs almost nothing if you use thrifted books.
14. A Popcorn and Cranberry Garland
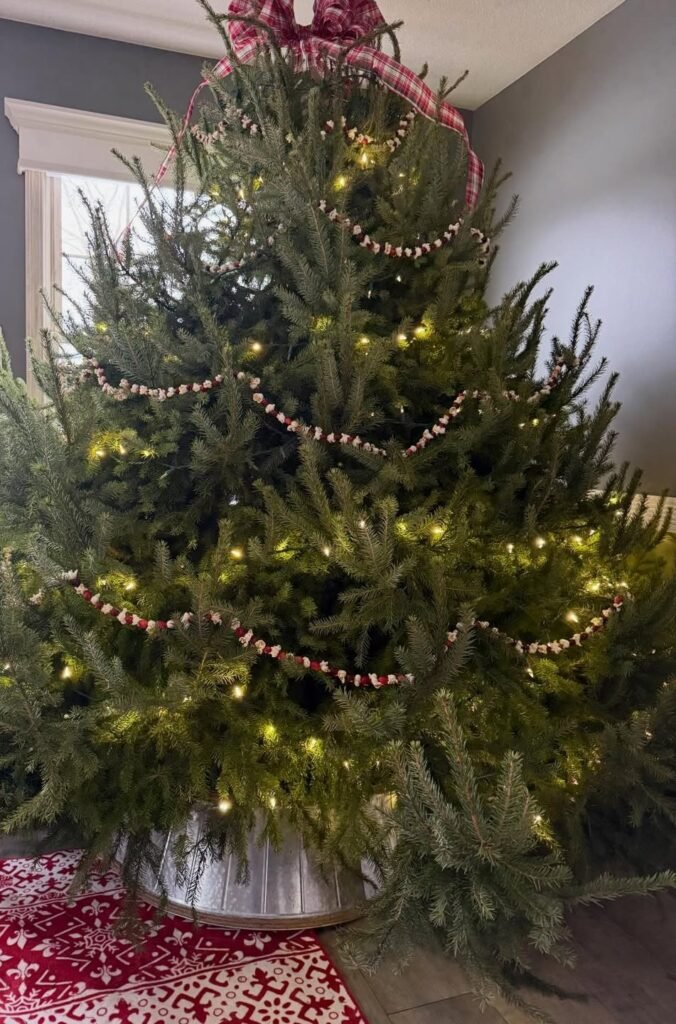
String popcorn and fresh cranberries on a sturdy thread, alternating for a classic old-fashioned look. It’s a traditional craft that’s fun for families, and it looks lovely on a tree or draped on a mantel. Use a blunt needle, and take your time.
It’s best for indoor use for a short period, since food items can spoil and attract pests. Cost is about $5-8.
15. A Felt Ball Garland
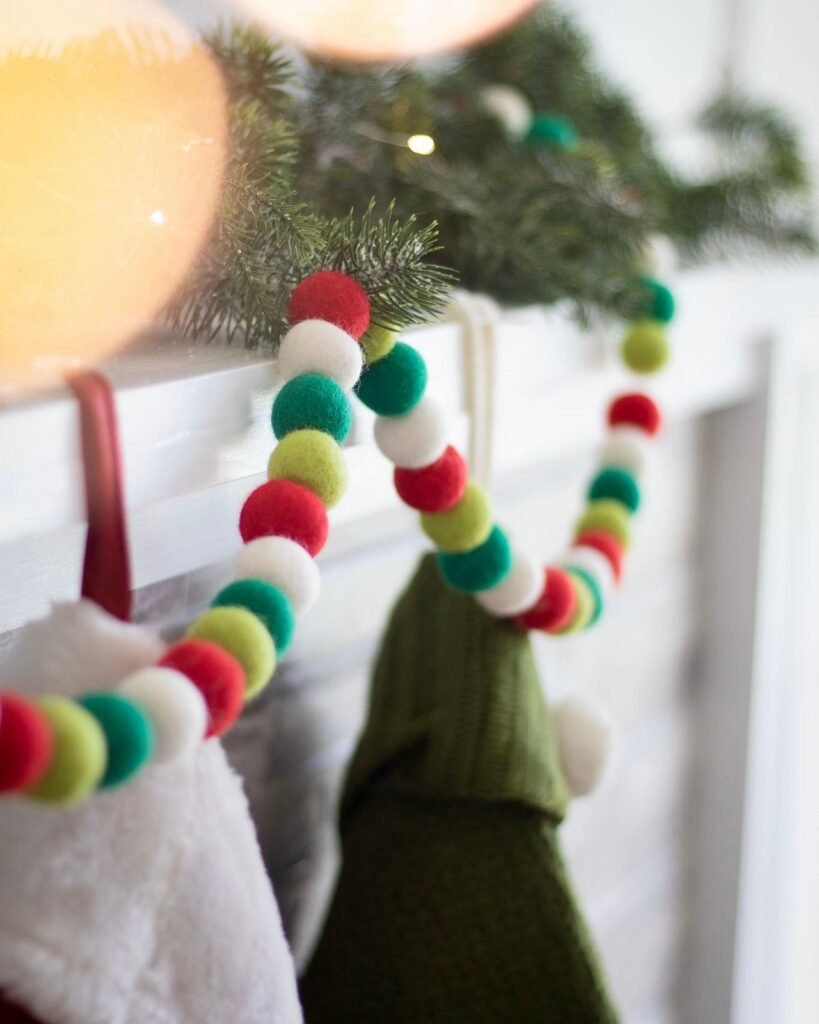
Felt balls in shades of cream, gray, and deep green can be strung together on twine for a soft, modern garland. Buy pre-made balls or make your own, and thread them using a large needle. It looks like something from a boutique, and takes about thirty minutes.
Vary the sizes for interest. Cost is about $8-15 for a long strand.
16. A Pinecone Garland or Wreath
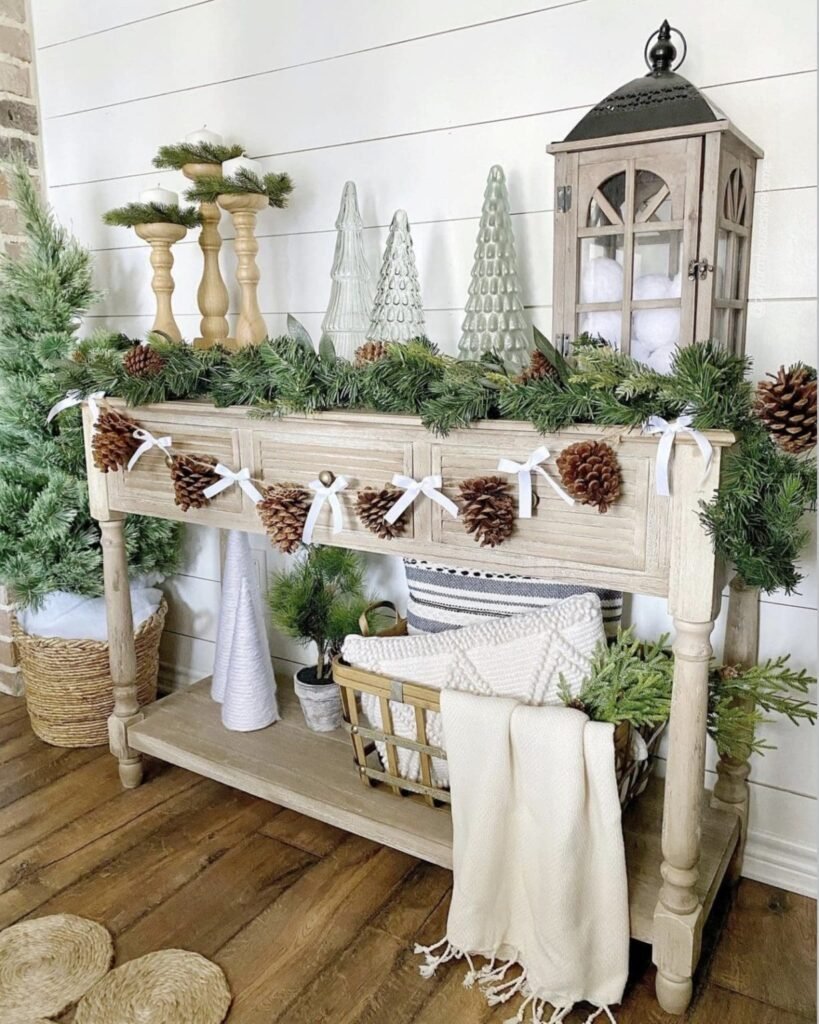
Collect pinecones, clean them by baking at a low temperature for about 30 minutes to remove sap and insects, and then wire them onto a garland or glue them onto a wreath ring. Dust them with white paint for a frosted look, or tip them with gold.
Pinecones are free if you can forage them, and they add natural texture. Check the weight if you plan to hang a long garland. Cost is $0-10.
17. Painted Candlestick Centerpieces
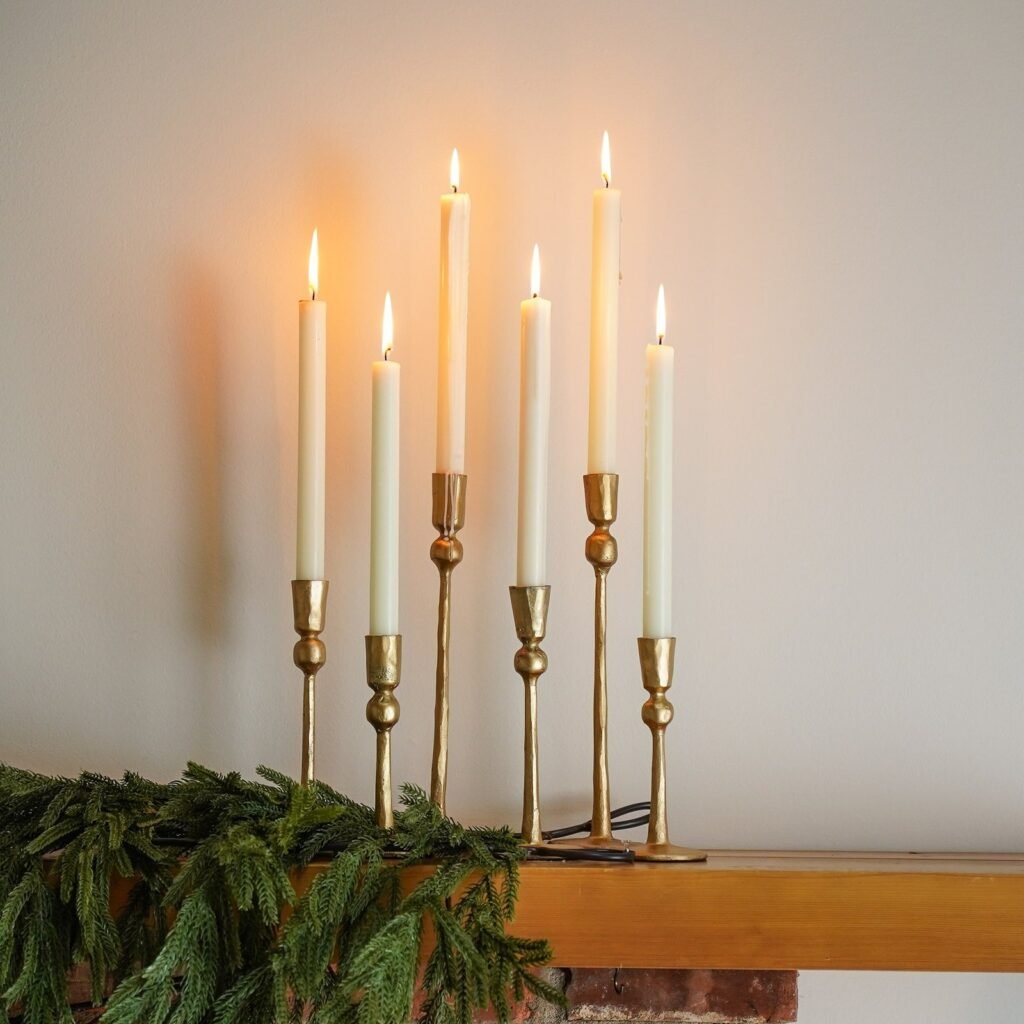
Thrifted or dollar store candlesticks look high-end with a coat of matte gold, white, or black paint. Group three or five at different heights on a tray, and add a few sprigs of greenery. Use flameless candles if you’re worried about heat or children.
For more ways to turn cheap finds into polished pieces, my guide to dollar store DIY decor has a full list of makeovers that work for the holidays too. Cost is about $5-12.
18. Frosted Mason Jar Luminaries
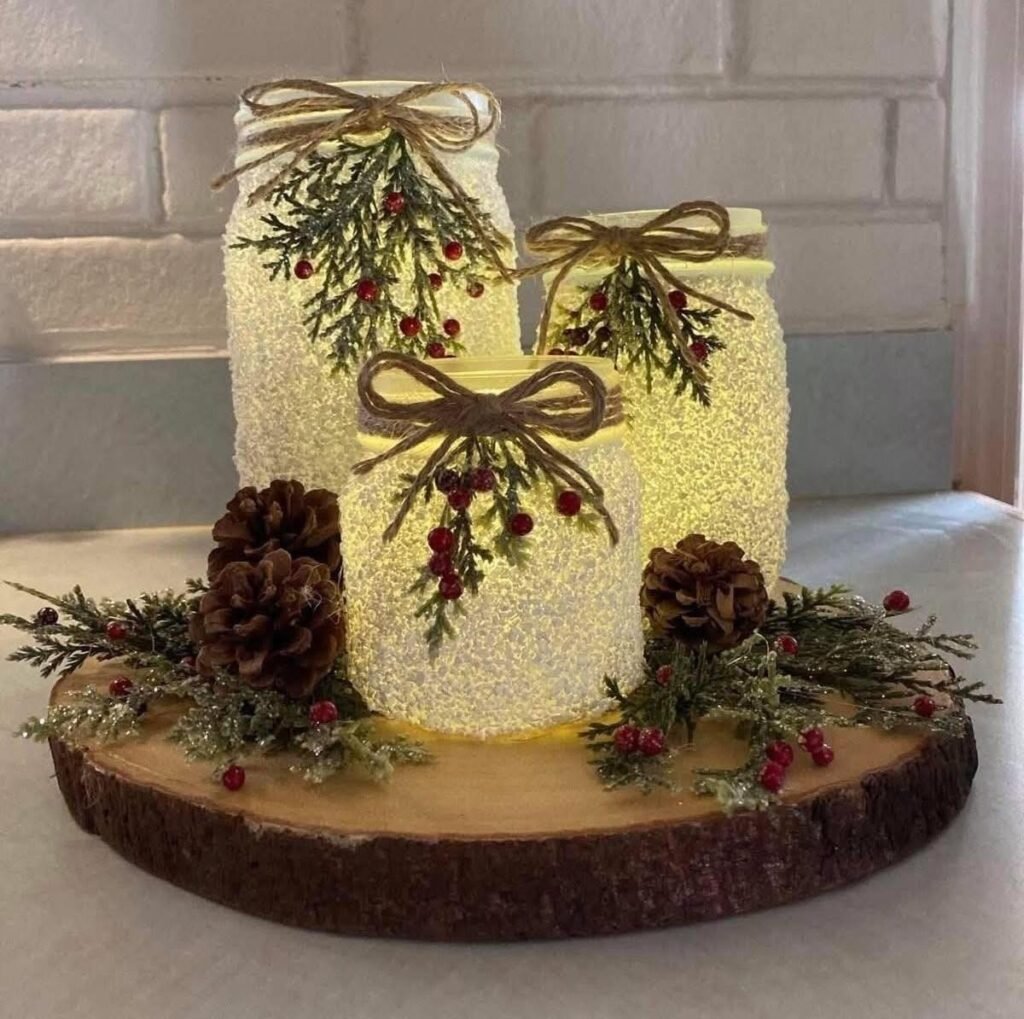
Brush a thin coat of white glue or epsom salt and water mixture on the outside of a glass jar, sprinkle with epsom salt for a frosty look, or use frosted glass spray. Tie twine and a sprig around the neck, and place a battery tea light inside.
Always use flameless candles with glass jars and décor materials, since open flames and dried greenery are a fire risk. Cost is about $3-8 per jar.
19. Scented Simmer Pot Gift Jars
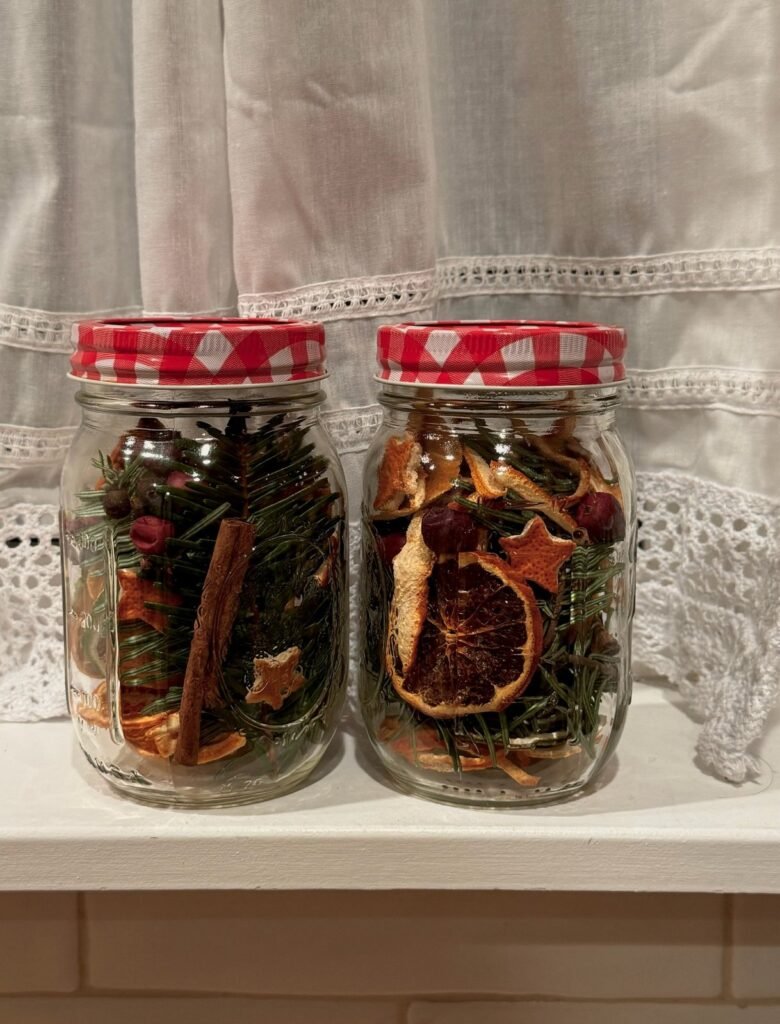
Fill a jar with dried orange slices, cinnamon sticks, whole cloves, and cranberries, add a tag with instructions, and tie on a ribbon. Recipients simmer the contents in water on the stove to fill the house with scent. It’s a thoughtful, inexpensive gift.
Include a note not to leave the pot unattended, and to keep it away from pets. Cost is about $4-8 per jar.
20. A Tray Centerpiece With Mini Evergreens
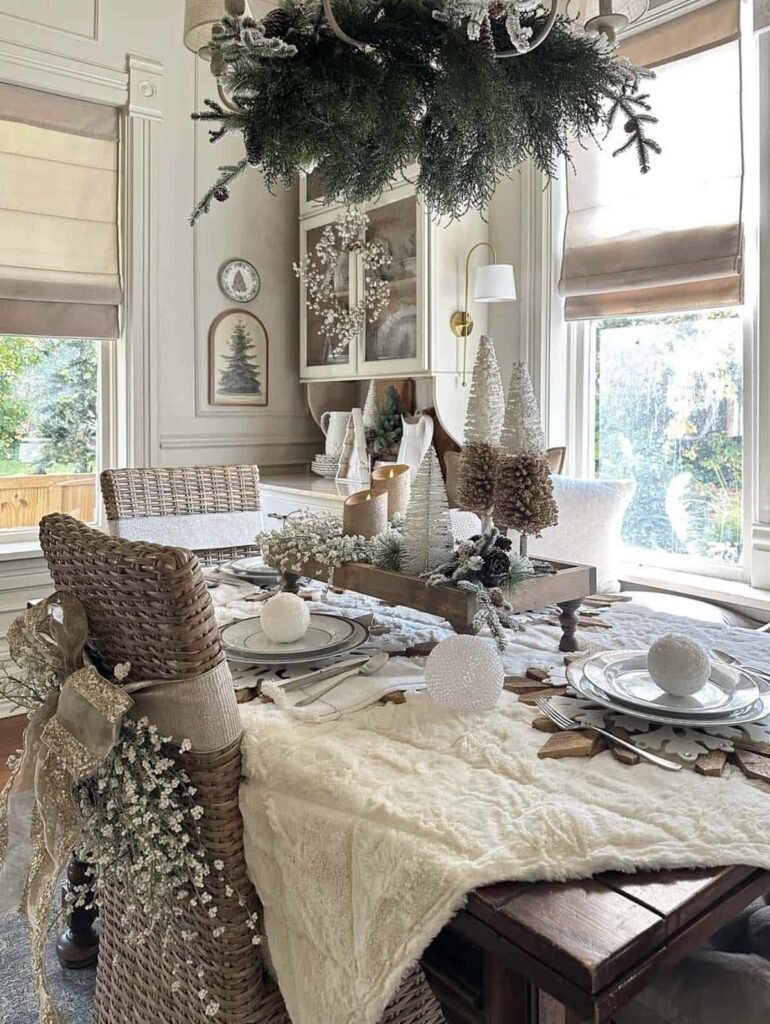
Place small potted evergreens or faux trees on a wood tray with a few candles, pinecones, and ribbon. It’s a ready-made centerpiece that you can assemble in minutes and swap out as the season changes. Use odd numbers and different heights for balance.
Water live plants lightly, and keep them away from heat. Cost is about $10-25.
21. Painted Pinecone Tabletop Display
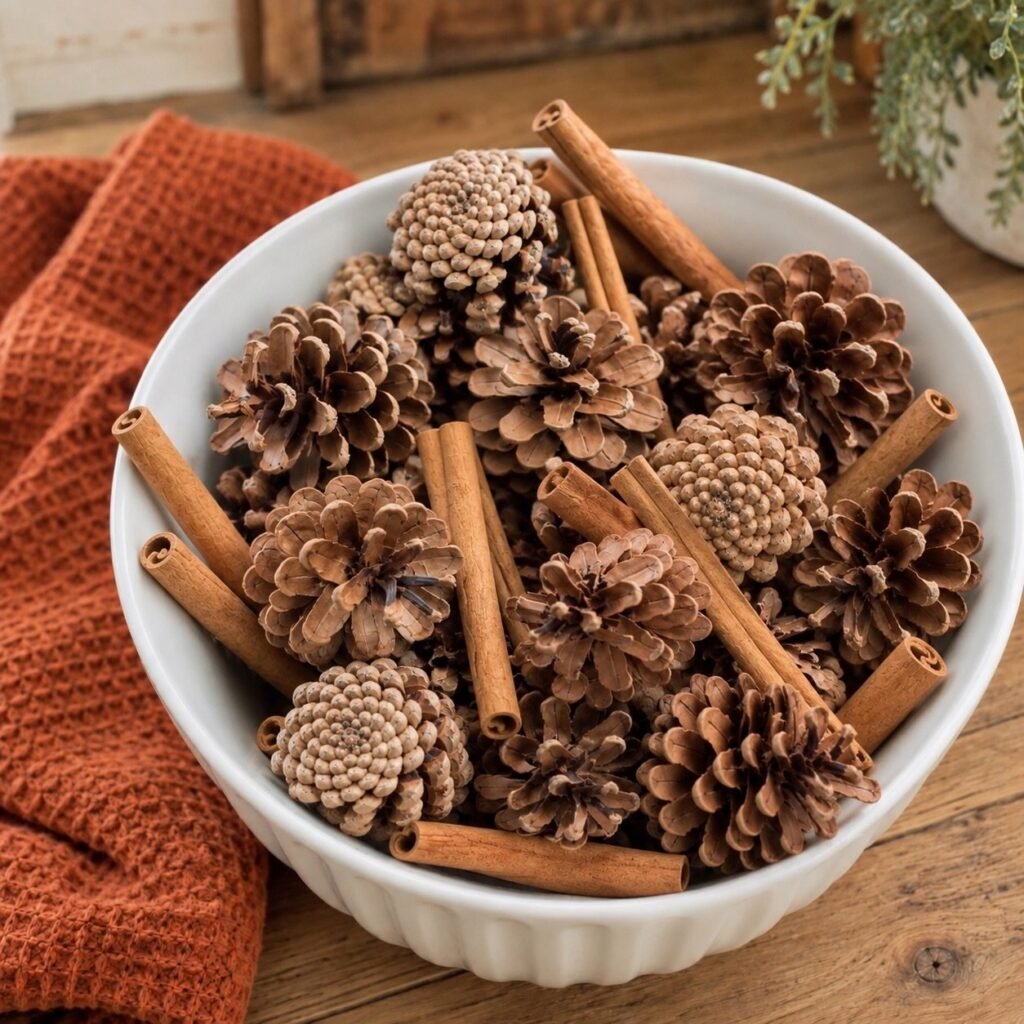
Fill a glass bowl or a wooden tray with a mix of natural and white-painted pinecones, plus a few cinnamon sticks or small ornaments. It’s an instant seasonal accent that works on a coffee table, a console, or a dining table.
Dust off the pinecones occasionally, and avoid placing them near open flames. Cost is under $10.
22. No-Sew Stockings From Fabric or a Sweater
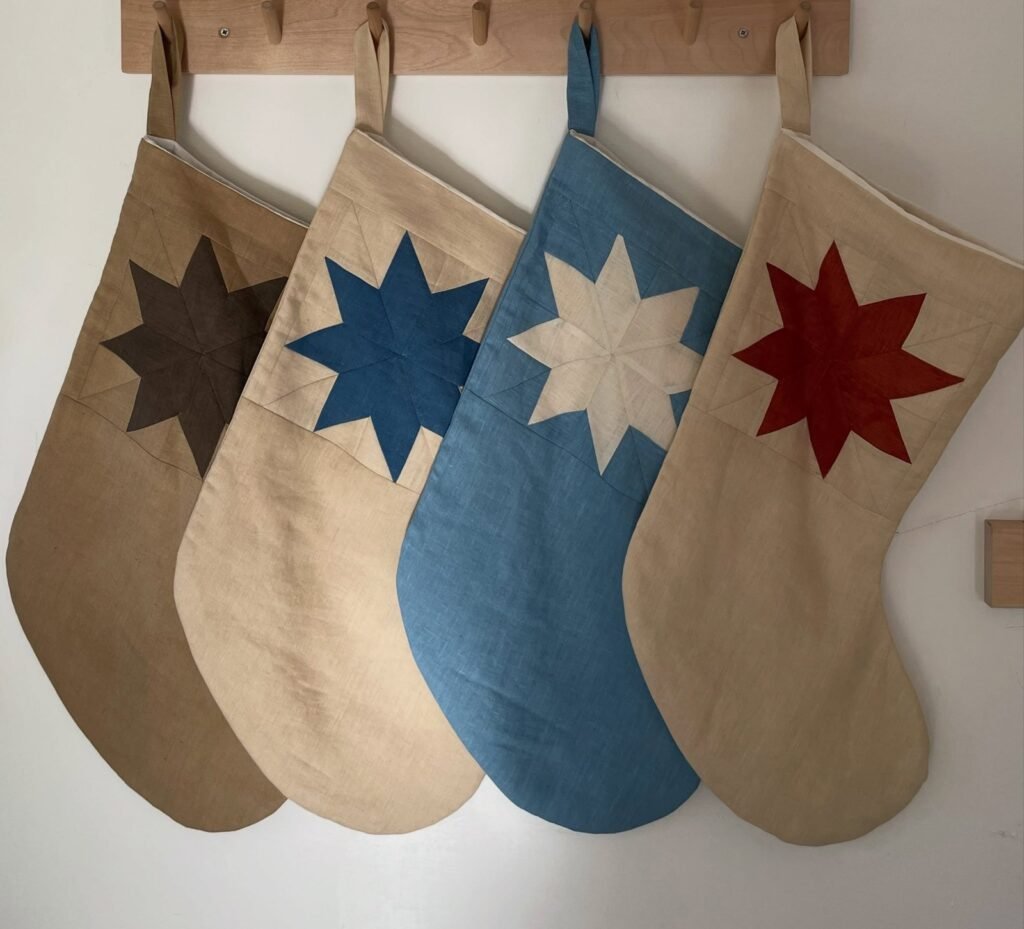
Trace a stocking shape onto fabric or an old sweater, cut two pieces, and join them with fabric glue or iron-on hem tape. Add a cuff, a loop, and a name tag. A cable knit or a plaid flannel looks warm and cozy.
Check that glued seams are fully dry before filling, and test with a small amount first. Cost is about $5-12 each, and thrifted sweaters are perfect.
23. Twine and Greenery Napkin Rings
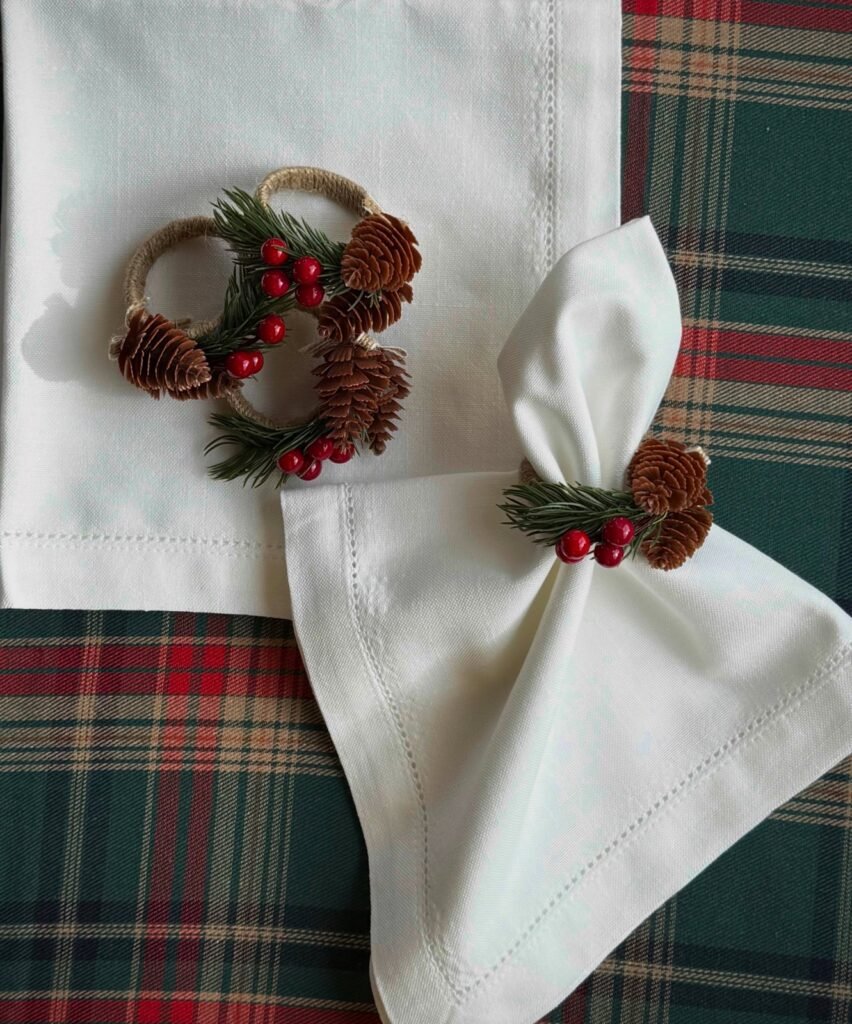
Wrap twine around a cardboard tube section several times, glue it, and tuck in a small sprig of greenery or a tiny ornament. A set of four dresses up a holiday table for almost nothing. Add a name tag for a personal touch.
Use faux greenery if the napkin rings will be used for several days. Cost is about $3-6 for a set.
24. A Washi Tape Tree on the Wall
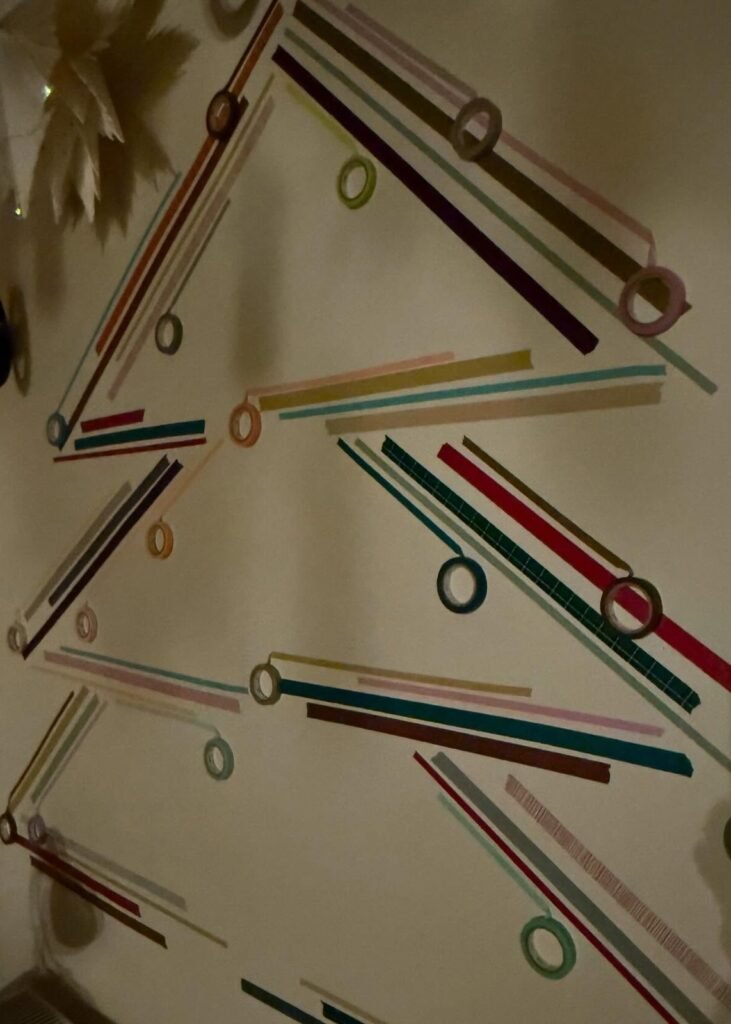
If you don’t have room for a tree, create one on the wall using washi tape in a triangle shape, then add ornaments, photos, or cards. It’s a great option for renters, dorms, and very small spaces, and it peels off in most cases without damage. Test a small hidden spot first.
Use a level and a measuring tape for neat lines. It costs under $10, and it’s a clever focal point for a bare wall.
25. A Christmas Card Display on a Ribbon or Ladder
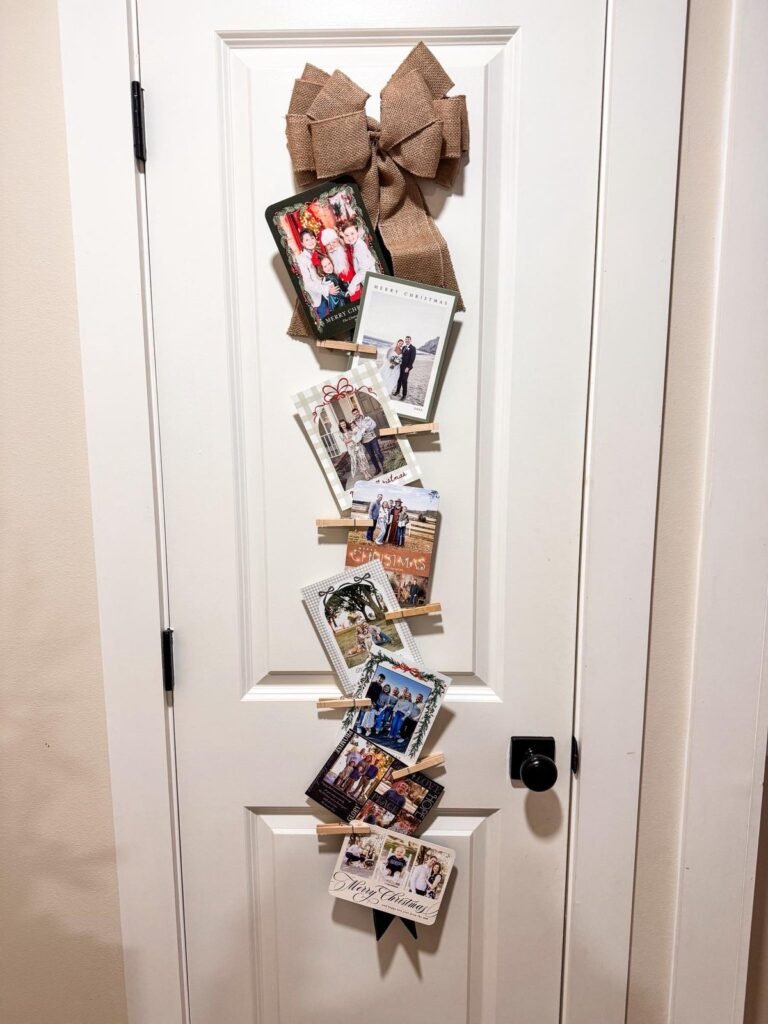
Hang a length of ribbon with small clips, or lean a decorative ladder against the wall, and clip your cards to it. It shows off the cards without taking over a surface, and you can add them as they arrive. A garland of greenery across the top completes the look.
Anchor it with removable hooks rated for the weight. Cost is about $5-15.
26. A Wooden Plank Door Hanger Sign
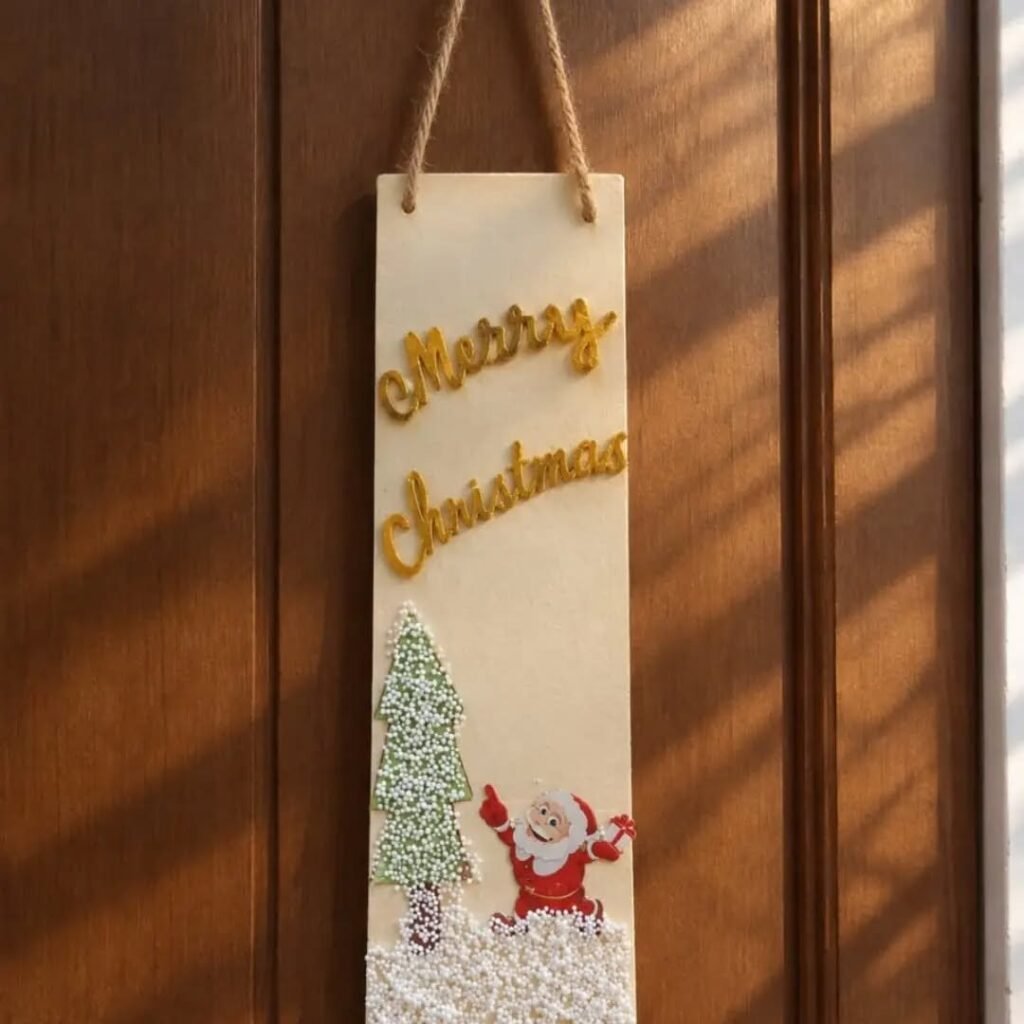
Cut or buy a plank of wood, paint it white or green, and stencil a simple greeting, then add a rope loop to hang it. Pair it with a bow or a sprig of greenery for a welcoming front door. It’s a good beginner project with big visual impact.
Use two thin coats of paint, and seal with a matte finish. Cost is about $8-15.
27. An Envelope or Matchbox Advent Calendar
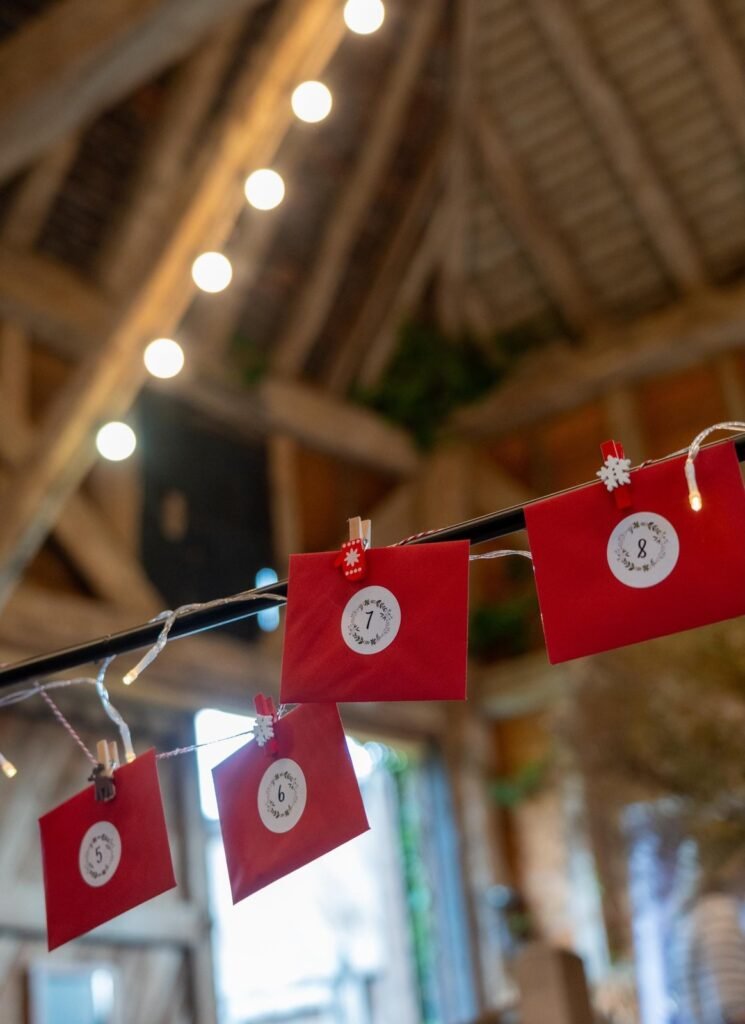
Number 24 small envelopes or matchboxes, fill each with a note, a treat, or a tiny gift, and hang them from a branch, a string, or a board. It builds anticipation, and it can be as simple or detailed as you like. Choose a consistent paper color for a polished look.
Be mindful of any allergies when you choose treats. Cost is about $8-20, depending on what you put inside.
28. Branch Lights in a Vase

Place a bunch of bare branches in a tall vase, weave in warm white battery fairy lights, and add a few small ornaments if you like. It’s a minimalist, sculptural tree alternative, and it looks elegant in any corner. Spray the branches white or leave them natural.
Battery-powered lights are the safest and easiest. Cost is about $8-15.
29. Paper Bag Luminaries

Cut shapes, like stars or trees, into the sides of small paper bags, fold down the tops, and place a battery tea light in each one. Line them along a path, a mantel, or a windowsill for a soft, glowing effect.
Never use real candles in paper bags, and keep them away from heat. A pack of bags costs just a few dollars.
30. Kraft Paper and Greenery Gift Wrap

Plain kraft paper, twine, and a sprig of greenery or a dried orange slice make gifts look like they came from a boutique. Add a simple tag, and stick with a single ribbon color. It’s inexpensive, and it also happens to be easy on the environment.
A roll of kraft paper and a spool of twine can wrap dozens of gifts. Cost is about $8-15. If you’re worried about where to keep all your holiday supplies afterward, my guide to holiday decor storage ideas shows how to pack and store them so they’re easy to find next year.
31. Hot Cocoa Jar Gifts
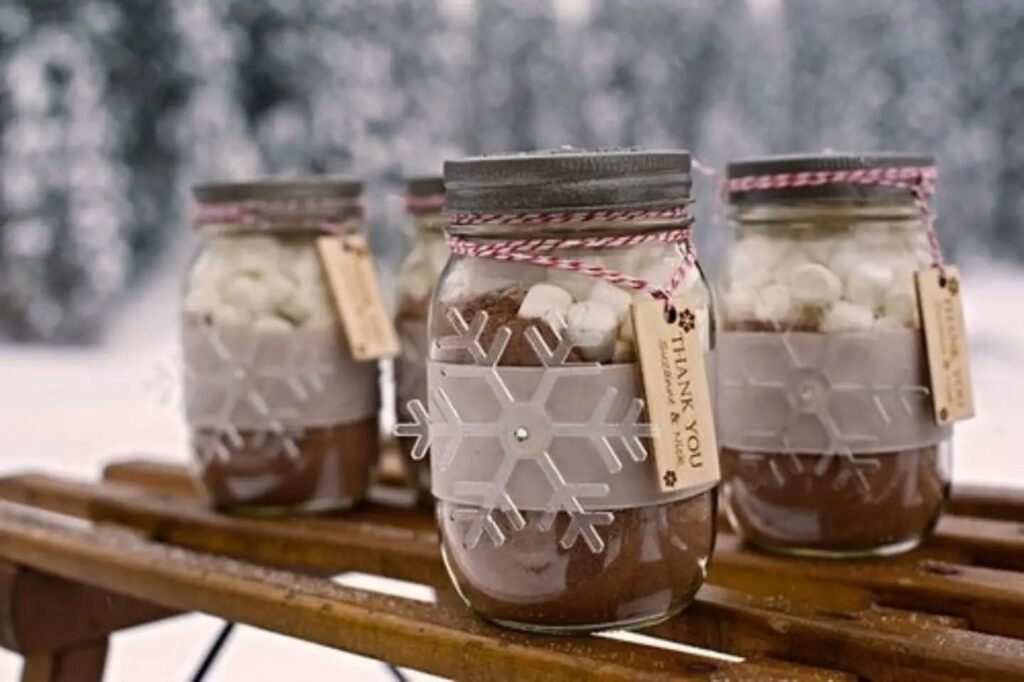
Layer cocoa powder, sugar, mini marshmallows, and chocolate chips in a jar, add a tag with mixing instructions, and tie on a ribbon. It’s an easy, inexpensive gift for neighbors, teachers, and coworkers. Choose a clear jar to show off the layers.
Include an ingredient list in case of allergies. Cost is about $4-8 per jar.
32. Wood Slice and Cardboard Gift Tags
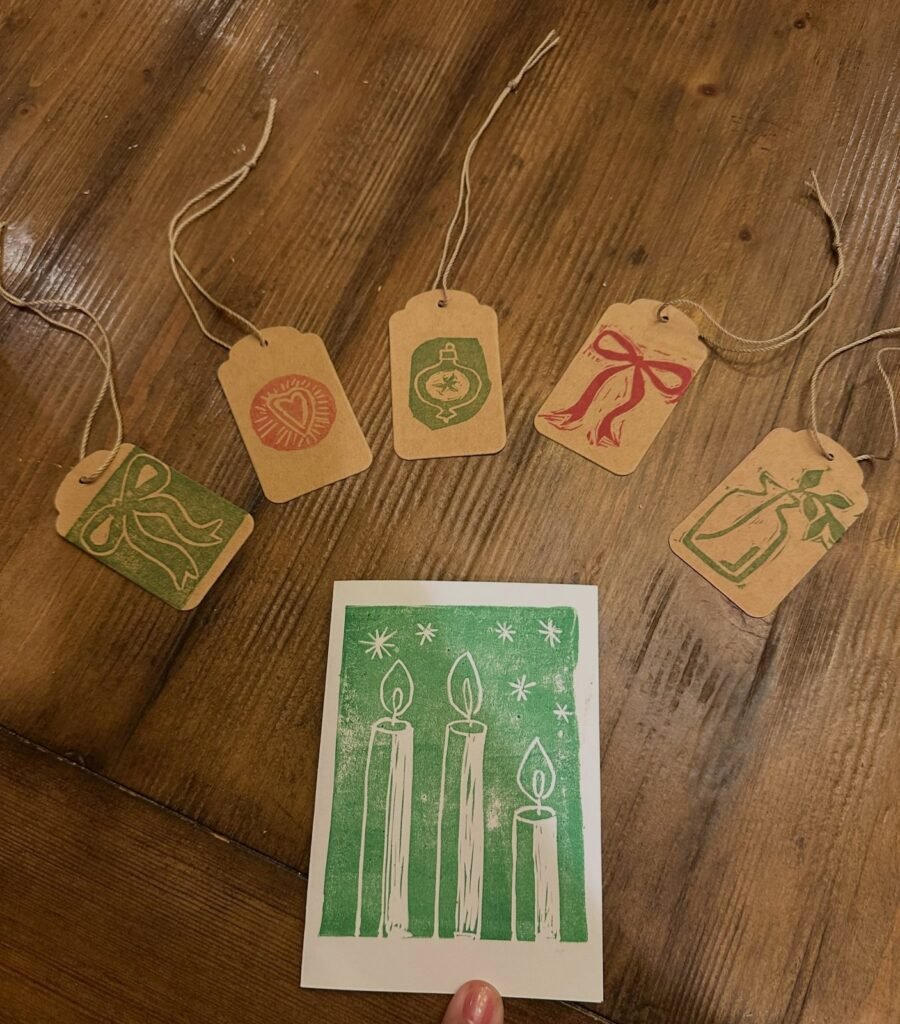
Cut small tags from cardboard or wood slices, write names in a neat hand or stamp them, and tie them on with twine. They double as small ornaments, so the recipient can hang them on a tree. A consistent style, such as all kraft or all white, looks cohesive.
Use a thin marker for clean lettering. Cost is a few dollars for a whole set.
33. Kid-Friendly Handprint and Clothespin Reindeer Ornaments

Press a child’s hand into salt dough or air-dry clay for a keepsake, or use clothespins, craft sticks, and googly eyes to make little reindeer. They’re easy, silly, and kids love to see them on the tree. Write the year and name on the back with a marker if you’d like to keep them as mementos.
Supervise young children with small items like googly eyes and beads. Cost is under $10.
Quick Reference: Cost, Time, and Difficulty by Category
| Category | Example Projects | Approx. Cost | Time | Difficulty |
|---|---|---|---|---|
| Ornaments | Salt dough, clay, paper stars, felt, wood slices | $3-15 | 30 minutes to 2 hours | Easy |
| Wreaths and garlands | Greenery wreath, pom-pom wreath, orange garland, pinecone garland | $5-20 | 1-3 hours | Easy to medium |
| Table and mantel | Candlesticks, luminaries, pinecone display, napkin rings | $3-25 | 30 minutes to 1 hour | Easy |
| Walls and doors | Washi tape tree, card display, door sign, advent calendar | $5-20 | 30 minutes to 2 hours | Easy to medium |
| Lighting | Branch lights, paper bag luminaries | $5-15 | 20-45 minutes | Easy |
| Gifts and wrapping | Kraft wrap, cocoa jars, tags, simmer jars | $4-15 | 20 minutes to 1 hour | Easy |
Which Projects Work Best With Kids
| Project | Good For Ages (Roughly) | Adult Help Needed? |
|---|---|---|
| Popsicle stick snowflakes | 5 and up | Some help with glue |
| Salt dough or clay ornaments | 3 and up | Yes, for baking and cutting |
| Paper stars and paper bag luminaries | 6 and up | Some help with cutting and lights |
| Pom-pom ornaments | 6 and up | Some help with tying and trimming |
| Popcorn garland | 6 and up | Yes, for needles |
| Handprint and clothespin reindeer | 3 and up | Yes, for small parts |
Ages are only a rough guide, and every child is different. Always supervise crafts that involve glue guns, ovens, scissors, or small parts.
A Simple Crafting Schedule
| When | What to Make | Why Then |
|---|---|---|
| Early in the season | Salt dough, clay ornaments, dried orange slices | They need drying and baking time |
| Mid season | Garlands, wreaths, napkin rings, stockings | Core decor you’ll want up early |
| A week before | Fresh greenery wreath, centerpieces, luminaries | Fresh materials look their best |
| Last few days | Gift wrap, tags, cocoa jars, advent calendar fill | Finishing touches and gifts |
A Basic Craft Supply List
You can make most of these projects with a small kit: a hot glue gun and glue sticks, twine, scissors, a craft knife, acrylic paint in white, gold, and green, a few paintbrushes, air-dry clay, flour and salt for dough, cinnamon sticks, floral wire, and battery tea lights and fairy lights. A starter kit like this costs about $40-70, and it covers dozens of projects.
Look at thrift stores and dollar stores first for candlesticks, jars, baskets, and frames. And if you’re looking for more projects beyond Christmas, my collection of easy DIY home decor ideas has plenty to try all year round.
Safety Notes for Holiday Crafting
Use a heat-safe surface and follow the instructions when using a hot glue gun, oven, or craft knife. Keep flames away from dried greenery, paper, and fabric, and use flameless candles in jars, bags, and decor. Never leave a simmer pot, oven, or candle unattended.
Keep craft supplies, salt dough, small ornaments, and edible garlands out of reach of pets and young children, and supervise kids around glue and small parts. Water fresh greenery as needed, and remove anything that dries out near heat or lights. When in doubt, follow the product’s labels and local fire safety guidance.
Mistakes That Make Handmade Decor Look Homemade
The biggest mistake is using too many colors and materials at once, which looks busy. The second is skipping prep, such as sanding clay, wiping jars, or drying paint, and the third is rushing the finishing details like trimming glue and tying neat bows. Another is making everything the same size, which looks flat.
Try to plan a small palette, make a few items in multiple sizes, and do a test run of any new technique. You’ll catch problems early, and the final result will look much more polished.
If I Were Starting My DIY Christmas Decor From Scratch
I’d make five things: a dried orange garland, a batch of salt dough ornaments, a simple greenery wreath, a few painted candlesticks, and a set of kraft-wrapped gifts with twine. That’s roughly $35-50 total, and it’s enough to make a whole apartment feel festive. I’d leave the more complicated projects for a quiet weekend, once the basics were up and I knew what the room still needed.
DIY Christmas decor crafts don’t have to be fancy to feel special. Stick to a tight palette, repeat your materials, finish neatly, and make a little at a time. Do that, and your home will feel warm, personal, and unmistakably yours, and it’ll cost a fraction of what you’d spend on a store-bought set.
FAQs
What are the easiest DIY Christmas decor crafts for beginners?
Dried orange garlands, cinnamon stick bundles, paper stars, salt dough ornaments, and kraft paper gift wrap are all easy and inexpensive. They need only basic supplies and forgive small mistakes.
How much does it cost to make DIY Christmas decor?
Most projects cost $3-15, and a starter craft kit costs around $40-70 and covers many projects. Using thrifted and natural materials keeps the cost even lower.
How do I make DIY Christmas decor look expensive?
Use a limited color palette, repeat materials in several places, finish edges neatly, and mix natural textures like wood, greenery, and linen. Making items in different sizes also makes a display look intentional.
Are these crafts safe for kids and pets?
Many are, with supervision. Keep salt dough, small ornaments, and food-based garlands away from pets, and watch young children around glue, scissors, and small parts. Use flameless candles in any decor.
When should I start making DIY Christmas decor?
Start early for items that need drying or baking, like salt dough and orange slices, and save fresh greenery and wrapping for the last week. A little each weekend keeps it relaxed.
How do I store handmade decorations so they last?
Let everything dry completely, wrap fragile pieces in tissue, and store them in labeled bins in a cool, dry place. Keep orange slices and clay items away from moisture to prevent mold.






Leave a Reply