
Last spring I spent an afternoon making a lumpy clay bowl for my entryway. It’s uneven, one side is slightly taller than the other, and the glaze pooled in a way I did not plan. It’s also the single most complimented object in my apartment. People pick it up, turn it over, and ask where I got it. That bowl is a pretty good summary of where DIY home decor is heading: away from perfect, catalog-style rooms and toward things that look made by a person, with a little character in them.
If you’re looking for DIY home decor trends worth your time, the good news is that most of the popular ones are low-cost, forgiving, and beginner-friendly. Texture is in, handmade imperfection is in, warm natural materials are in, and so are bold, personal touches like painted patterns and sculptural wall art. I’ve picked 12 trends I’d actually try, each with a project you can finish in a weekend or less. If you want even more project ideas beyond these, my collection of easy DIY home decor ideas is a good next stop.
For each trend, I’ve included what it looks like, how to make it, rough costs, and whether it works in a rental. There’s a comparison table of all 12, a cost-tier chart, a supply list, safety notes, and FAQs. Prices are ballpark and vary a lot by region, trends come and go, and a few projects involve paint, plaster, or tools, so follow the instructions on every product you use.
How to Pick a Trend Without Regretting It
The trick with any trend is choosing the ones that suit your space and that you’ll still like in a year. Look at your existing colors, your light, and how much you can change. If you rent, favor projects you can take with you. If a trend feels like it belongs in someone else’s house, skip it, no matter how popular it is.
A smart way to try a trend is to start small. A pillow cover, a tray, or a single vase costs almost nothing and tells you quickly whether you like the look. For a broader view of what’s popular in small spaces beyond DIY, my roundup of small apartment decor trends covers the bigger picture.
Pro tip: Choose one trend per room, and keep everything else in that room calm. Layering five trends in one corner turns “intentional” into “chaotic” very quickly.
1. Handmade Imperfection (Hello, Lumpy Clay Bowls)
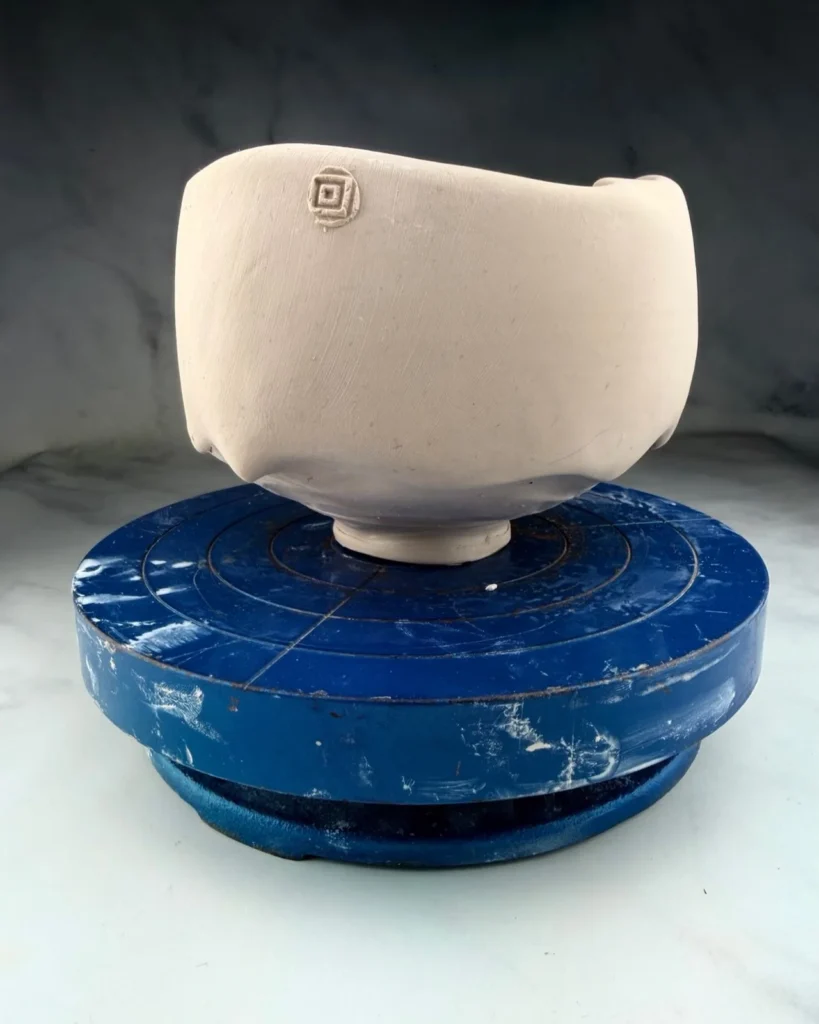
Handmade, slightly uneven pieces are having a moment, and the appeal is that they can’t be mass-produced. Air-dry clay lets you make bowls, trays, and trinket dishes without a kiln. Roll it out, shape it over a bowl, smooth the edges with water, and let it dry for a day or two.
Finish with a coat of matte paint or sealer, and leave a few fingerprints in it if you like. Expect about $8-20 for clay and paint. The trade-off is that air-dry clay isn’t food-safe or waterproof, so keep it for keys, jewelry, and candles, not for snacks.
2. Sculptural Plaster Wall Art
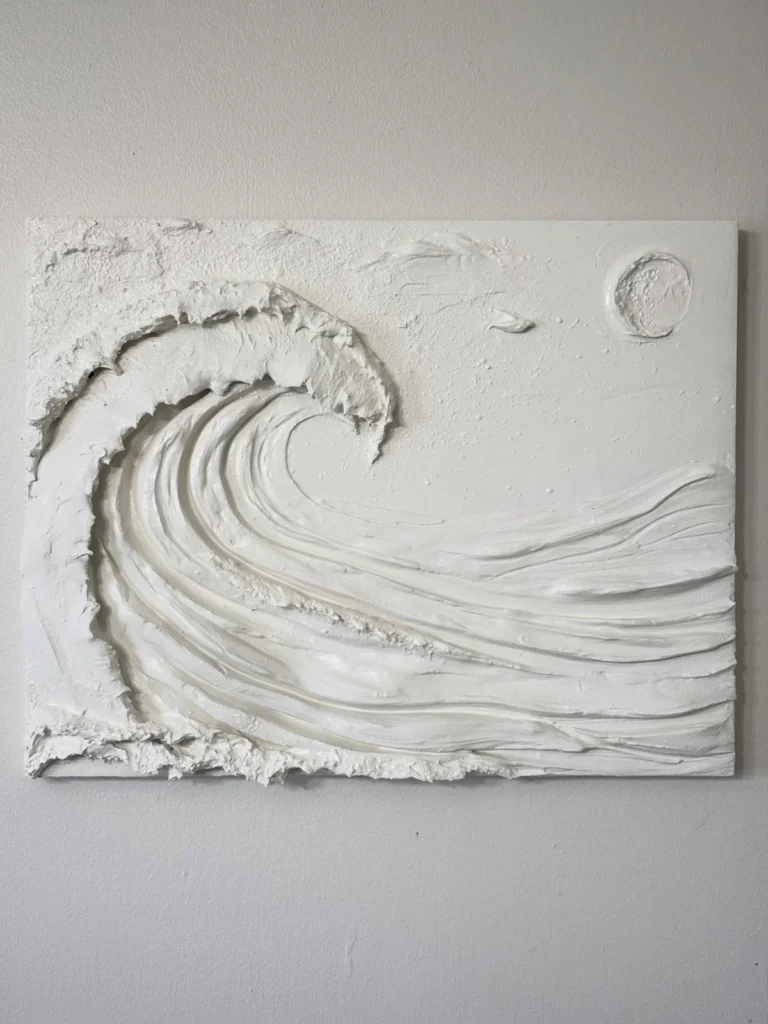
Raised, textured wall art in soft white or cream is everywhere right now, usually in arches, waves, and organic shapes. You can make it at home by spreading joint compound or a plaster-style paste over a canvas with a spatula, building ridges and curves, and painting it once dry.
It looks like gallery art and costs about $12-30. Work in thin layers so it doesn’t crack, wear a dust mask if you sand, and keep it in a well-ventilated area. It’s lightweight enough to hang with removable strips in most rentals, but check the weight rating first, and my guide to apartment renter mistakes explains which hanging methods protect your walls and deposit.
3. Color Drenching and Tonal Rooms
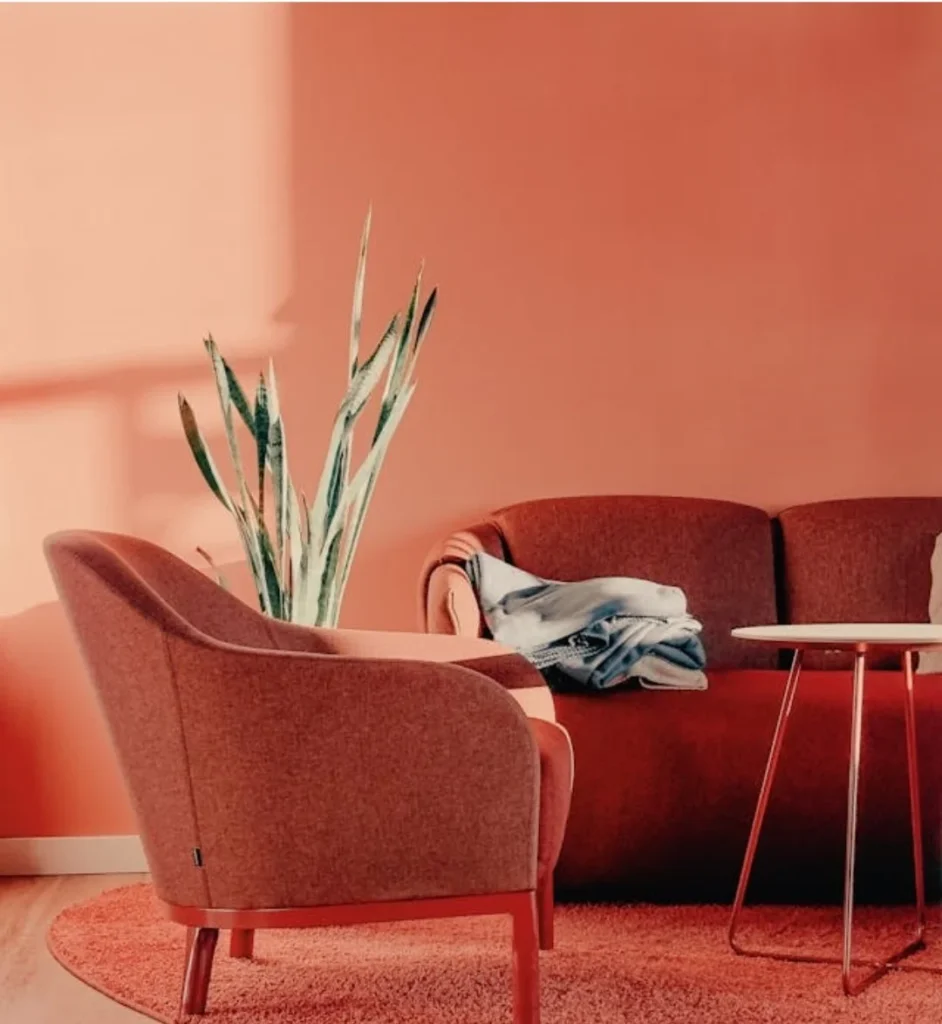
Color drenching means using one color across walls, trim, and sometimes furniture, so the room feels wrapped in it. If you can’t paint, you can still try the look with tonal styling: curtains, throws, art, and a rug in one color family. A friend of mine, Aaliyah, did a deep olive bedroom this way with bedding, curtains, and a painted frame, and guests assumed she’d painted the walls.
If you do paint, test a sample on a large piece of poster board and look at it morning and night. Cost runs about $30-80 for paint, or $0-40 for a tonal restyle using what you have.
4. Natural, Earthy Textures (Jute, Wood, Linen, and Stone-Look)
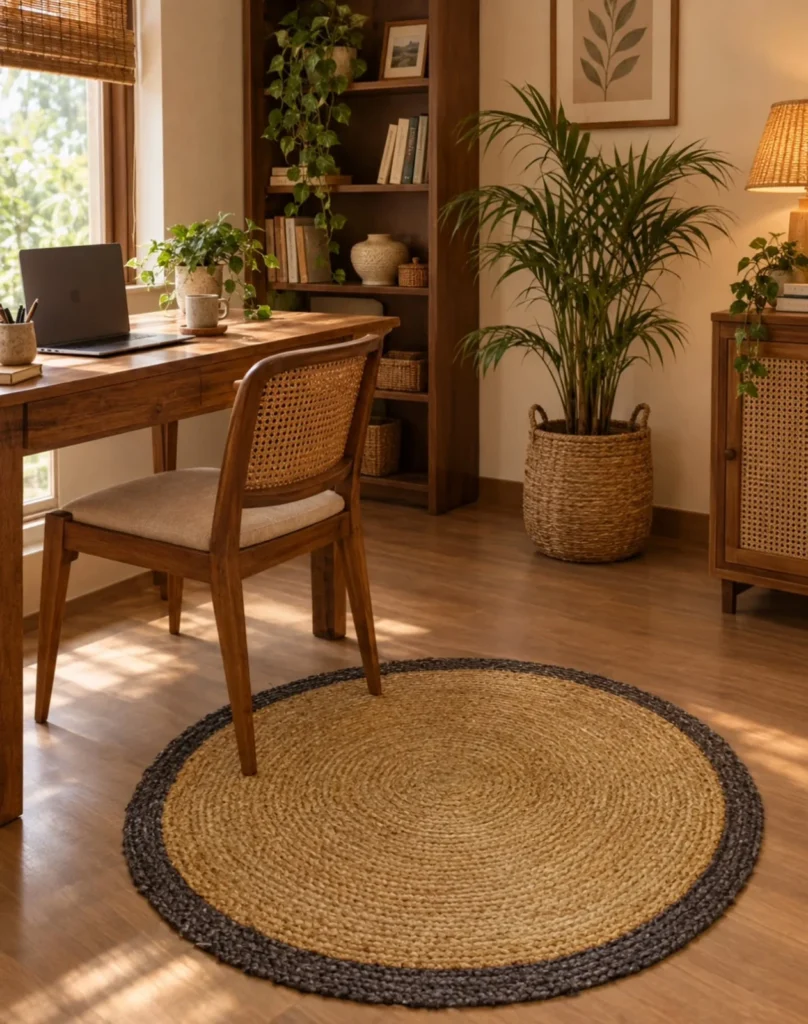
Natural materials keep showing up because they make a room feel warm and calm. DIY ways to get the look include wrapping a lamp base in rope, covering a plain vase in jute, sanding and waxing a wooden board for a shelf, or sponge-painting a stone texture on a tray.
Stick to three or four materials, and repeat them around the room. Costs run about $5-25 per project. The trade-off is that natural fibers can fray or stain, so seal wood and choose washable linens in busy areas.
5. Faux Built-Ins
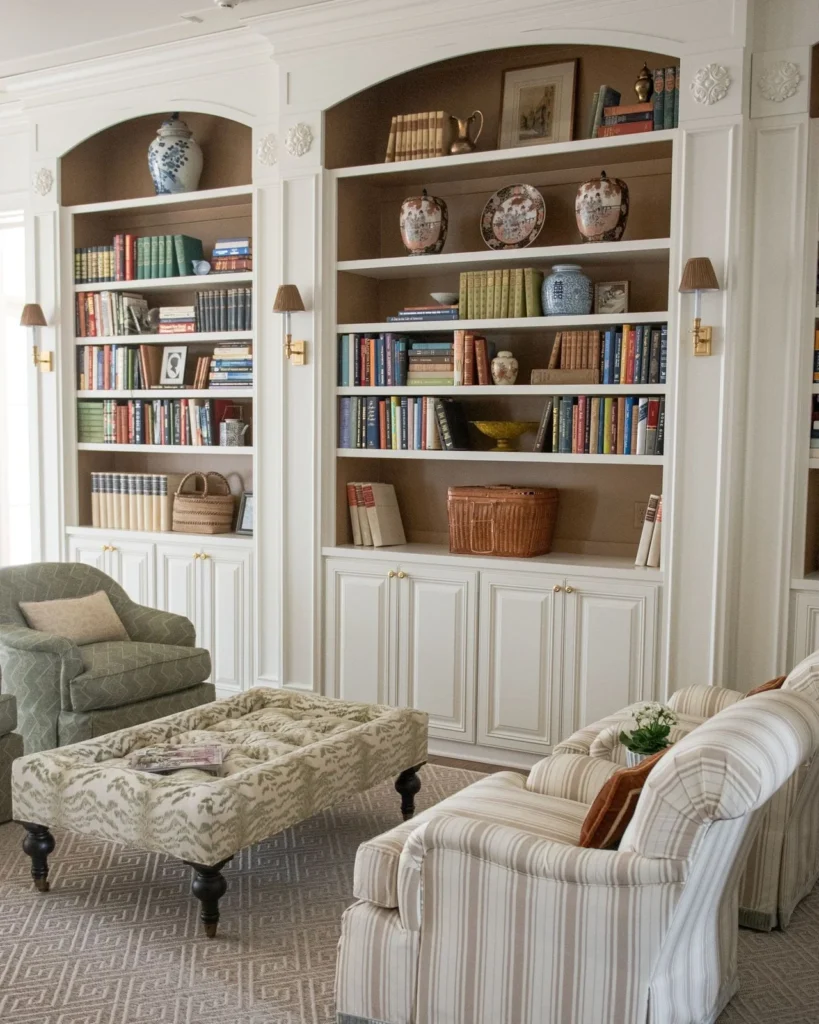
Built-in cabinets are one of the most sought-after features, but real ones are expensive. A DIY version uses standard bookcases placed side by side, with trim added across the top and sides, painted one color so they look custom. It’s a bigger project, but the payoff is major.
Expect roughly $120-350 depending on the bookcases and trim. Anchor tall units to the wall, and measure ceiling height carefully before you build. In a rental, keep the units freestanding and skip the permanent trim, so you can take them with you.
6. Chunky Knit and Textile Wall Hangings
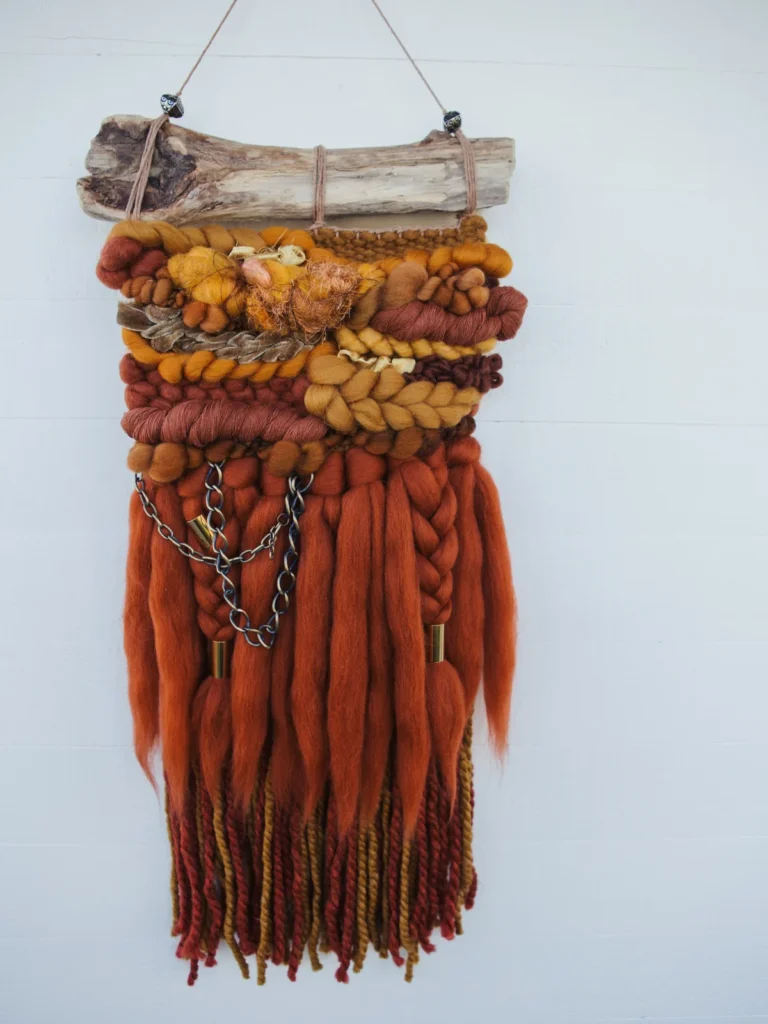
Soft, oversized textiles on the wall add warmth and absorb sound. Try a chunky arm-knit or crochet piece, a macrame hanging, or a vintage-style crocheted runner displayed on a wall. They’re also a good use for leftover yarn.
A beginner project takes a couple of hours and costs about $10-35. Hang them from a dowel with removable hooks, and keep them away from stoves, candles, and heaters, since fibers burn easily.
7. Hand-Stenciled Patterns
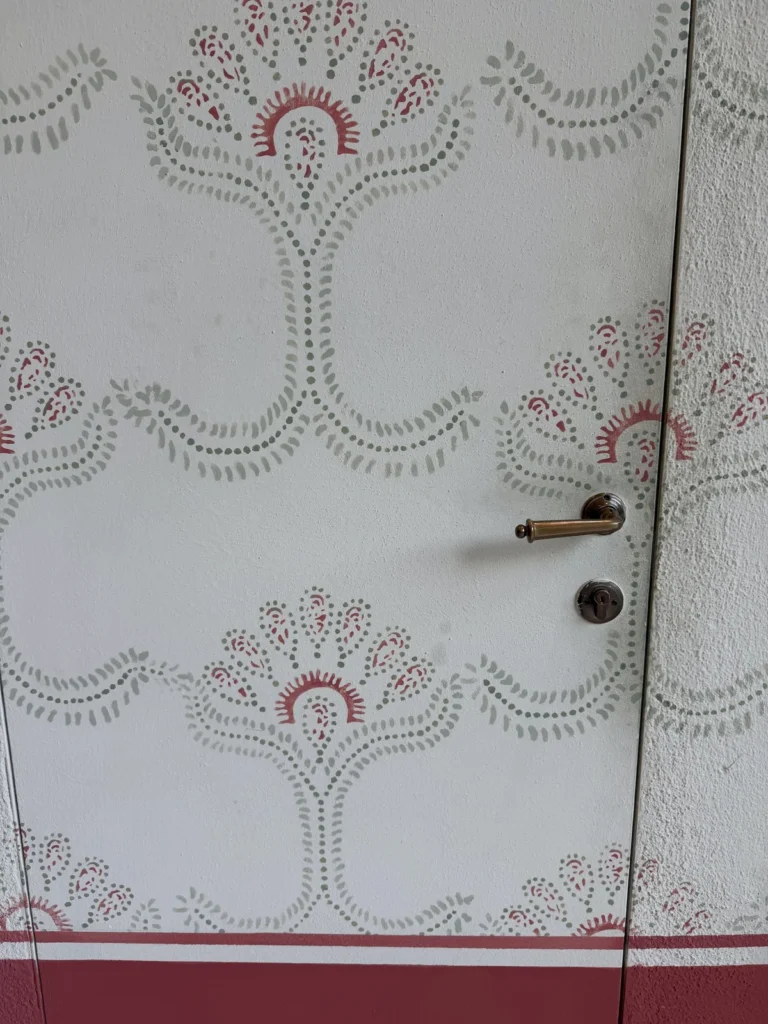
Stenciled patterns on furniture, doors, and walls feel personal and crafted. Choose a simple geometric or botanical stencil, tape it down, and dab paint with a nearly dry brush or sponge for crisp edges. A border around a doorframe or a pattern on the front of a dresser is a good first project.
Use a tight palette of two colors, and test the stencil on paper first. Cost is about $10-25. Wipe off the stencil between uses so paint doesn’t build up and smear.
8. Curved Shapes and Scalloped Edges
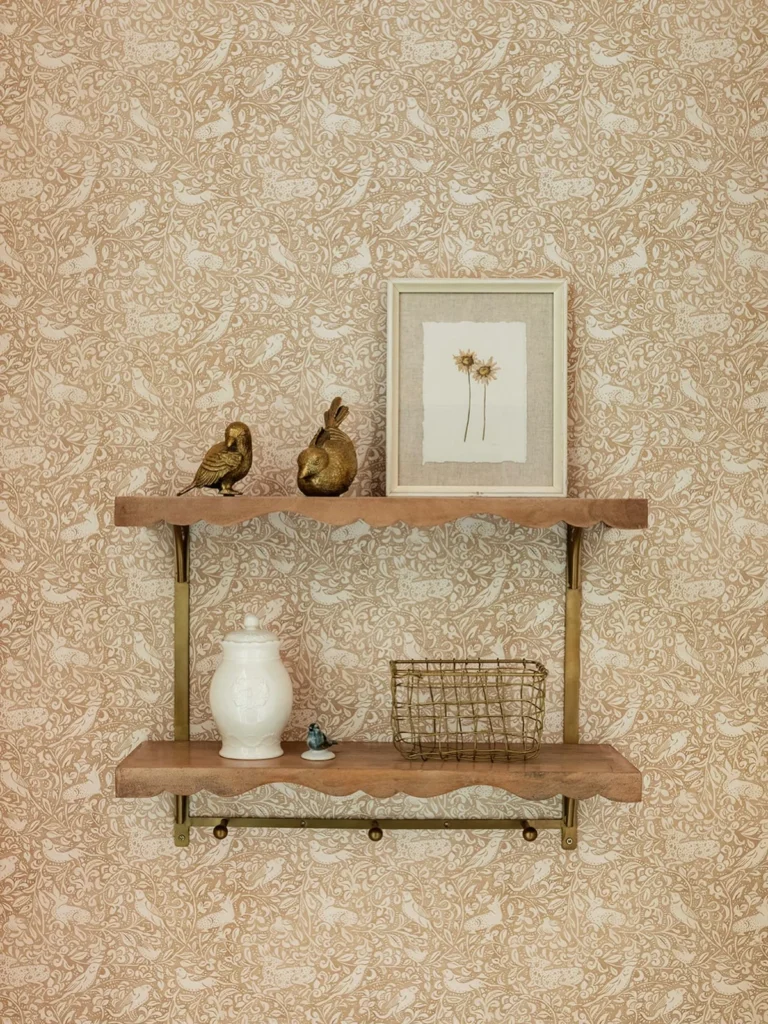
Arches, scallops, waves, and rounded corners are replacing sharp angles in decor. DIY versions include a scalloped edge cut on a shelf or tray, a painted arch behind a bed, or a rounded mirror frame wrapped in rope. Curves soften a boxy room and add a sense of movement.
Use a cardboard template to draw the curve before you cut, and sand the edges smooth. Cost is about $10-30. A jigsaw is helpful for wood, but cardboard and foam board work if you want to skip power tools.
9. Peel-and-Stick Wallpaper Nooks
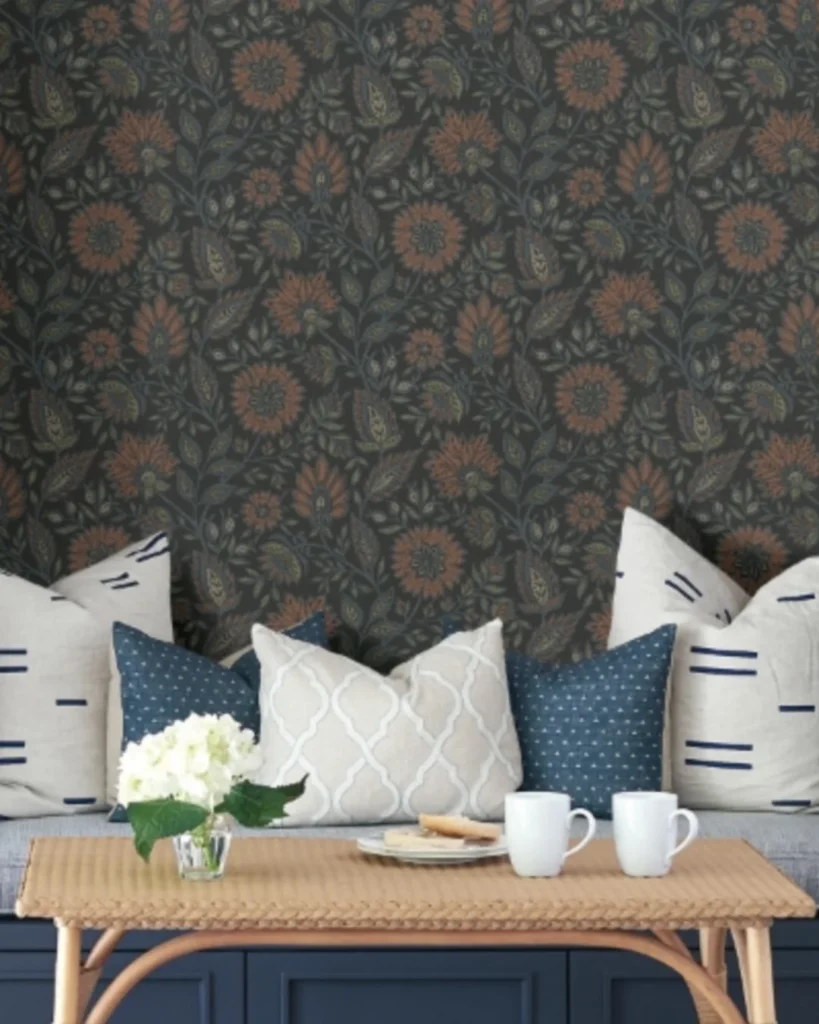
Renter-friendly wallpaper is perfect for defining a corner, such as a coffee station, a desk nook, or the back of a bookcase, without any construction. Choose a pattern that suits the mood of the space, and apply it slowly, smoothing as you go.
Test a small piece in a hidden area to make sure it removes cleanly, and avoid applying it over textured or freshly painted walls. Expect about $30-70 per roll. If you’re working with an open layout, this is a good way to give each zone its own personality.
10. Upcycled and Limewashed Furniture
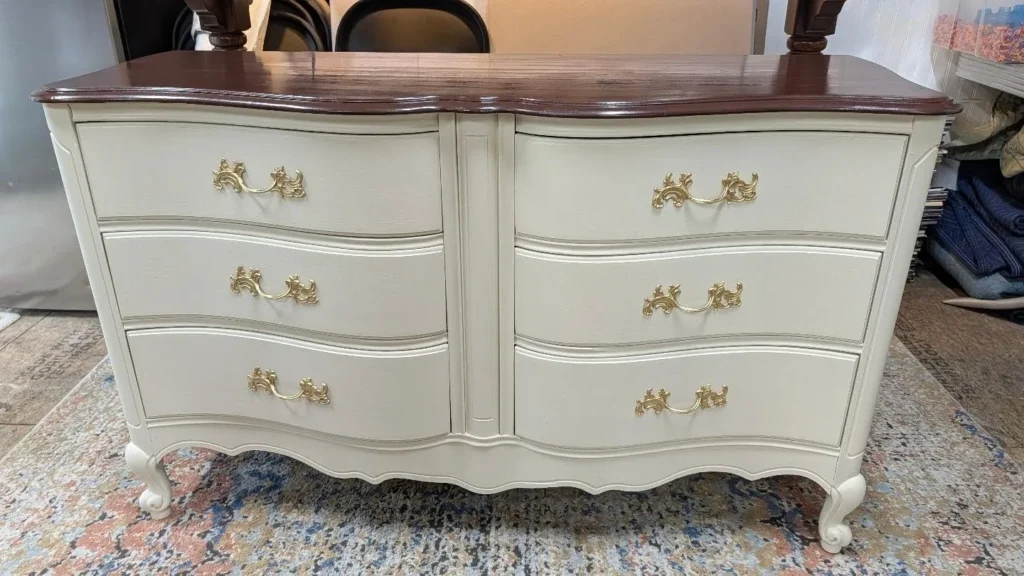
Thrifted furniture, refreshed with paint, a limewash-style finish, or new hardware, is both a sustainable and a stylish approach. Sand lightly, clean thoroughly, and thin paint with water for a soft, weathered effect, then wipe back so the grain shows. New knobs make an enormous difference.
Cost is typically $20-60 for the piece and supplies. Test the finish on a hidden spot first, and seal pieces that will see heavy use. Work in ventilated spaces, and dispose of oily rags safely, since some finishes can heat up and catch fire if bunched together.
11. Personalized and Custom Art
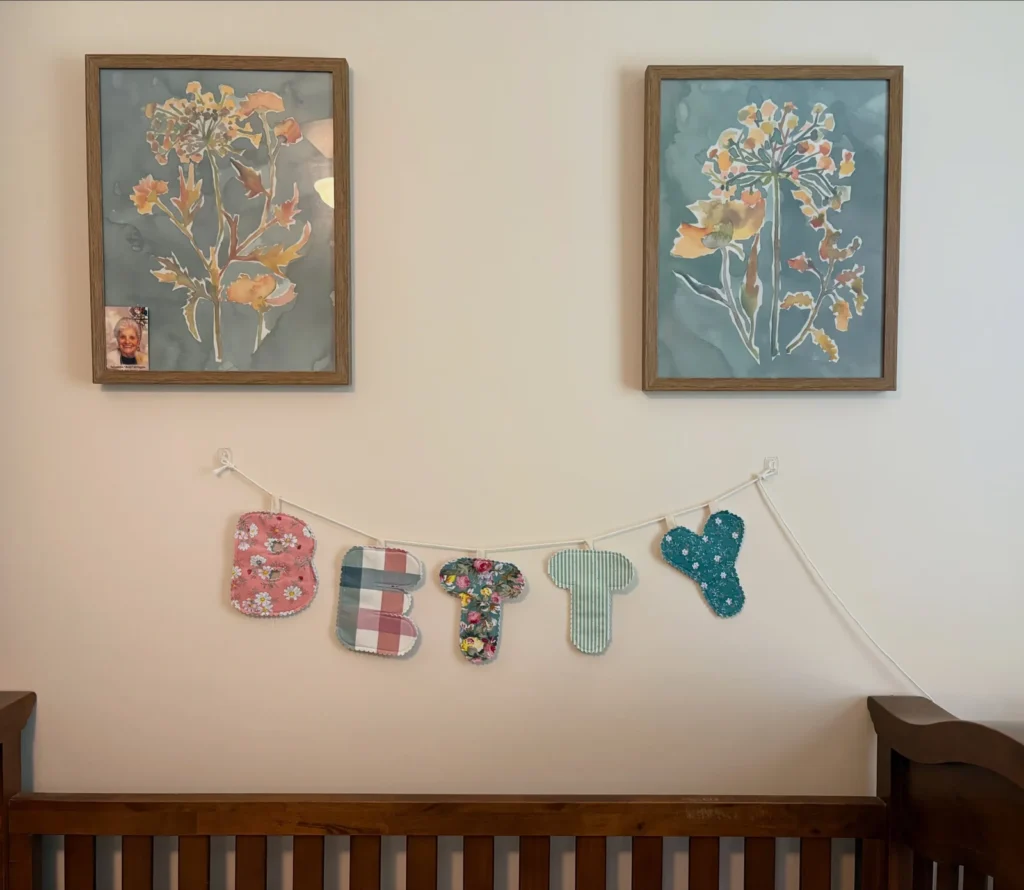
Instead of generic prints, people are making art that tells their own story: custom paint-by-number from a favorite photo, framed fabric from a family textile, or a simple painting in colors from their room. These pieces become conversation starters.
A custom paint-by-number kit can run $25-60 online, or you can make your own by tracing a photo and filling in blocks of color. Frame it simply, and hang it where you’ll see it often.
12. Budget Luxe From Dollar Store Finds
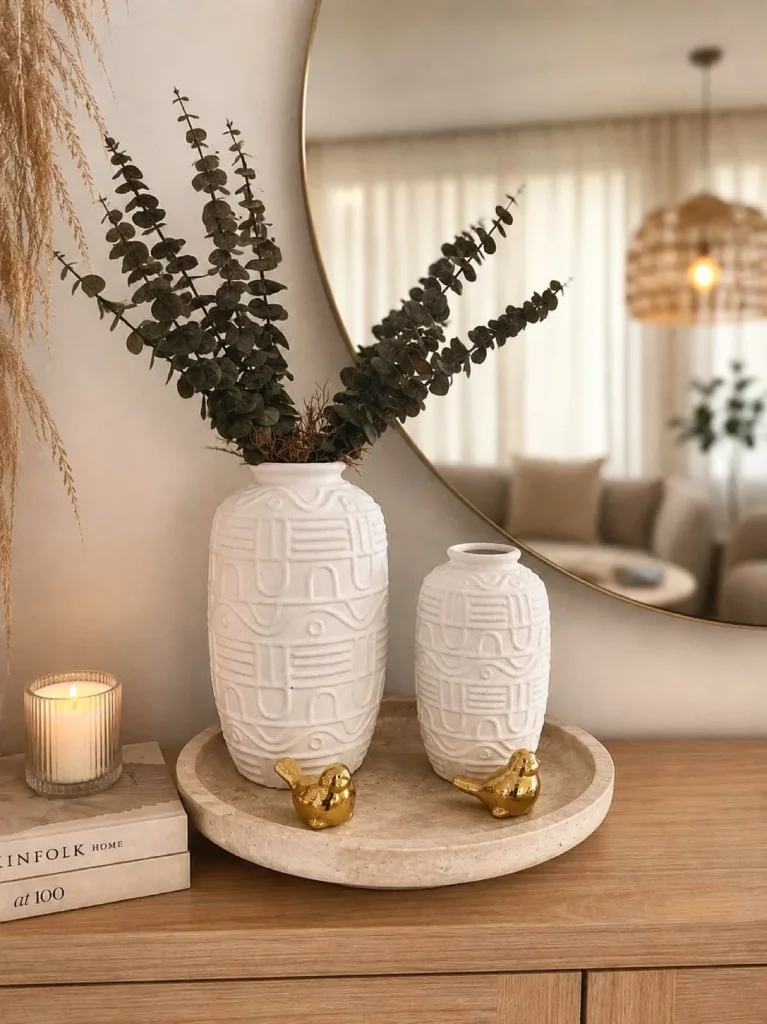
Turning cheap materials into expensive-looking pieces continues to be one of the most popular DIY movements. Spray-painted vases, rope-wrapped mirrors, faux marble trays, and upgraded frames all start with a few dollars. The secret is a tight color palette and a matte finish.
If this is the part that interests you most, my guide to dollar store DIY decor has 22 projects that look much more expensive than they are. Most of them cost under $10.
The 12 Trends at a Glance
| Trend | Starter Project | Approx. Cost | Difficulty | Renter-Friendly? | Staying Power |
|---|---|---|---|---|---|
| Handmade imperfection | Air-dry clay bowl | $8-20 | Easy | Yes | High |
| Sculptural plaster art | Textured canvas | $12-30 | Easy to medium | Yes | Medium to high |
| Color drenching | Tonal restyle or painted wall | $0-80 | Easy to medium | Tonal version, yes | Medium |
| Natural textures | Rope lamp, jute vase | $5-25 | Easy | Yes | Very high |
| Faux built-ins | Bookcases with trim | $120-350 | Medium to hard | Freestanding version | High |
| Textile wall hangings | Knit or macrame piece | $10-35 | Easy to medium | Yes | Medium |
| Hand-stenciled patterns | Dresser front or door border | $10-25 | Easy to medium | On furniture, yes | Medium |
| Curved shapes | Scalloped tray or arch | $10-30 | Easy to medium | Yes | Medium to high |
| Wallpaper nooks | Peel-and-stick accent | $30-70 | Medium | Mostly, test first | Medium |
| Upcycled furniture | Limewashed thrift find | $20-60 | Medium | Yes | Very high |
| Personalized art | Custom paint-by-number | $25-60 | Easy | Yes | High |
| Dollar store luxe | Painted vases and frames | $3-15 | Easy | Yes | High |
What a Trend Refresh Costs by Budget
| Budget Tier | Rough Total | What You Can Do |
|---|---|---|
| Under $30 | $10-30 | Clay bowl, rope lamp, stenciled tray, painted frames |
| Weekend project | $40-100 | Plaster art, peel-and-stick nook, tonal restyle, upcycled piece |
| Bigger upgrade | $120-350 | Faux built-ins, a painted accent wall, a custom art set |
A Starter Supply List
| Supply | Approx. Cost | Used For |
|---|---|---|
| Matte acrylic paint in a few neutrals | $8-20 | Nearly every project |
| Air-dry clay and a small roller | $8-15 | Bowls, trays, ornaments |
| Joint compound and a spatula | $8-15 | Plaster-style wall art |
| Natural rope, jute, and twine | $4-10 | Lamps, vases, mirrors |
| Stencils and painter’s tape | $8-15 | Patterns and clean edges |
| Hot glue gun and wood glue | $8-18 | Rope, wood, and cardboard |
| Dust mask, gloves, safety glasses | $8-15 | Sanding, plaster, and paint |
| Removable hanging strips and hooks | $5-15 | Hanging finished pieces |
Safety and Prep Notes
Use paint, plaster, spray products, and strong glues in a well-ventilated area, and follow the label on every product. Wear a dust mask and safety glasses for sanding and cutting, and gloves for paint and plaster. Keep children and pets away from supplies, and let everything dry fully before use.
Check weight ratings on hooks, shelves, and strips, and anchor tall pieces like bookcases to the wall. Keep textiles and dried materials away from open flames, and use flameless candles with fabric or rope décor. If you rent, test adhesives in a hidden spot and ask your landlord before drilling.
Mistakes That Make DIY Trends Look Dated Fast
The biggest mistake is copying a trend exactly instead of adapting it to your room. The second is using too many trends at once, which makes a space look like a mood board. The third is rushing the finish, since sloppy edges and uneven paint show immediately, and the fourth is choosing trendy colors that don’t suit your light.
Another trap is spending too much on something that may fade. Keep trend-driven projects cheap and swappable, and put real money into basics like a good sofa or a solid bed.
If I Were Starting Over This Weekend
I’d make one clay bowl, one plaster wall art piece, and one rope-wrapped lamp, and I’d stop there. That’s about $40-60, a weekend, and three different trends in a way that still feels like one room. I’d live with them for a few weeks before adding anything else, which is a habit I wish I’d built before my years of impulse craft supply shopping.
The best DIY home decor trends right now share one idea: your home should look like you made it, or at least like someone with taste and a sense of humor lives there. Pick one or two, keep them simple, and let imperfection do the work. When you’re ready to style the rest of the space around your projects, my small apartment decorating ideas guide is a good next step.
FAQs
What are the biggest DIY home decor trends right now?
Handmade and imperfect pieces, sculptural plaster art, warm natural textures, color drenching, textile wall hangings, curved shapes, and upcycled furniture are some of the most popular. Many are low-cost and beginner-friendly.
How can I follow DIY decor trends on a budget?
Start with small projects like clay bowls, painted frames, and rope-wrapped lamps, and use thrifted or dollar store materials. A tight color palette and matte finishes make inexpensive pieces look more expensive.
Which DIY trends work in a rental?
Most of them, including clay accessories, plaster art on canvas, textile hangings, tonal styling, upcycled furniture, and peel-and-stick wallpaper tested in a hidden spot. Avoid anything that needs permanent changes unless your landlord approves.
How do I make DIY decor look professional?
Choose a limited palette, finish edges neatly, sand and prep surfaces, and go bigger rather than smaller with art. Take your time with drying and paint thin coats instead of one thick one.
How much does a DIY decor refresh cost?
Small projects cost $5-30, weekend projects run $40-100, and larger builds like faux built-ins can reach $120-350. Prices vary by region and by how many materials you already own.
Will these trends go out of style quickly?
Some may, which is why it helps to keep trend-driven projects cheap and swappable. Natural textures, upcycled furniture, and handmade pieces tend to last longest, since they’re less tied to a single look.









Leave a Reply