
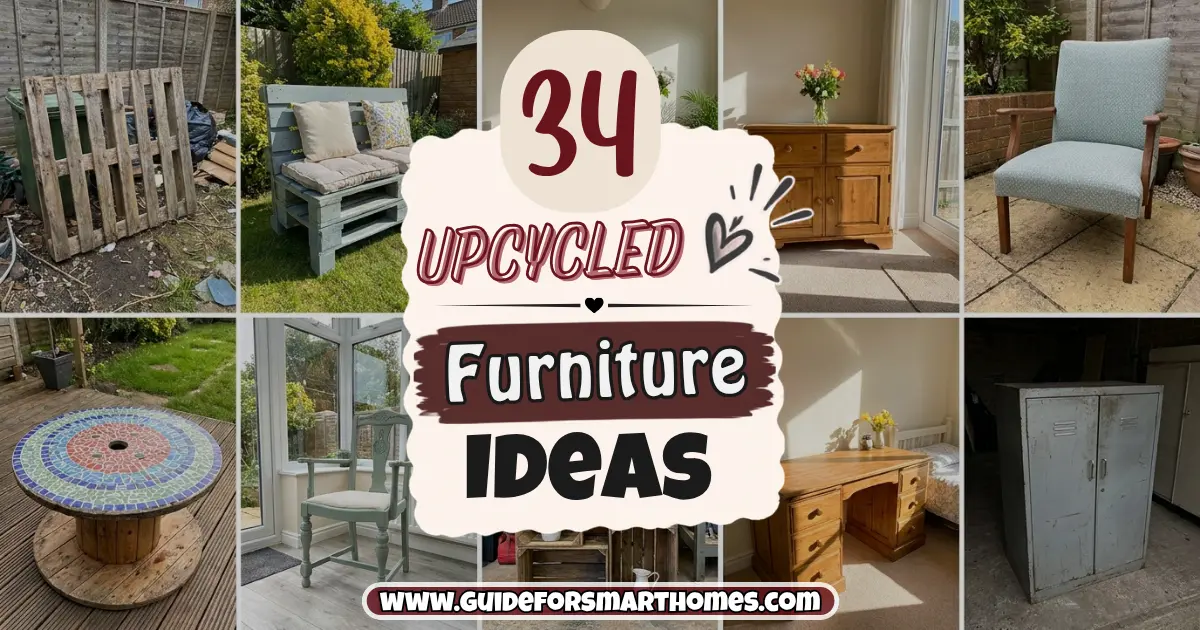
The first piece of furniture I ever flipped was a $25 dresser I found at a church rummage sale, and one of its drawers stuck so badly I had to kick it shut every night for about a month before I finally did something about it. I sanded the whole thing in my parking spot, painted it a muddy greige I immediately regretted, and then redid it two weekends later in a deep olive that I still love. That clumsy first attempt is the reason I now have strong opinions about primer.
If you’re looking for upcycled furniture ideas that actually work in a real home, not a styled photoshoot with a 2,000 square foot workshop behind it, you’re in the right place. A lot of these projects started in rentals and small apartments, which is where good upcycled furniture ideas matter most because every piece has to earn its spot. If you’re still working out the bigger picture for your space, my guide to small apartment decorating ideas pairs well with this list.
Furniture is also the fastest way to blow a budget, which is why flipping secondhand pieces is such a smart move. I wrote up a whole plan for furnishing a small apartment on a budget, and upcycling is the backbone of it. If you want projects that are even lighter than a full furniture makeover, my roundup of easy DIY home decor ideas is a good warm-up.
Below you’ll find 34 before and after furniture makeover ideas, from a ten-minute hardware swap to a weekend project, with the real trade-offs I’ve run into. I’ve also put a paint comparison and a cost breakdown near the end so you can pick a project that matches your budget and patience.
Before You Start: Supplies and Rules for Upcycled Furniture That Actually Lasts
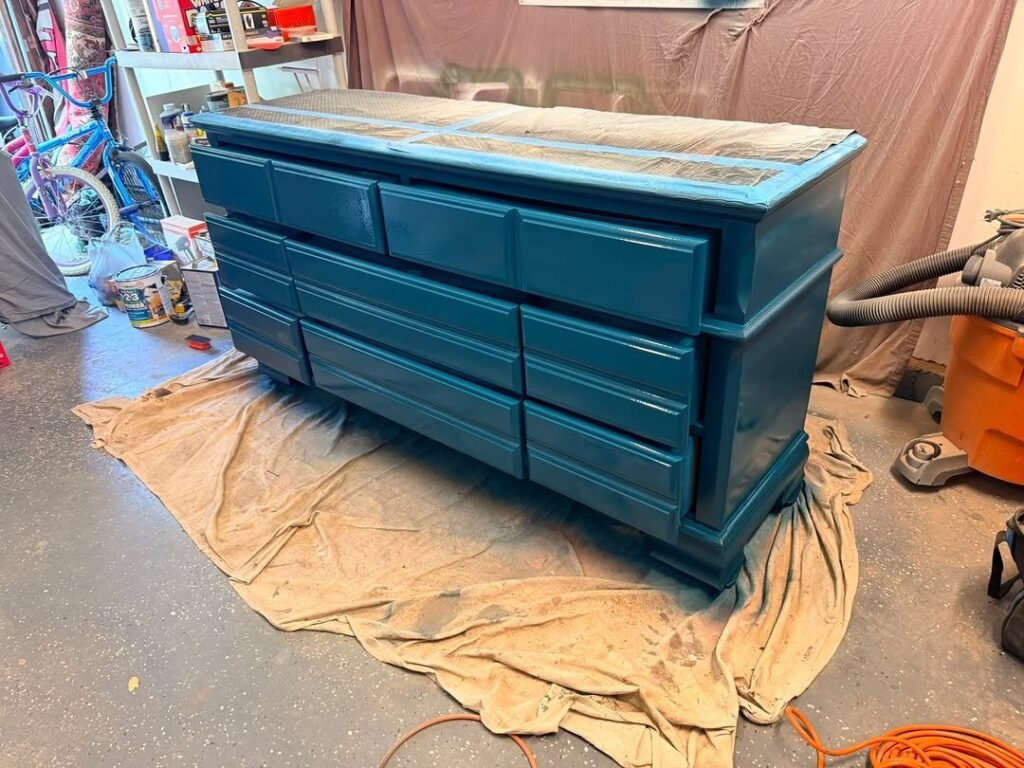
Almost every failed makeover I’ve seen (mine included) comes down to skipped prep, not bad taste. Clean the piece with a degreaser, scuff sand the surface, prime if it’s shiny or laminate, and give each coat of paint real drying time. That’s about 80 percent of a good result.
Here’s the starter kit I’d buy if I were starting over: a degreasing cleaner, 120 and 220 grit sandpaper, a quality angled brush, a small foam roller, a stain-blocking primer, a water-based topcoat, and painter’s tape. If you’re setting up your first place and building a tool collection from nothing, my first apartment checklist covers what’s worth owning.
One safety note most blogs skip: if a piece was made before 1978, the old paint may contain lead. Buy a cheap lead test swab before you sand anything, and if it’s positive, don’t sand it dry. Also, renters should read through the common apartment renter mistakes before drilling into walls or painting anything attached to the unit.
Which Paint Should You Use? A Quick Comparison
Prices below are rough ranges I’ve paid, and they shift by brand and region.
| Paint Type | Best For | Prep Needed | Approx. Cost | Trade-Off |
|---|---|---|---|---|
| Chalk-style paint | Solid wood, vintage pieces, a soft matte look | Light cleaning, little sanding | $30 to $45 per quart | Needs a wax or topcoat to resist wear |
| Milk paint (powder) | Raw or stripped wood, a chippy farmhouse look | Bonding agent on sealed surfaces | $25 to $35 per batch | Unpredictable on slick finishes |
| Cabinet and trim enamel | Kitchen pieces, dressers, high-touch surfaces | Scuff sand and primer | $35 to $60 per quart | Longer cure time, sometimes a week to fully harden |
| Spray paint | Hardware, metal frames, small accents | Clean and light sanding | $7 to $12 per can | Drips if you rush, and ventilation matters |
1. Turn a Dated Oak Dresser Into a Two-Tone Statement Piece
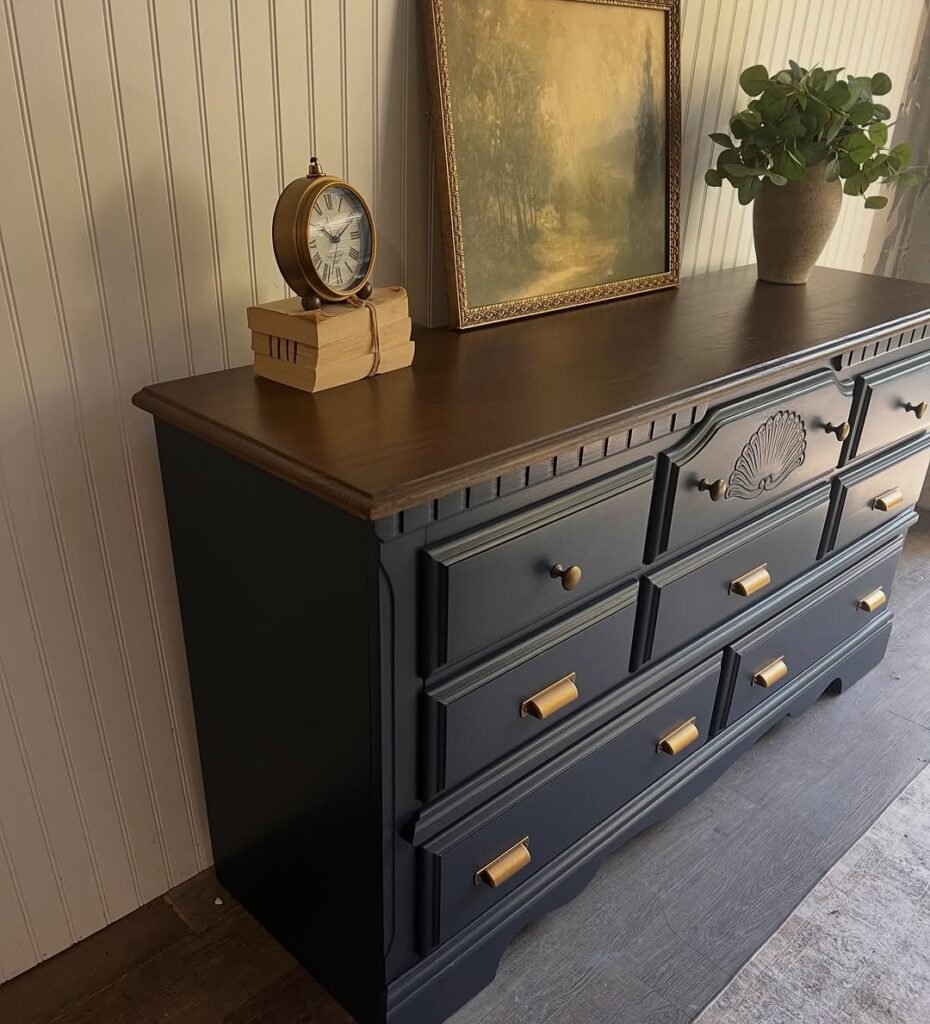
This is the project I’d recommend to a total beginner, because the “before” is so forgiving. Picture a honey-orange oak dresser with those curly brass pulls from the 90s. Nobody is attached to it, and that’s freeing.
Paint the body in a deep color (forest green, navy, or a warm charcoal) and leave the top natural or restain it. Swap the pulls for something simple in matte black or brushed brass. The contrast between painted body and wood top is one of the reasons two-tone is showing up in so many of the small apartment decor trends I keep seeing.
Pro tip: Orange oak bleeds tannins through light paint. Use a stain-blocking primer under any pale color, or you’ll get yellow blotches a few weeks later.
2. Convert an Old Dresser Into a Rolling Kitchen Island
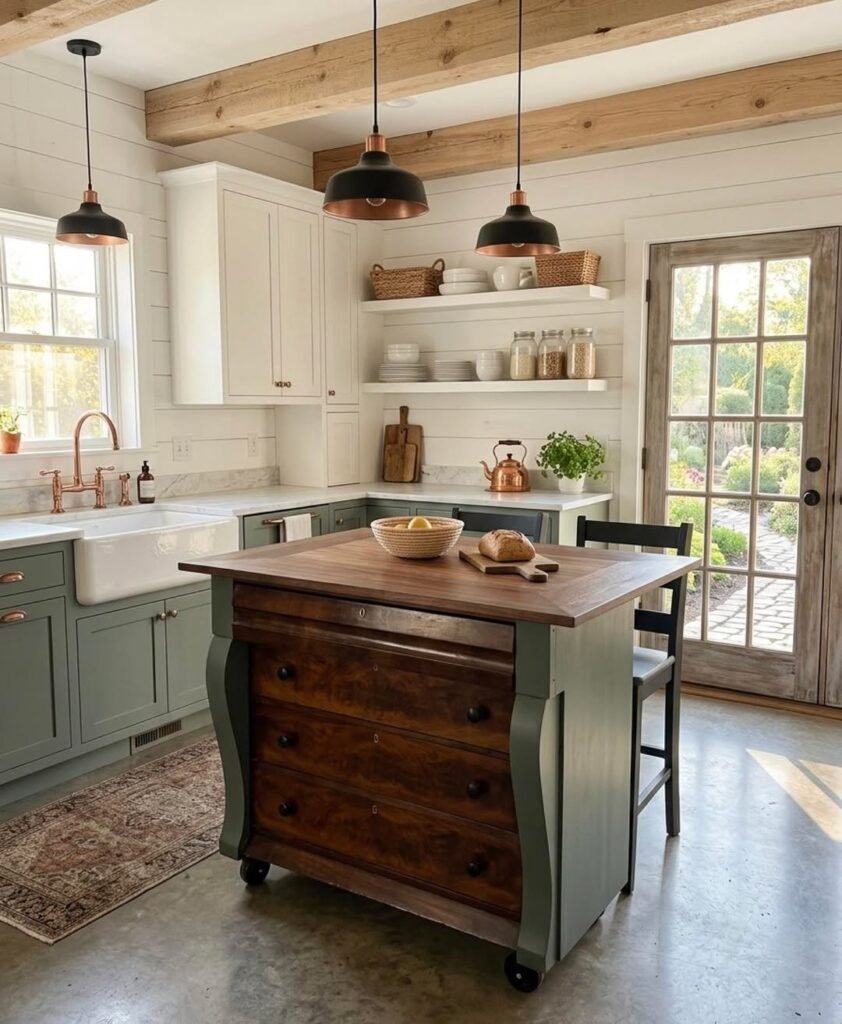
If your kitchen has more wall than counter, a dresser island solves a real problem: prep space and storage in one piece. The before is a boring bedroom dresser at 30 inches tall. The after is a 36-inch island with a butcher block or stone remnant top and drawers that finally hold your utensils, towels, and baking sheets.
Add a top that overhangs a few inches, then screw heavy-duty locking casters into the base. Check the height before you commit, since standard counters run about 36 inches and casters add a few inches of lift. This is a perfect example of the kind of multi-functional furniture for a small apartment that earns its floor space twice.
The trade-off is weight. A loaded dresser island is heavy, so get the casters rated well above what you think you need.
3. Make a Bathroom Vanity From a Thrifted Dresser or Console
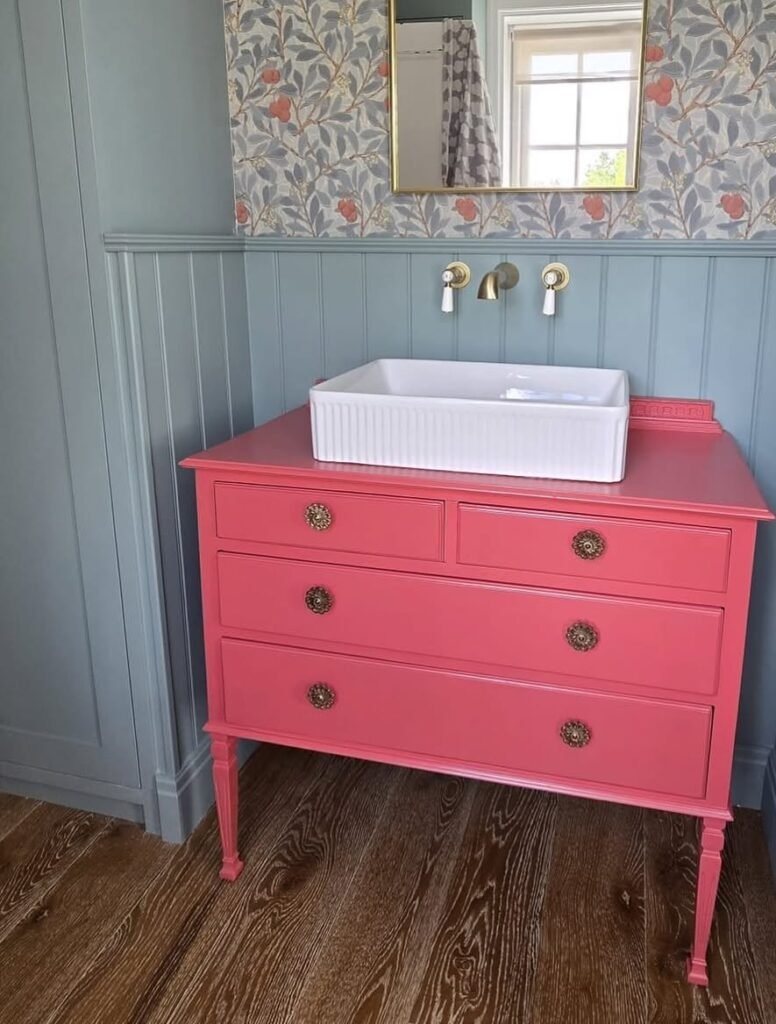
Custom vanities can run well into four figures, while a thrifted piece costs a fraction of that. The before is a plain wooden dresser. The after is a one-of-a-kind vanity with a vessel sink on top and faucet mounted through the surface or the wall.
You’ll need to cut an opening for the plumbing in the back of the cabinet, and you must seal every surface with at least three coats of water-based polyurethane, especially the top and the inside of the drawer cavity. I’d hire a plumber for the hookup unless you’ve done it before. Once the plumbing is in, the same logic from my guide on how to organize under the kitchen sink works for the cabinet below your new bathroom sink.
Pro tip: Fix a shallow tray inside the top drawer. The plumbing usually eats the space where drawers would go, and a short drawer cut around the pipes keeps the storage useful.
4. Repurpose a Low Dresser as a TV Console
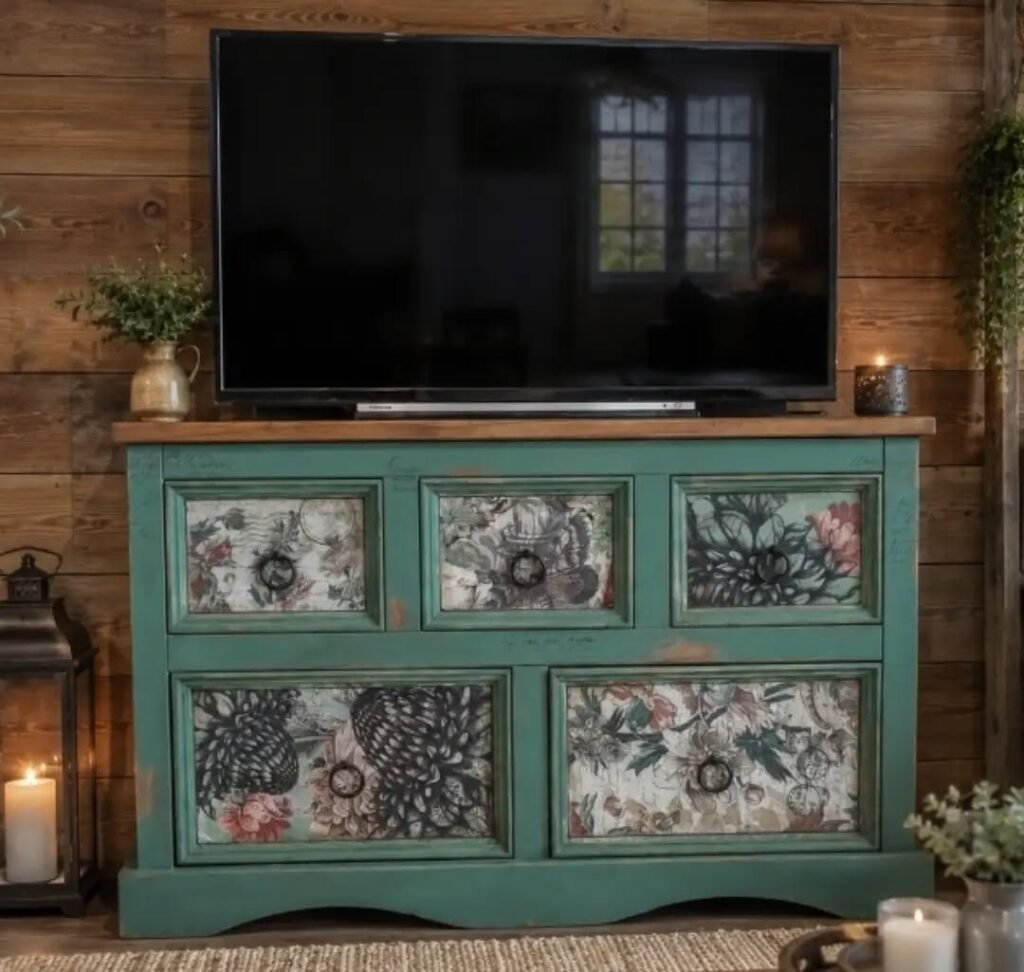
A long, low dresser is already about the right height for a TV, and the drawers hide remotes, game controllers, and the mess of cables nobody wants to see. The before is a bulky dresser in the guest room. The after is a media console that looks custom.
Remove the top drawer to create an open bay for a cable box or sound bar, and cut a notch in the back panel so wires can pass through. A coat of satin paint and new hardware finishes it. If your living area is tight, I put together a full list of small living room ideas that show how to place a console without crowding the room.
5. Hang Spare Drawers as Wall Shelves
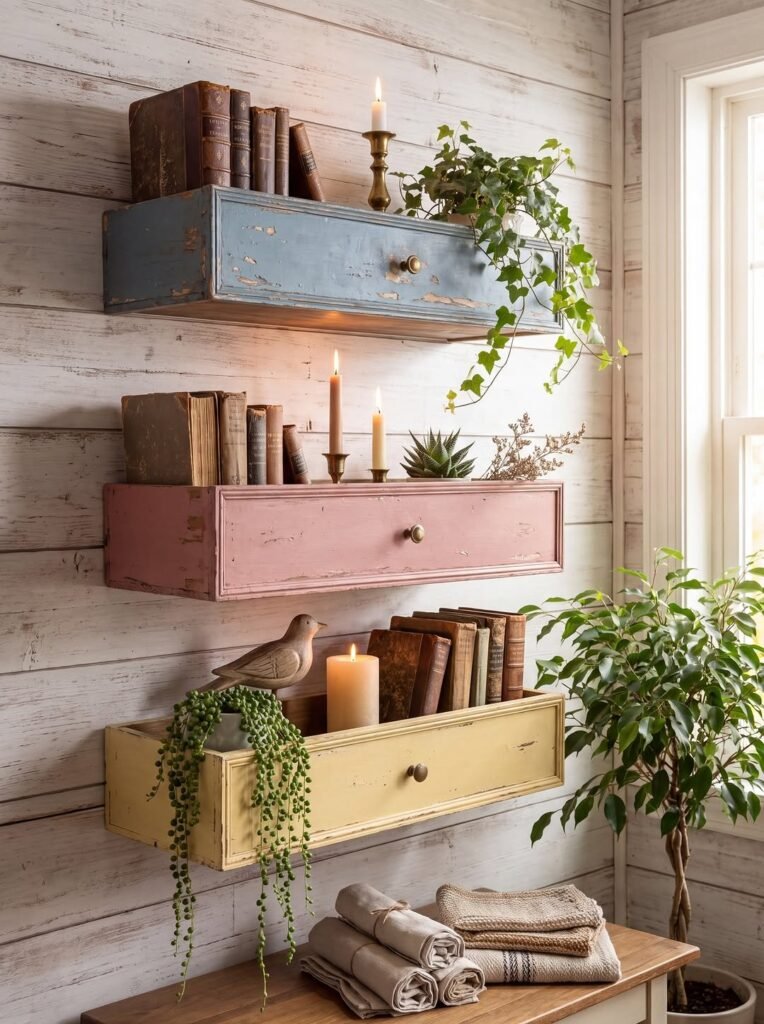
When a dresser drawer is cracked or the dresser itself is beyond saving, the drawers are often still perfectly good. Mount them sideways on the wall and you get a little box shelf with a built-in vintage look. The before is a pile of orphan drawers. The after is a gallery wall of storage.
Paint the interiors a contrasting color, add a French cleat or a pair of heavy-duty brackets on the back, and make sure you hit a stud or use anchors rated for the load. Small walls are an underused storage zone, which I dig into in my guide on how to maximize vertical space in a small apartment.
6. Stack Vintage Suitcases as a Nightstand
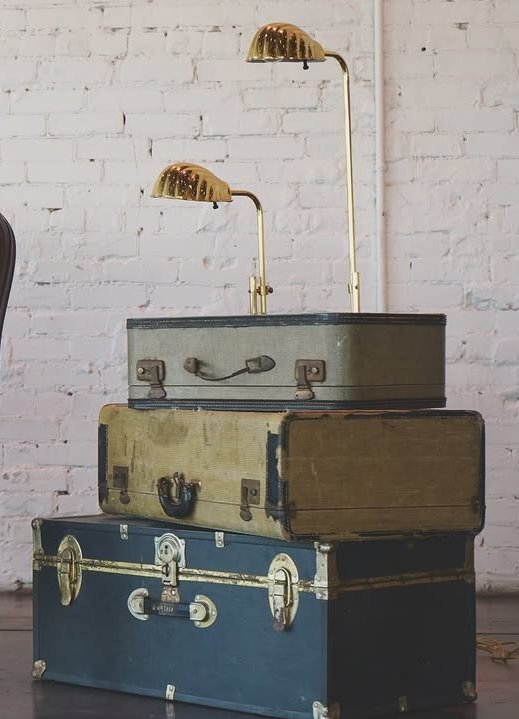
Two or three old hard-shell suitcases stacked on small legs make a nightstand that’s also hidden storage for spare sheets, chargers, or off-season socks. The before is a dusty suitcase from the back of a thrift store shelf. The after looks like it came from a design shop.
Clean the interior, replace any musty lining with a peel-and-stick liner, and screw four tapered wooden legs into a plywood base under the bottom case. Keep the top case small enough to hold a lamp without wobbling. If you want more ideas like this, my list of storage furniture for apartments goes deeper on pieces that hide clutter.
7. Turn an Old Door Into a Headboard
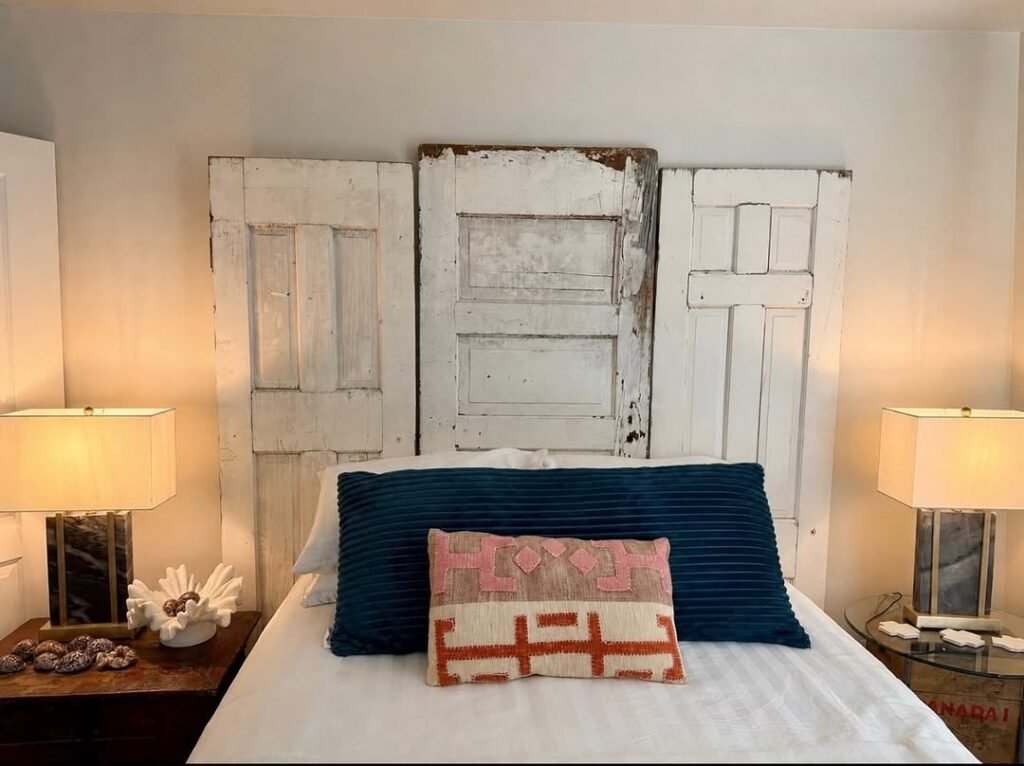
A solid wood door with panel detail is basically a ready-made headboard. The before is a paint-chipped door leaning on a salvage yard wall. The after is a statement behind your bed that costs maybe $40 to $60 plus paint.
Cut it to the width of your bed frame (or leave it a bit wider for drama), sand, paint, and mount it with a French cleat to the wall rather than attaching it to the bed. In a studio, a headboard like this can double as a soft divider between sleeping and living areas, which fits right into how I explain it in my guide to how to zone a studio apartment.
Pro tip: Hollow-core doors are light but flimsy. If you want a headboard that survives actual use, look for solid-core or true panel doors, and check the weight before you buy.
8. Build a Pallet Coffee Table on Casters
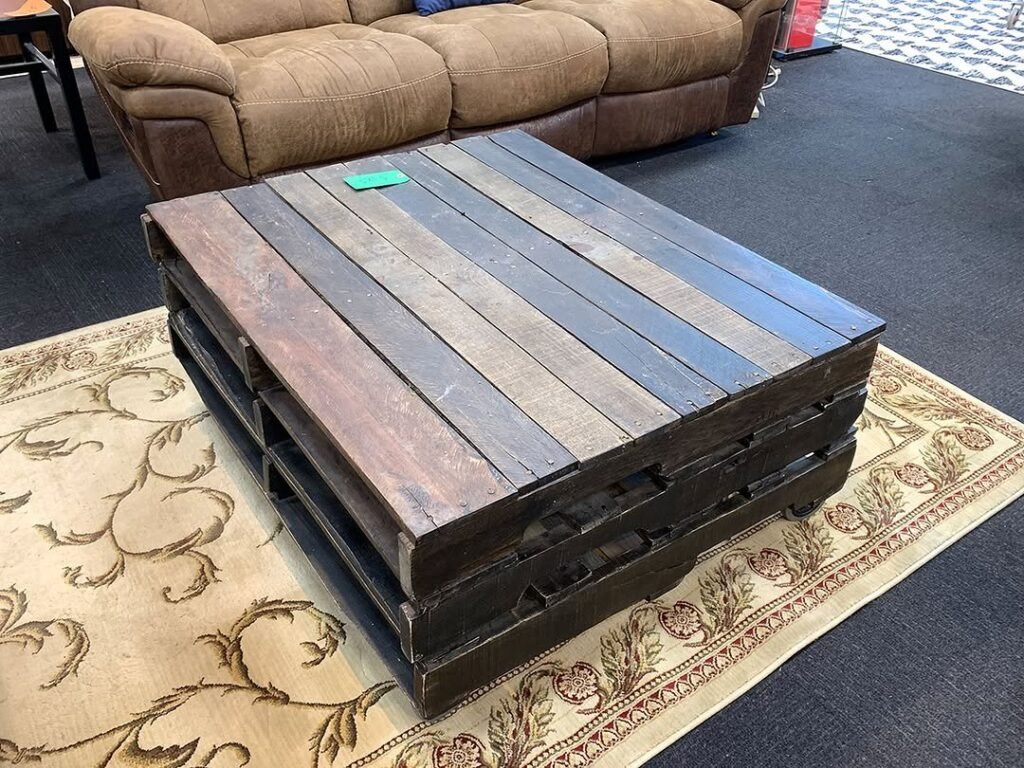
I’ll be honest: pallet furniture is overdone, but it’s still one of the cheapest ways to get a sturdy coffee table. The before is a rough shipping pallet. The after is a low platform table with casters that rolls out of the way when you need floor space.
Look for pallets stamped “HT” (heat treated) and avoid ones marked “MB,” which means they were treated with methyl bromide. Sand it thoroughly, because splinters are the main complaint with this project, and seal it with a clear matte coat. If floor space is your issue, you’ll find more options in my picks for space-saving furniture.
9. Turn a Wooden Ladder Into a Leaning Shelf
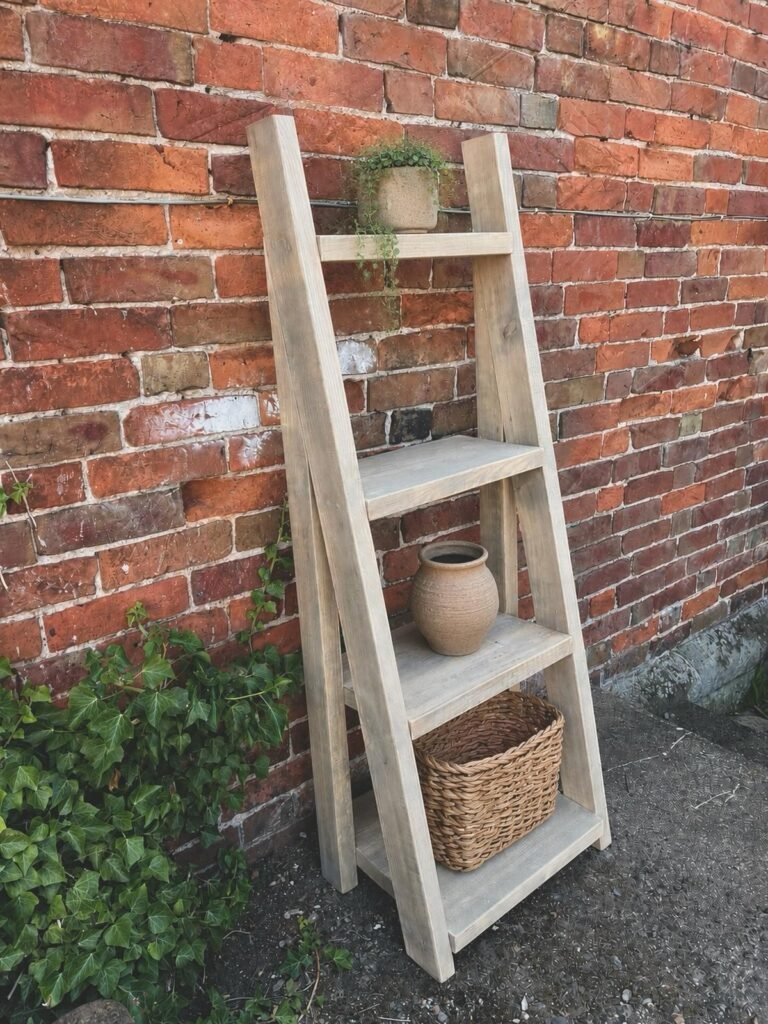
An old painter’s ladder cut in half or left whole can become a bookshelf, towel rack, or plant stand. The before is a paint-splattered ladder you’d normally toss. The after is a leaning shelf where each rung or added board holds something.
Add shelf boards across the rungs (cut to fit, screwed from below), sand rough edges, and lean it against a wall at a stable angle. If you have kids or pets, anchor the top to the wall for safety. It’s one of the simplest items on my list of home organization ideas.
10. Mount Wooden Crates as Entryway Shelves
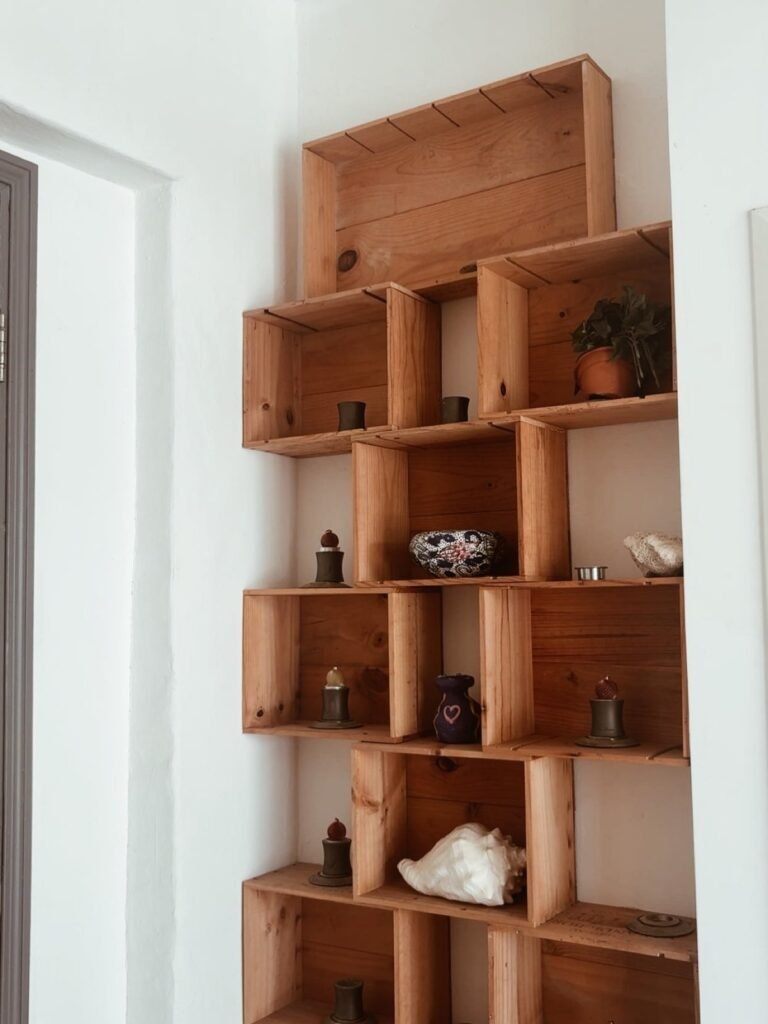
Produce crates or wine boxes go from trash to organized entry storage in about an hour. The before is a stack of mismatched crates behind a liquor store. The after is a wall of cubbies for shoes, mail, and dog leashes.
Sand the edges, apply a stain or wash that matches your trim, then screw the crates to each other and into wall studs. Staggering them looks more intentional than lining them up like a grid. I walk through the habits that keep entryways from turning back into a pile in my guide to clutter-free home tips.
11. Turn a Wire Cable Spool Into a Side Table
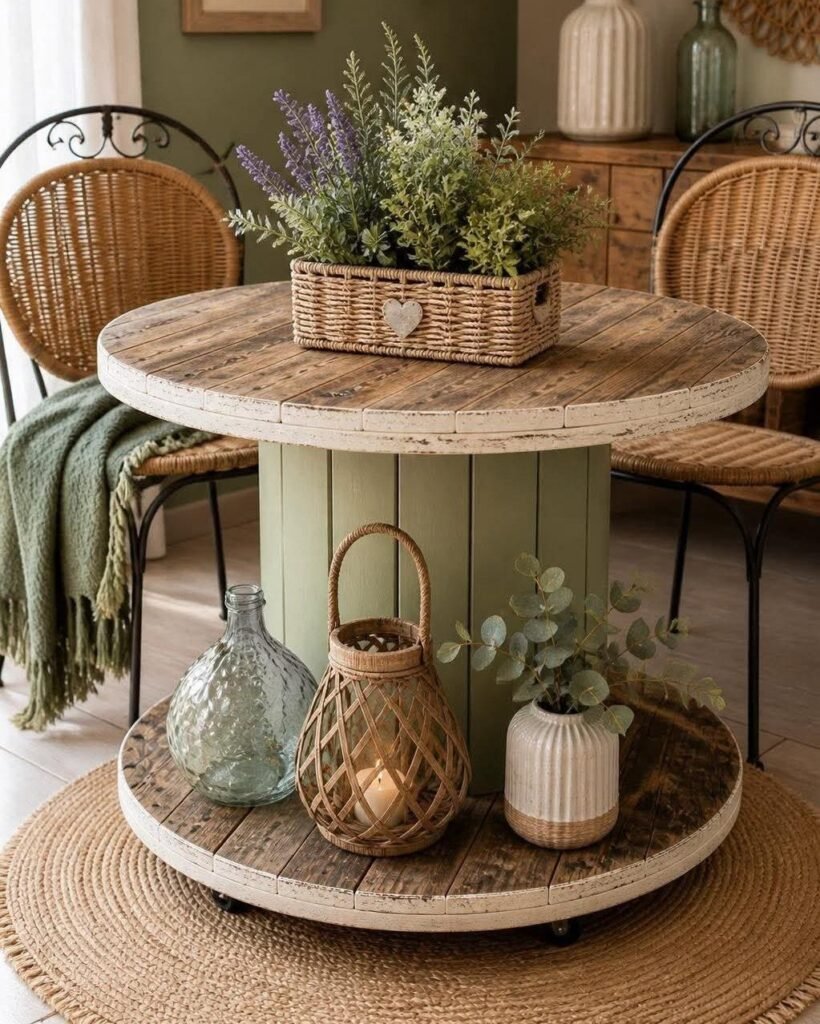
This one comes with an honest caveat: finding a clean spool can take patience. Construction sites, electricians, and local marketplace listings are the usual sources, and always ask permission first. The before is a splintered industrial spool. The after is a chunky side table with real character.
Sand the top and edges well, then finish with stain and a durable clear coat. A set of felt pads on the bottom keeps it from scratching your floors. If you’re hunting for cheap finishing touches like knobs, felt pads, or basket liners, check my dollar store DIY decor list before you spend full price.
12. Turn a Vintage Sewing Table Into a Compact Desk
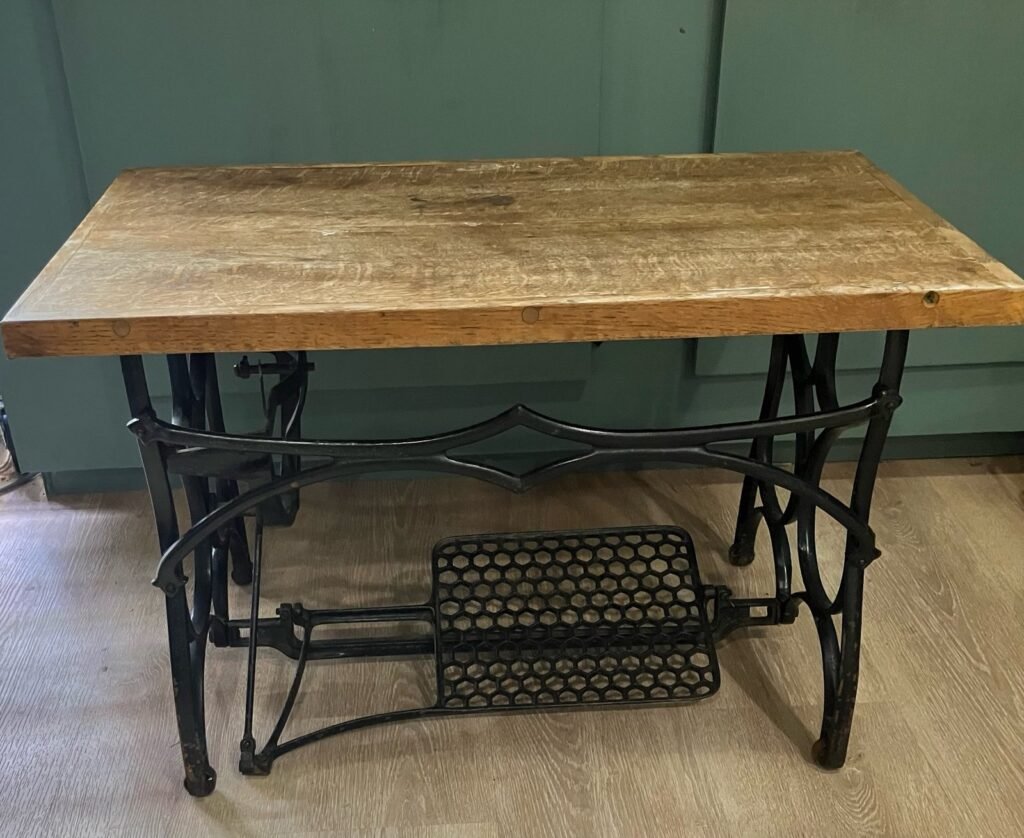
Old treadle sewing machine bases have beautiful cast iron legs, and the tops often need work. The before is a heavy base with a warped, water-stained surface. The after is a narrow desk with a wide-plank top that fits in a corner or beside a window.
Buy or cut a new top about 40 inches wide, attach it to the cast iron base with screws through the existing holes, and stain it to taste. It’s perfect for a laptop and not much else, so don’t expect dual monitors. If you’re carving out a work corner, my guide to a home office in a small apartment goes over layouts that actually work.
13. Frame a Mirror in an Old Window Sash
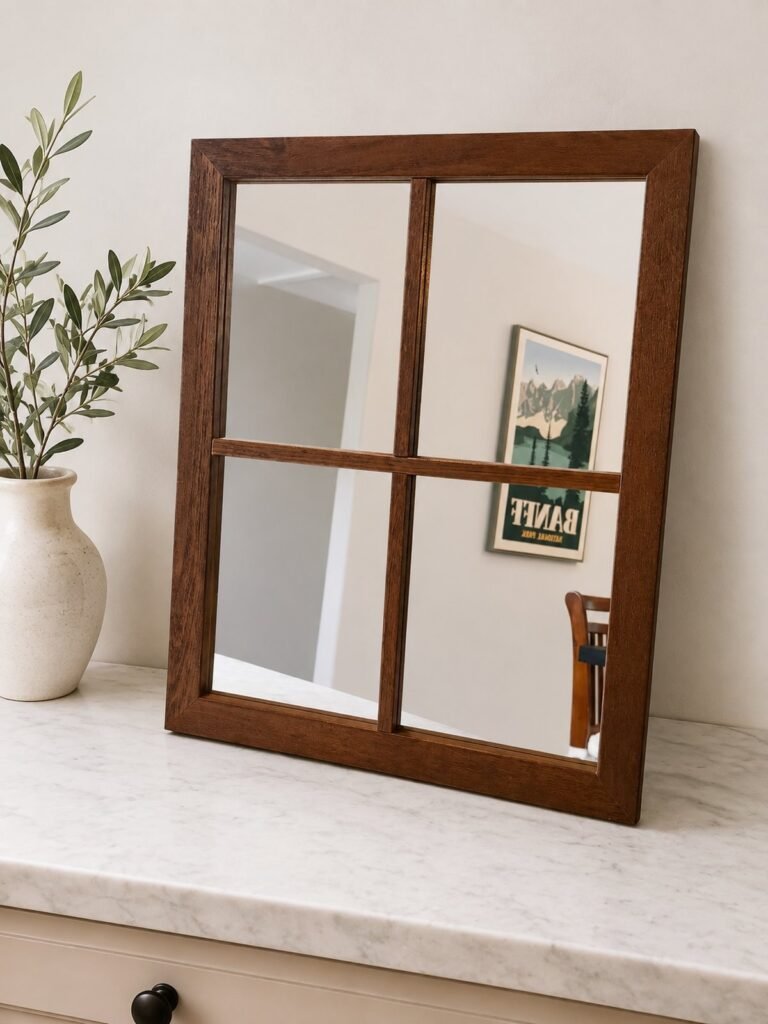
Old wood windows with multiple panes make a great statement mirror or photo display. The before is a chipped window frame from a salvage store. The after is a mirror with grid lines that feels like an architectural piece.
Scrape loose paint (and test for lead first), then replace the glass with mirror panels cut to size or back each pane with mirrored acrylic. Hang it with two heavy-duty hooks and keep the weight in mind, because real glass adds up. For more wall projects, my collection of DIY wall art ideas has other ways to fill a blank wall.
14. Give a Scratched Coffee Table a Tile Top
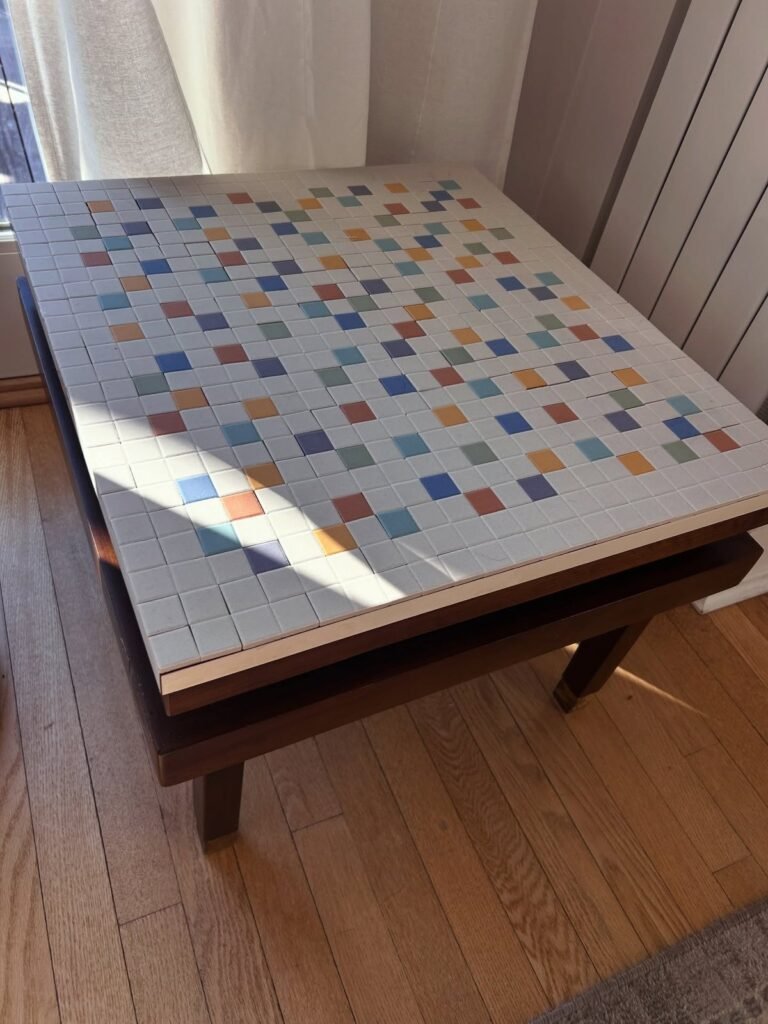
This is the project that surprised me most. A cheap laminate coffee table with a burned ring from a hot mug becomes a mosaic or tile-top table that’s actually wipeable and heat-resistant. The before is a tired veneer top. The after looks like a tiled café table.
Remove the old top (or build a plywood tray over it), set 4 by 4 inch tiles with tile adhesive, grout, and seal. Edge it with wood trim so the tile doesn’t catch on sleeves. Placement matters in tight rooms too, and my list of studio apartment layout ideas shows how to keep a low table from clogging the walkway.
Pro tip: Dry-fit your tiles before mixing any adhesive. I once got three rows in before realizing my last column would be a sliver, and fixing it meant ripping up everything.
15. Reupholster a Dining Chair Seat in 20 Minutes
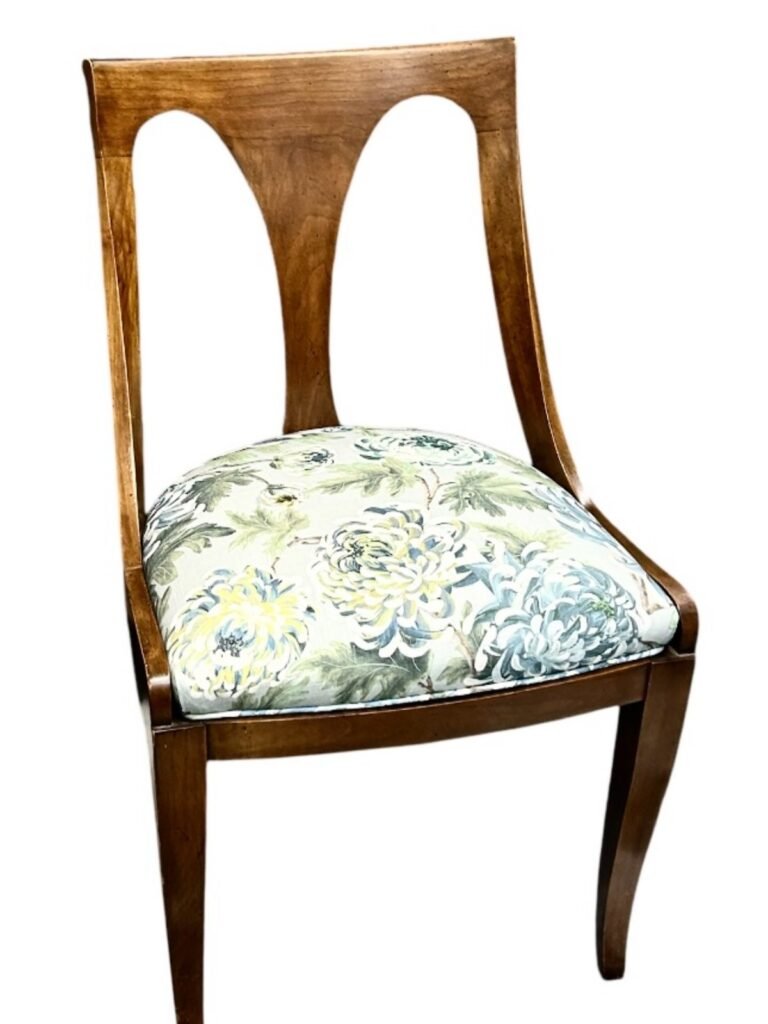
You don’t need to be a upholsterer to refresh a chair. The before is a set of dining chairs with stained, flattened seat pads. The after is a set that looks pulled together with new fabric and fresh foam.
Flip the chair over, unscrew the seat, and staple new fabric over a layer of high-density foam. Pull the fabric tight at the center of each side first, then work out toward the corners. Warm tones like rust, mustard, or olive velvet make a table feel cozy for cooler months, which pairs nicely with the colors I suggest in my fall apartment decor ideas.
16. Convert Two Chairs Into a Window Bench
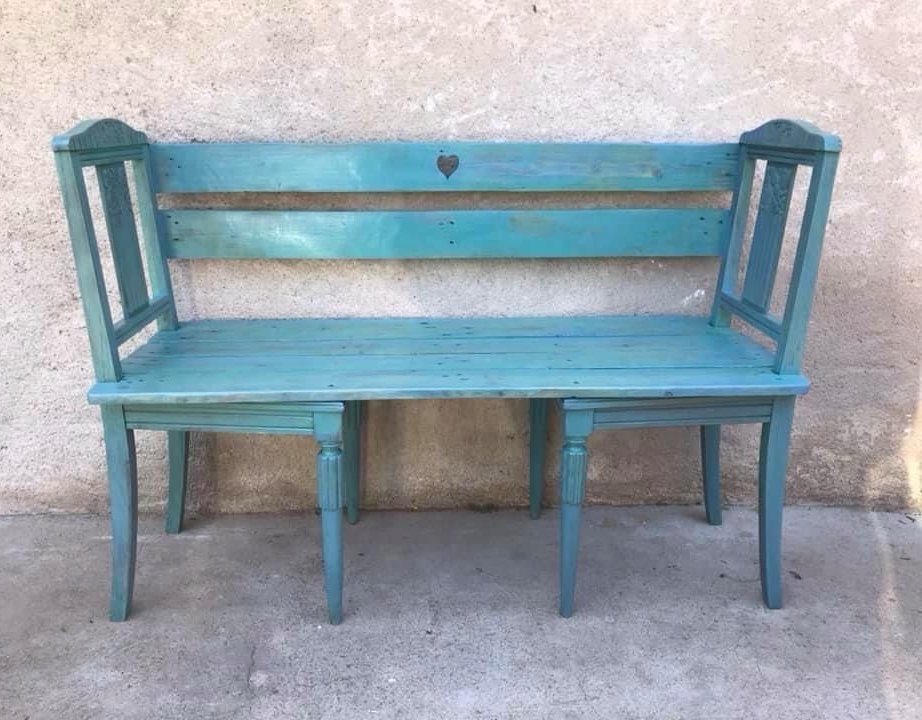
When you have a matching pair of chairs but no use for them, turn them into the supports for a cushioned bench. The before is two chairs sitting in a corner. The after is a long bench under a window with a plank seat on top.
Cut the seat frames so they line up, then attach a board across both and add a thin cushion. Keep the bench shallow if you’re working with a narrow window nook. Dress the window with curtains hung high and wide to make it feel bigger, using the tips from my guide on how to hang curtains to make a small room look bigger.
17. Turn a Footstool Into a Storage Ottoman
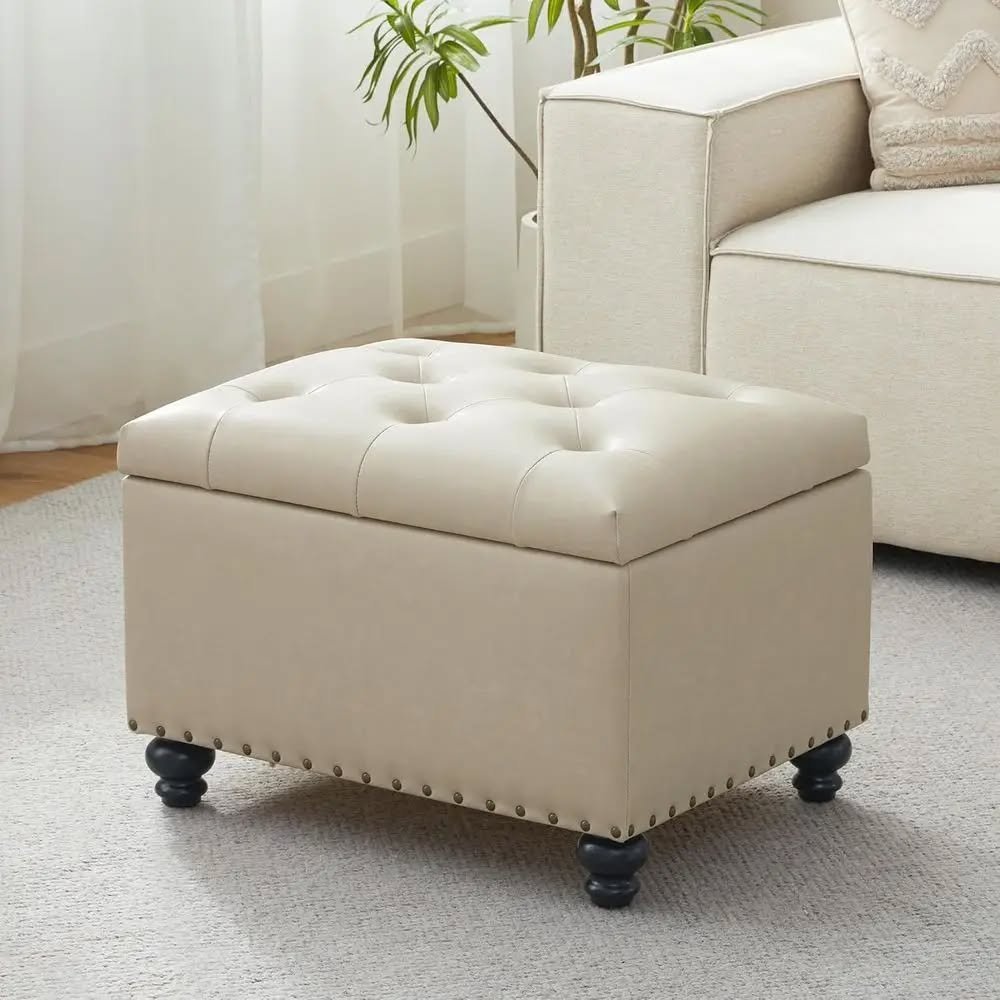
A boxy footstool with a worn top can become a storage ottoman with a lift-off lid. The before is a stool nobody uses. The after is a place to hide throw blankets or kids’ toys right beside the sofa.
Replace the top with a hinged or removable padded lid, and add a fabric bin or basket inside. Check bin sizes before you start so the interior fits the way you want. My roundup of the best storage bins includes sizes that fit under most ottoman lids.
18. Turn a Tall Bookcase Into a Pantry Cabinet
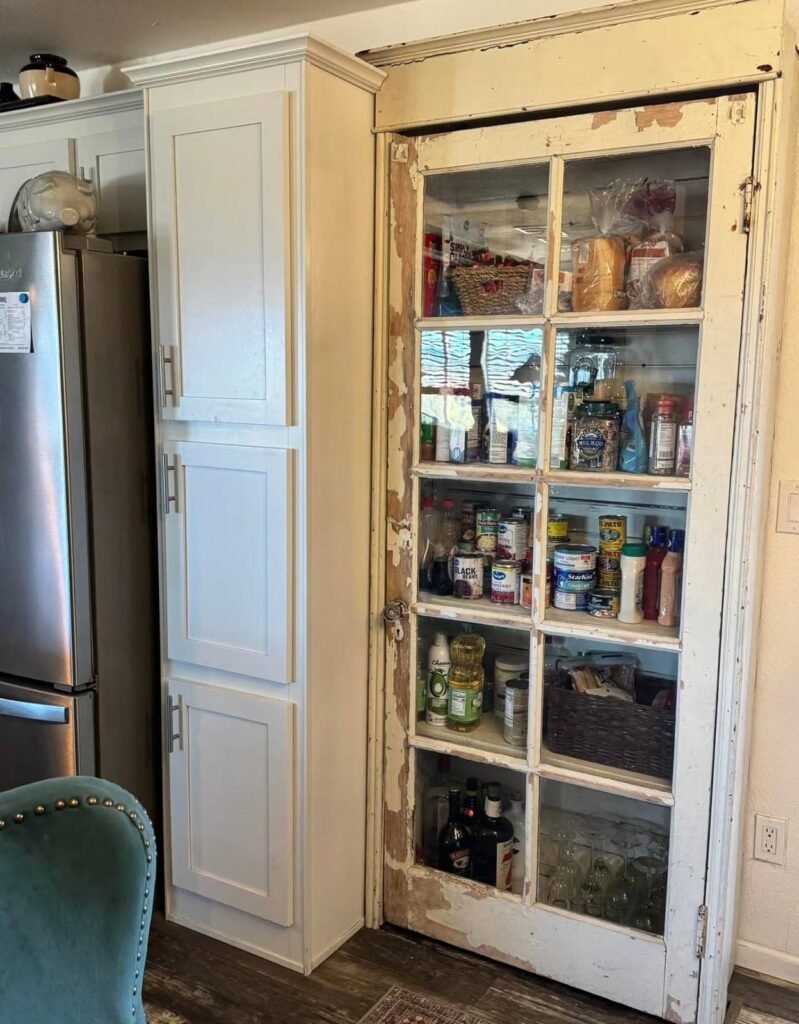
If your kitchen has no pantry, an old bookcase can step in. The before is a scuffed bookcase with adjustable shelves. The after is a pantry cabinet with doors, bins, and a clean paint job.
Attach hinged doors (a pair of thrifted cabinet doors works well), add a magnetic catch, and line the shelves with a wipeable shelf liner. Shelves meant for books are not always deep enough for cans, so measure your biggest items first. When you’re ready to fill it up, my guide to how to organize a pantry shows how to group items so you can actually find them.
19. Give a Basic Bookcase a Built-In Look
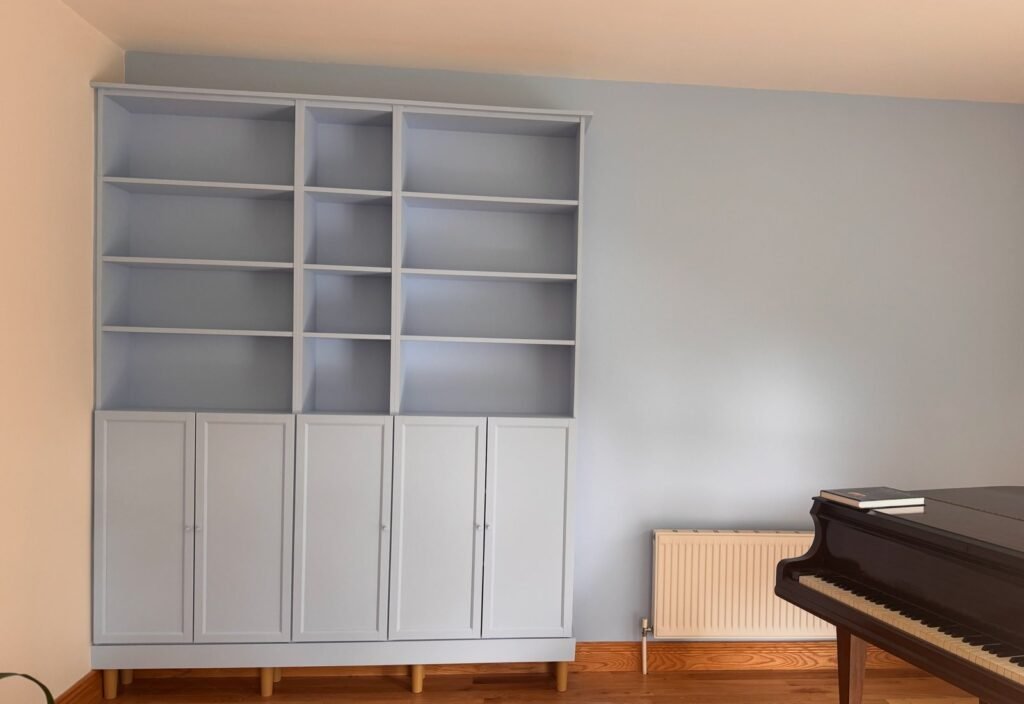
A plain bookcase can pass for a built-in with some trim and paint. The before is a freestanding unit with a visible gap at the top and sides. The after blends right into the wall, and the room feels taller.
Add crown molding along the top, side trim to cover gaps, and paint the whole thing the same color as the wall. A matching color tricks the eye, which is a technique I use throughout my guide on how to make a small apartment feel bigger. Just be careful if you rent, because attaching trim may not be allowed in your lease.
20. Make an Entryway Bench From an Old Table
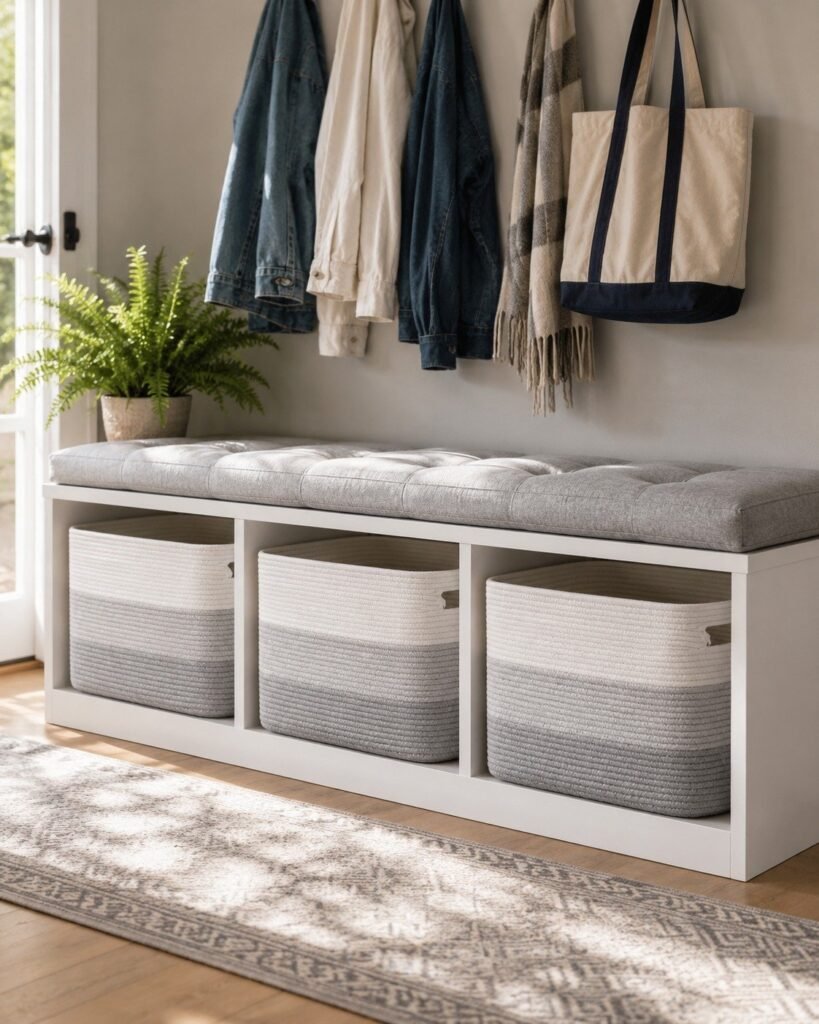
A short, sturdy table with a rough top can become a bench with shoe cubbies below. The before is a leftover plant stand or end table. The after is a landing spot that keeps boots off the floor.
Cut the legs to bench height (about 17 to 18 inches), sand, stain, and add a lower shelf or woven baskets for shoes. Write down a rule for what lives there and what doesn’t. Half of this project is making room, and my guide on how to declutter your home is a good place to start before you build anything.
21. Turn a China Hutch Into a Coffee Bar
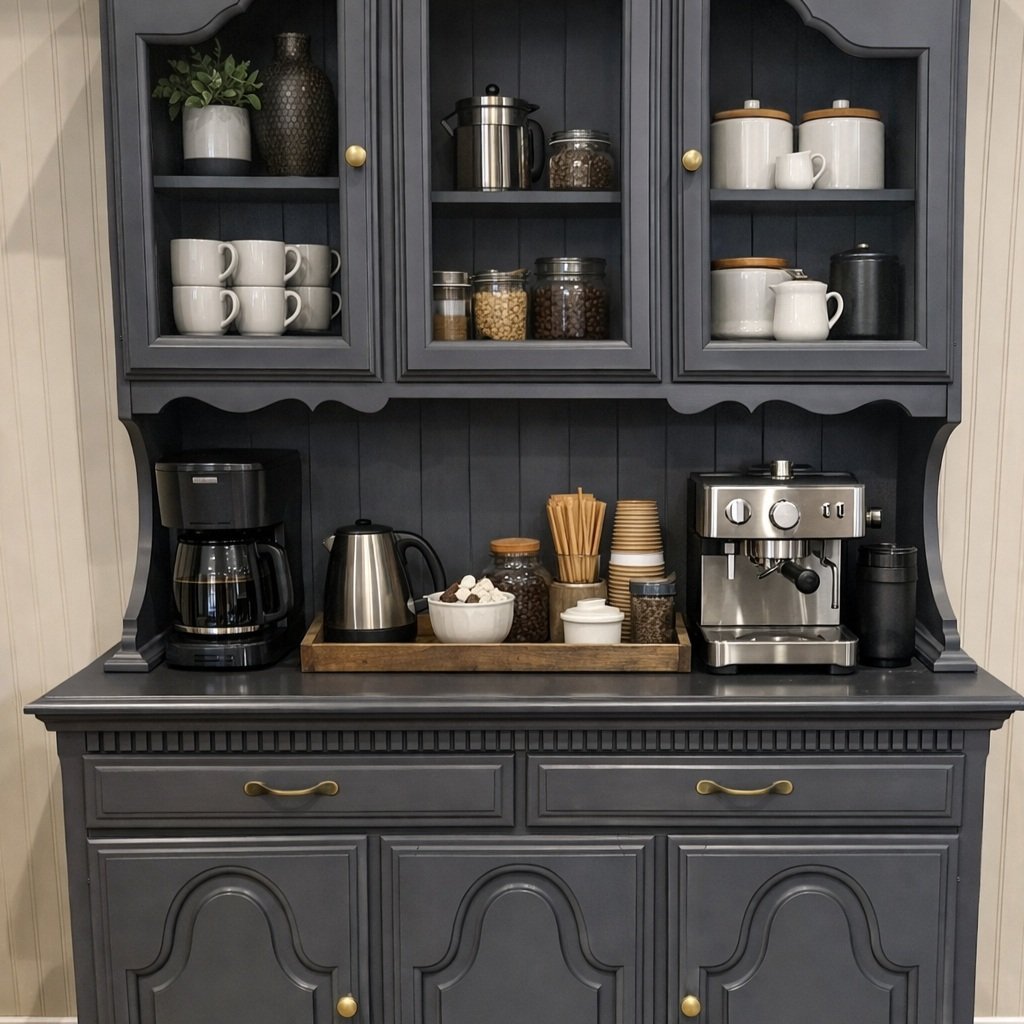
Almost every thrift store has a china hutch that nobody wants. The before is a heavy dark cabinet with glass doors and lace. The after is a coffee and cocktail station with a counter, hooks for mugs, and a pretty paint job.
Clear the shelves, paint the interior a bright color, and use the lower cabinet for syrups, filters, and a small fridge if you have one. Be selective with what you keep behind the glass. I borrowed a lot of my thinking from the KonMari method for beginners, since a hutch only looks good when it holds things you genuinely like.
22. Add Dividers to a Dresser Drawer So It Stops Being a Junk Pit
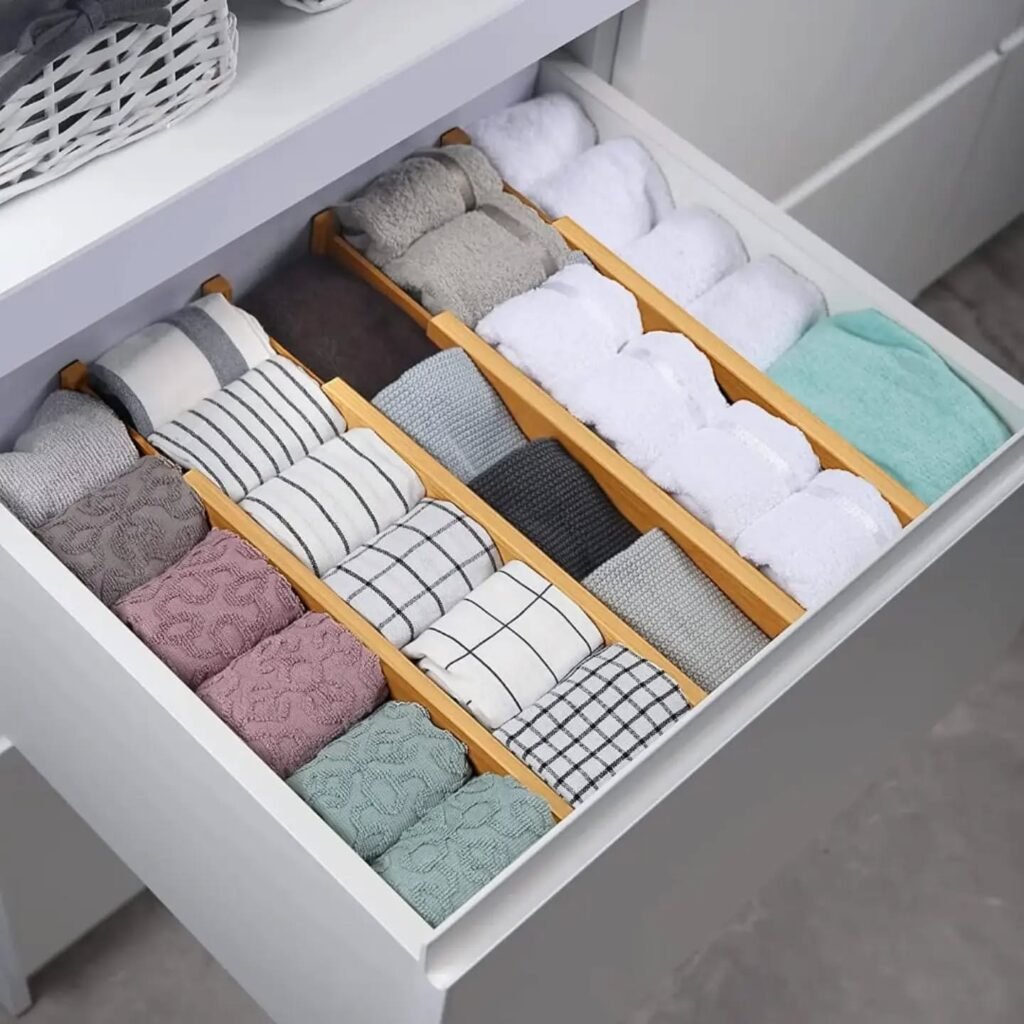
This is the least glamorous idea on the list and probably the one that improves daily life the most. The before is a deep drawer where everything migrates to the back. The after is a drawer with cut-to-fit dividers and a tray for small items.
Use thin plywood or even cardboard-wrapped-in-contact-paper dividers sized to your drawer, and group by category. A small drawer can hold more than you’d think once the space is sectioned. I explain the whole system in my post on how to organize a junk drawer.
23. Create a Fluted Look on a Plain Laminate Cabinet
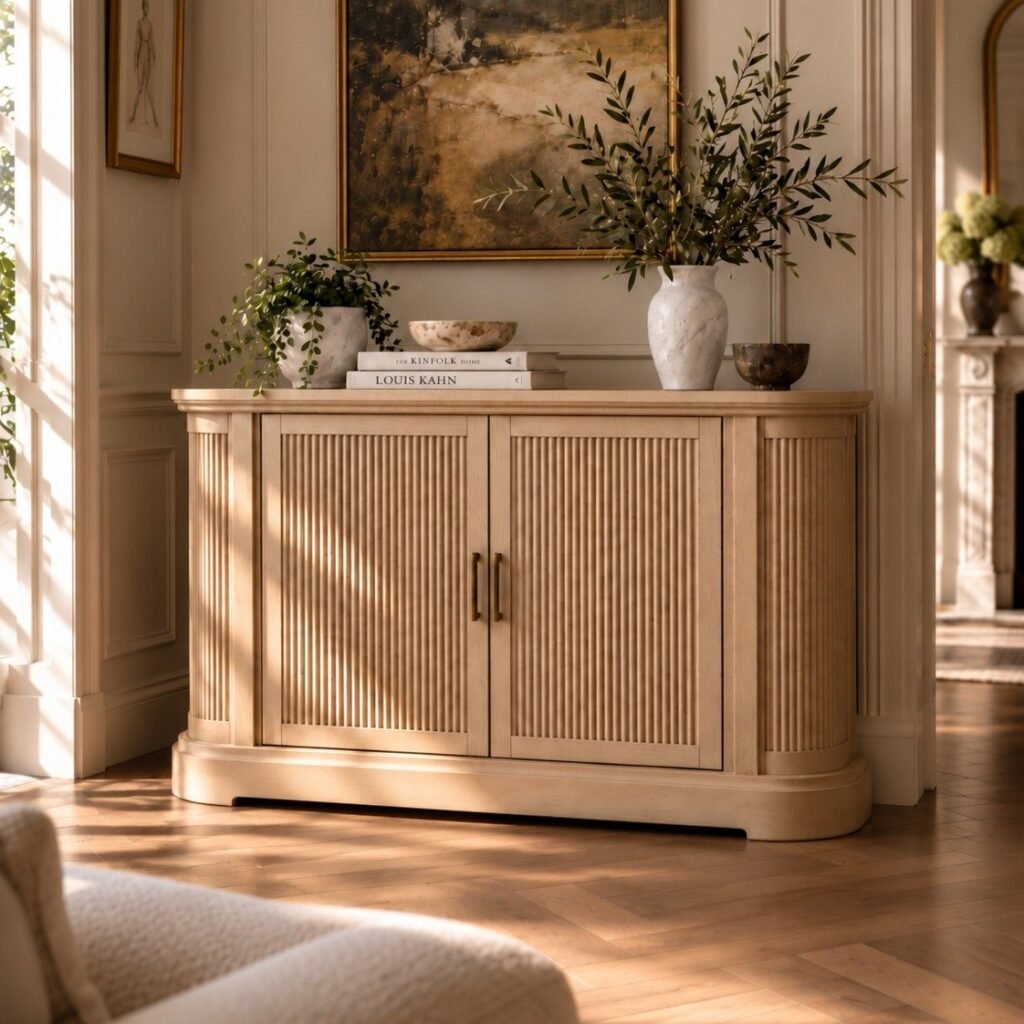
The fluted or ribbed look is everywhere, and you can fake it on a boring laminate cabinet with half-round dowels or flexible fluted panels. The before is a flat, shiny cabinet. The after is a textured piece that looks like it belongs in a boutique hotel.
Glue the fluting onto the doors, sand lightly, apply a bonding primer, and paint in a warm neutral. It’s a project that rides the same wave as the shifts I covered in home organization trends, where texture and closed storage keep winning.
Pro tip: Laminate and glossy surfaces need a bonding primer, not regular primer. Skipping that step is the number one reason painted laminate peels at the edges.
24. Turn an Old Twin Bed Frame Into a Daybed Sofa
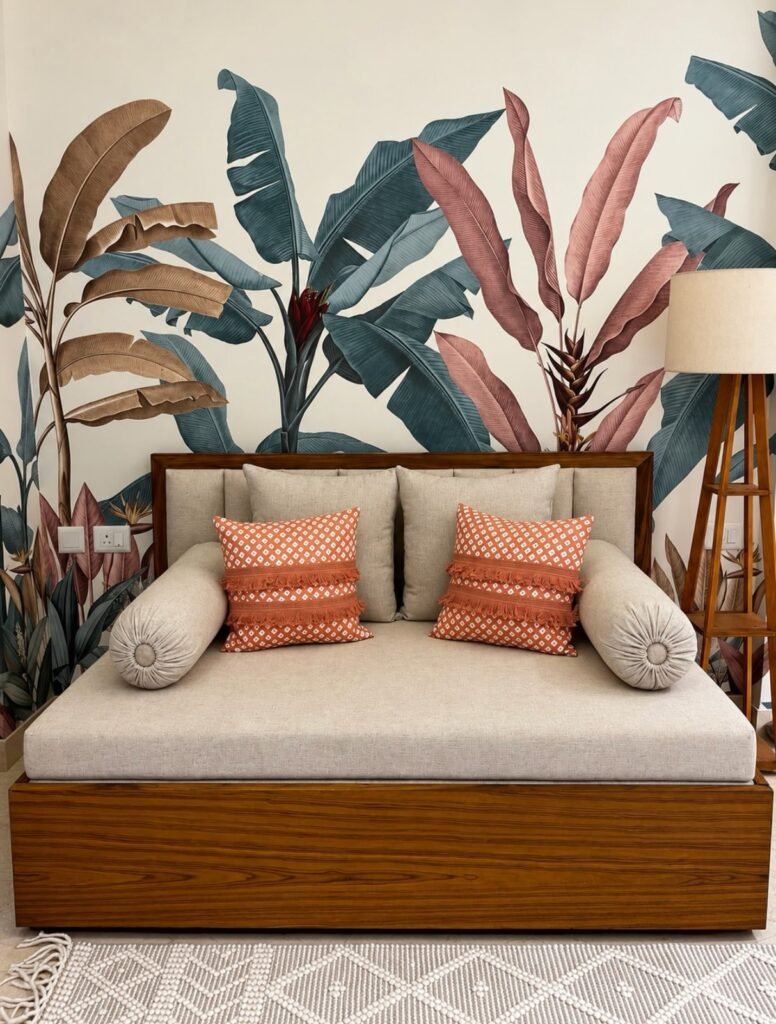
A twin frame with a good headboard and footboard can become a daybed that works as seating by day and a guest bed at night. The before is a dated twin frame from a yard sale. The after is a daybed with bolsters and a trim mattress.
Paint the frame, add a firm mattress, and arrange cushions along the back. You’ll need extra pillows to make it comfortable as a sofa, and a thin mattress will sag if you skimp on quality. If you want a ready-made alternative, my guide to convertible sofa beds for small spaces compares options.
25. Turn a Bulky Wardrobe Into a Mini Mudroom
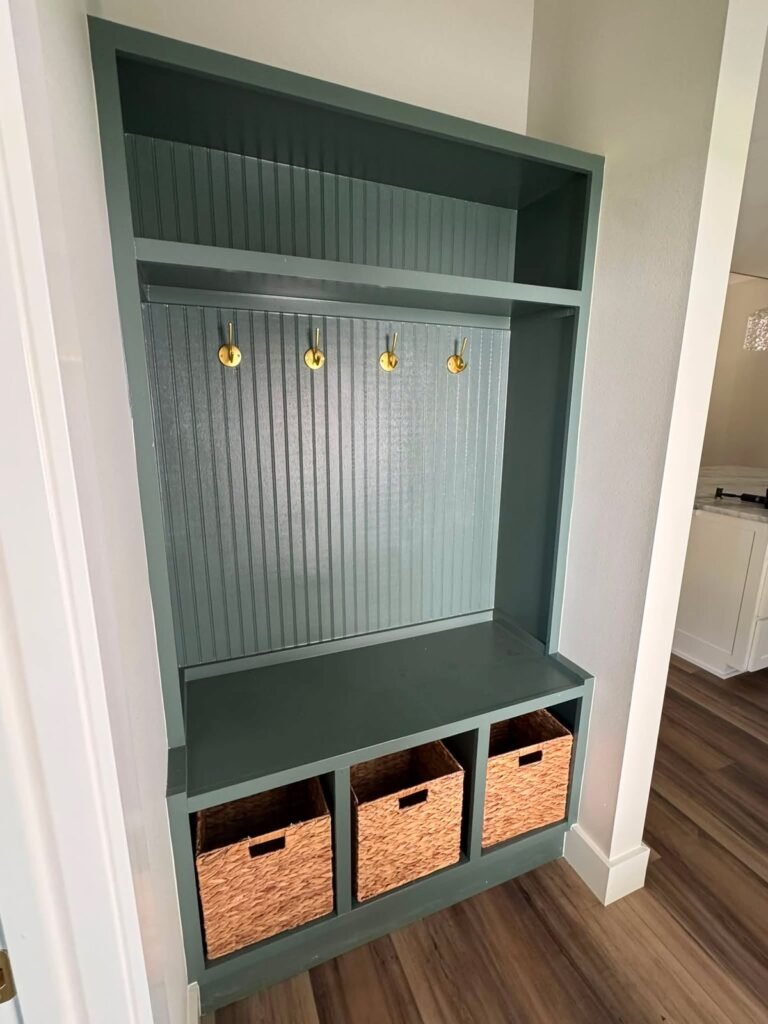
If your apartment has no coat closet, an old wardrobe can serve as one. The before is a hulking dark wood wardrobe with a bar and a drawer. The after is an entry cabinet with hooks, baskets, and a shoe tray.
Remove the clothing rod and install hooks at different heights, plus a small bench shelf for bags. Paint it a light color so it doesn’t swallow the entry. If you’re short on closet space in general, my post on closet organization on a budget shares cheaper ways to get more out of what you have.
26. Turn an Armoire Into a Home Bar
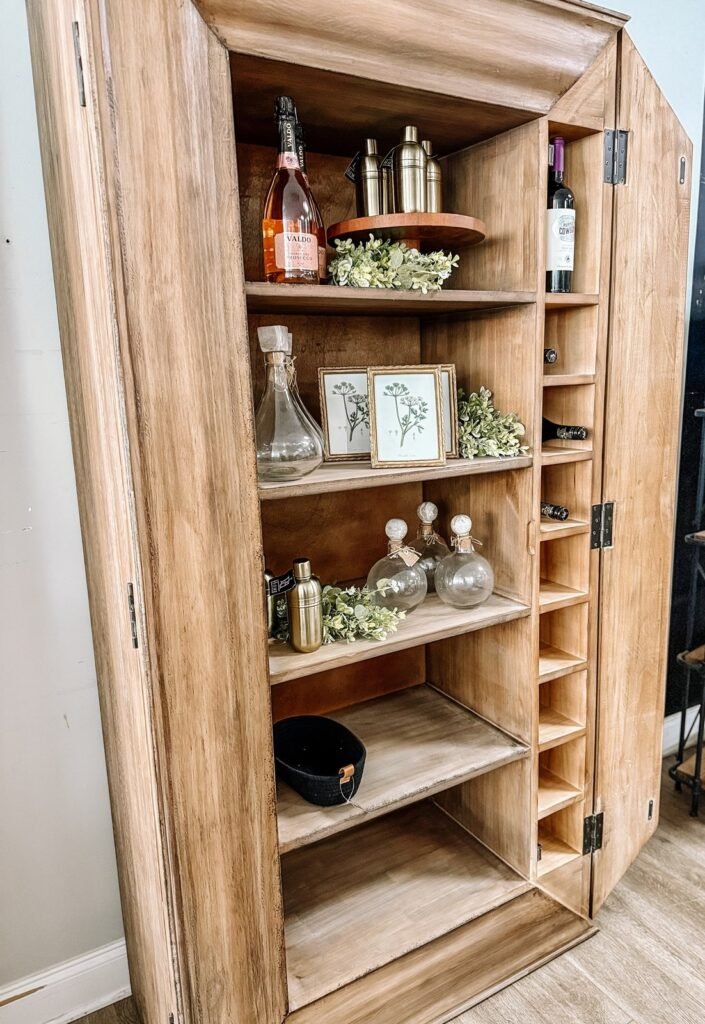
Armoires are huge, which is why they’re cheap secondhand. The before is a TV armoire with a dated veneer. The after is a closed bar cabinet that hides bottles, glasses, and a few serving trays.
Take out the TV shelf, add a mirrored back panel, and install a small light strip inside. Use the doors to hold stemware on slide-in racks. It’s a lovely piece to have when guests come over, and I think of it as an extension of the hosting ideas in my small apartment Christmas decor guide.
27. Turn a Vintage Trunk Into a Coffee Table With Hidden Storage
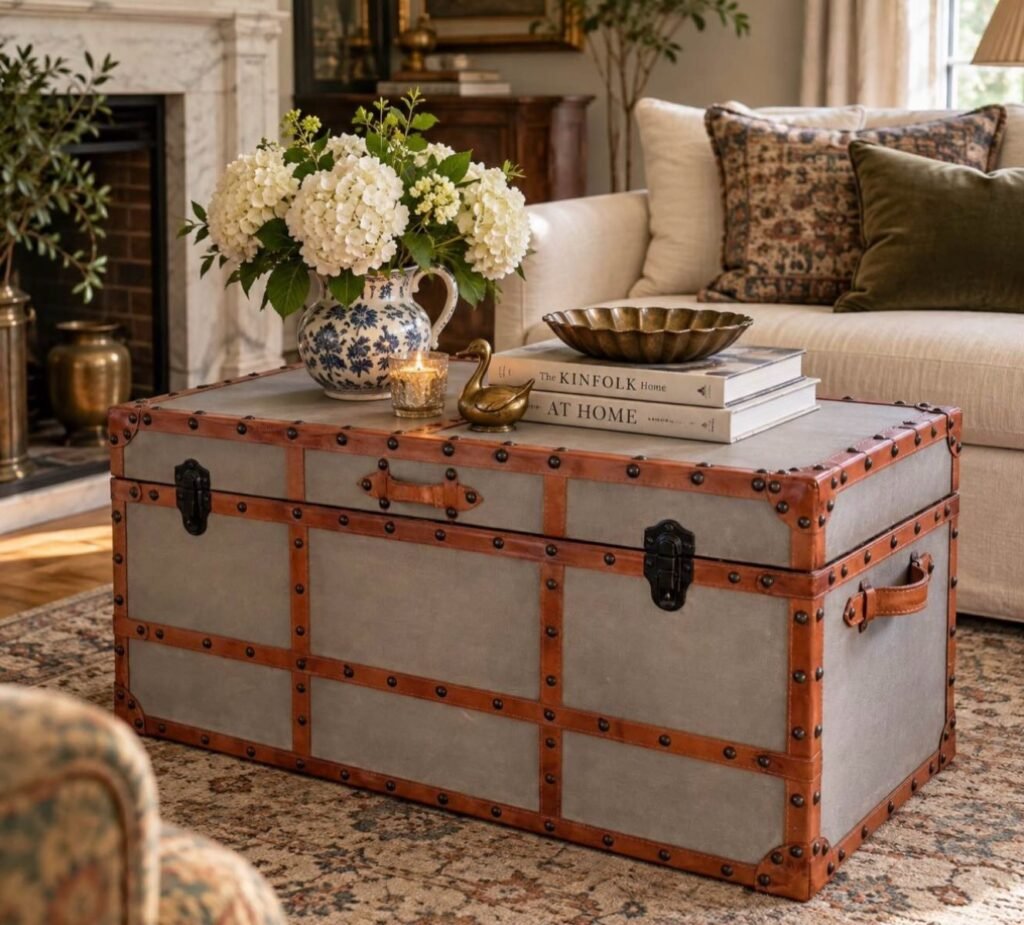
A steamer trunk is already a coffee table waiting to happen. The before is a beat-up trunk with rusted latches. The after is a table with a lid that opens to reveal storage for blankets or seasonal items.
Clean it thoroughly, replace any broken hardware, and add a small tray on top to keep drinks from marking the surface. This is where holiday boxes and wrapping paper can live without eating a closet. I’ve got more ideas in my guide to holiday decor storage ideas.
28. Refresh a Metal Filing Cabinet
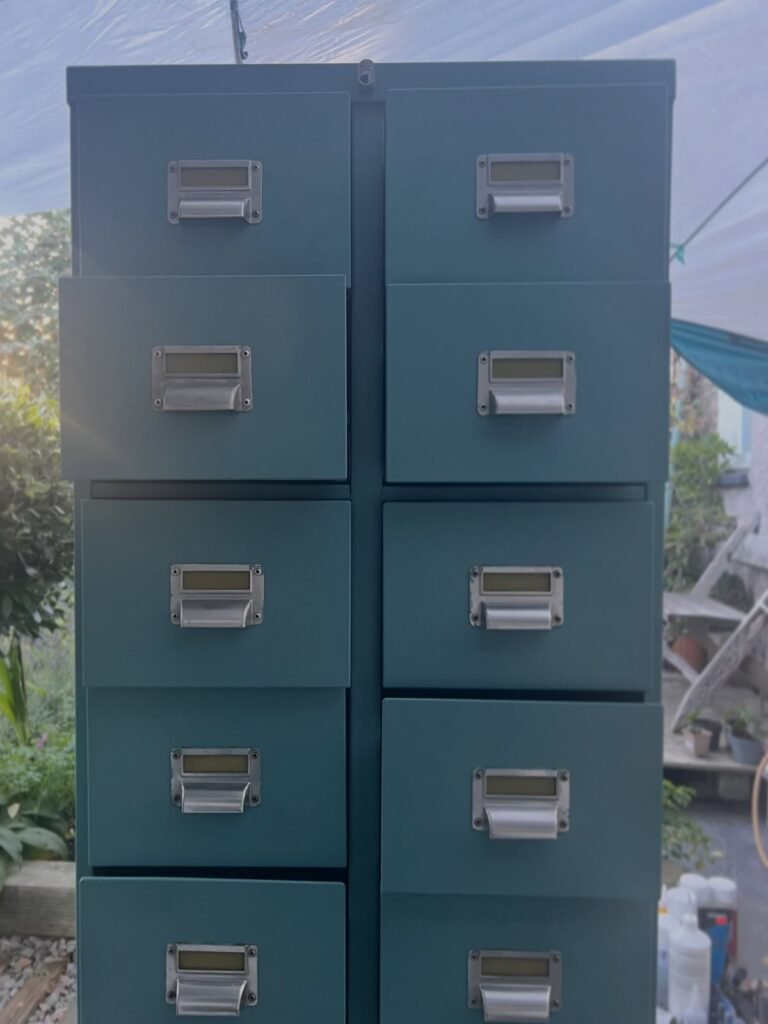
It’s not pretty, but a filing cabinet is secretly one of the best upcycle candidates. The before is a scratched gray cabinet that screams office supply closet. The after is a matte colored cabinet with new pulls and clear labels.
Sand lightly, prime with a metal primer, and use spray paint for even coverage. Keep an eye on the drawers so they still slide smoothly after painting. A little labeling goes a long way, and I put together a guide to labeling systems for organization that you can borrow from.
29. Split an Old Side Table Into Nesting Tables
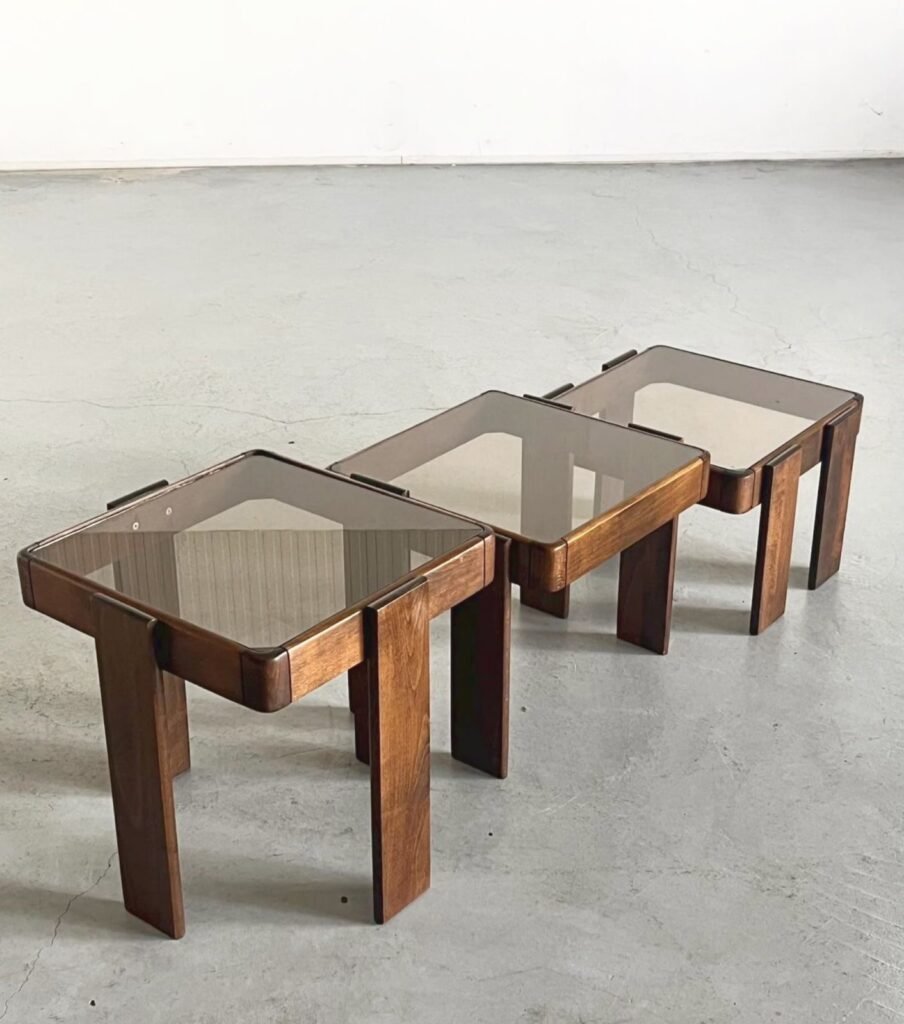
If you have a larger side table with a stable base, you can build two or three nesting tables out of the leftover wood. The before is one bulky table. The after is a trio of nesting tables in graduated sizes.
Cut and refit the legs so each table tucks under the next, then finish them in a single paint or stain. These work well when you have more room to play with. If you’re deciding whether you need that extra space at all, my comparison of a studio versus a one-bedroom apartment breaks down how the layout changes the furniture you pick.
30. Add Caned Doors to a Plain Cabinet for Linen Storage
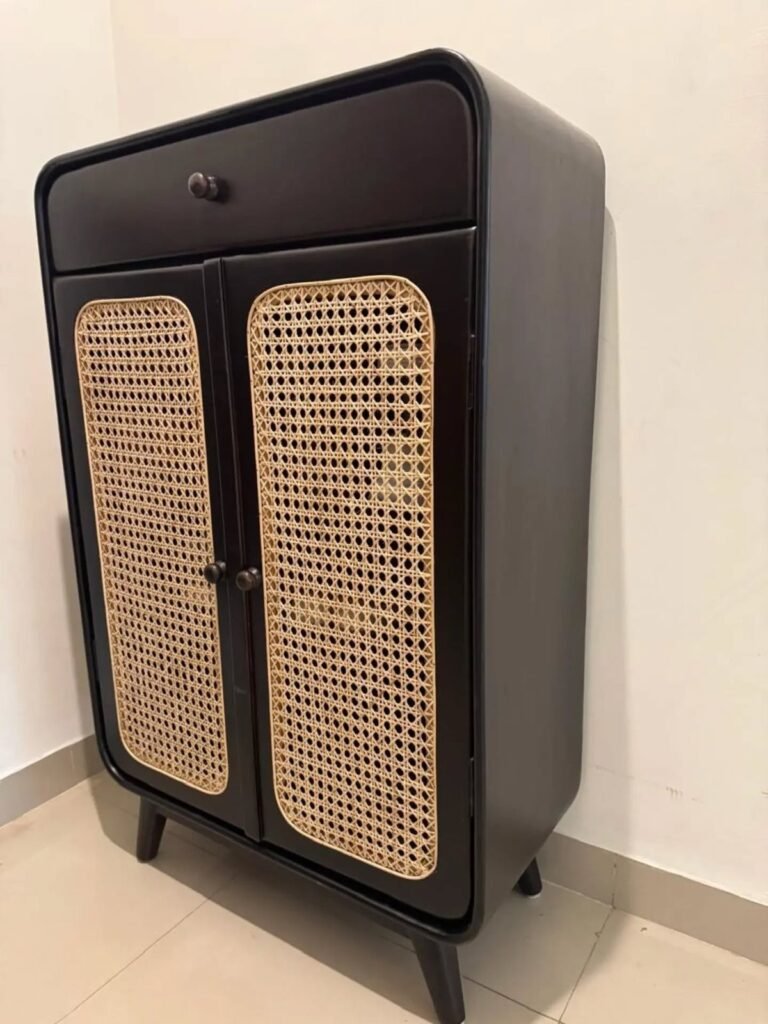
Caning is one of those details that makes a cheap cabinet look vintage and expensive. The before is a cabinet with flat, plain doors. The after is a breathable linen cabinet with woven panels.
Cut out the center of each door panel, then staple pre-woven cane webbing (soak it first so it tightens as it dries) behind the opening. Trim the back with a thin strip of wood. The airflow is great for towels and sheets, and I cover the best ways to fill a cabinet like this in my guide to linen closet organization.
31. Rescue a Vintage Wooden Chair
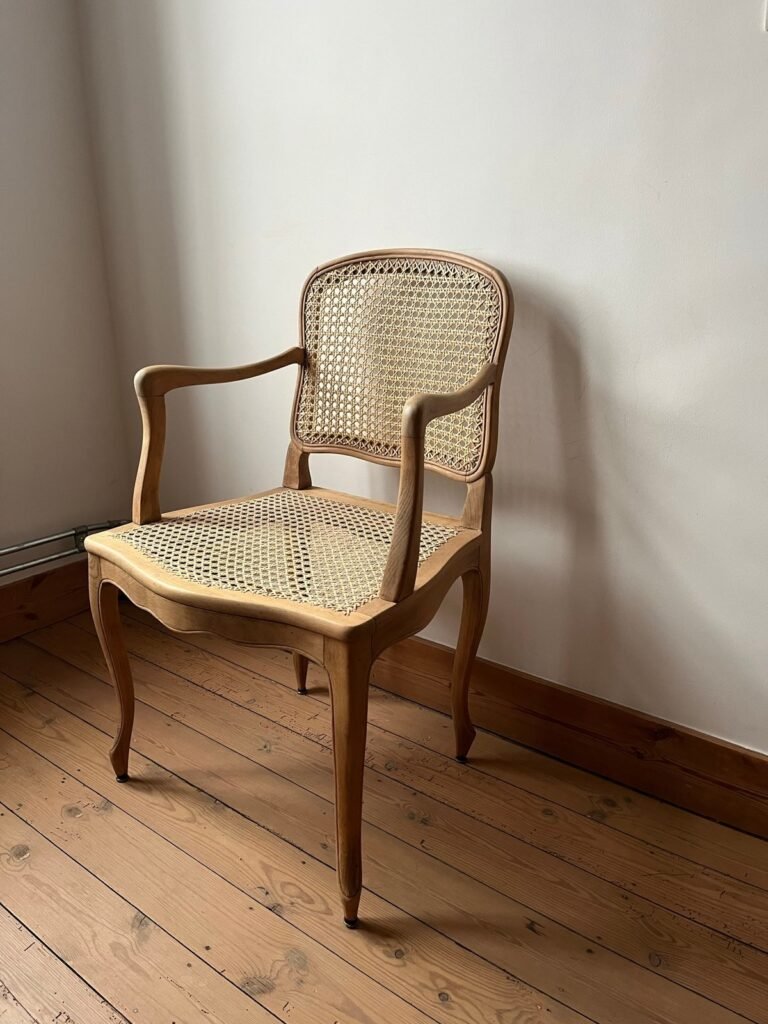
Single vintage chairs are everywhere at flea markets, and they’re often built better than anything you’d buy new. The before is a wobbly, scratched chair. The after is a solid accent chair that sits in a corner or beside a desk.
Tighten the joints with wood glue and clamps, sand the surface, refinish, and add a seat cushion or woven seat. It’s worth the effort because a chair like this adds personality without taking much room. If you’re just settling into your first place, my apartment living for beginners guide helps you decide which pieces are worth keeping.
32. Turn a Shelving Unit Into a Closet System Insert
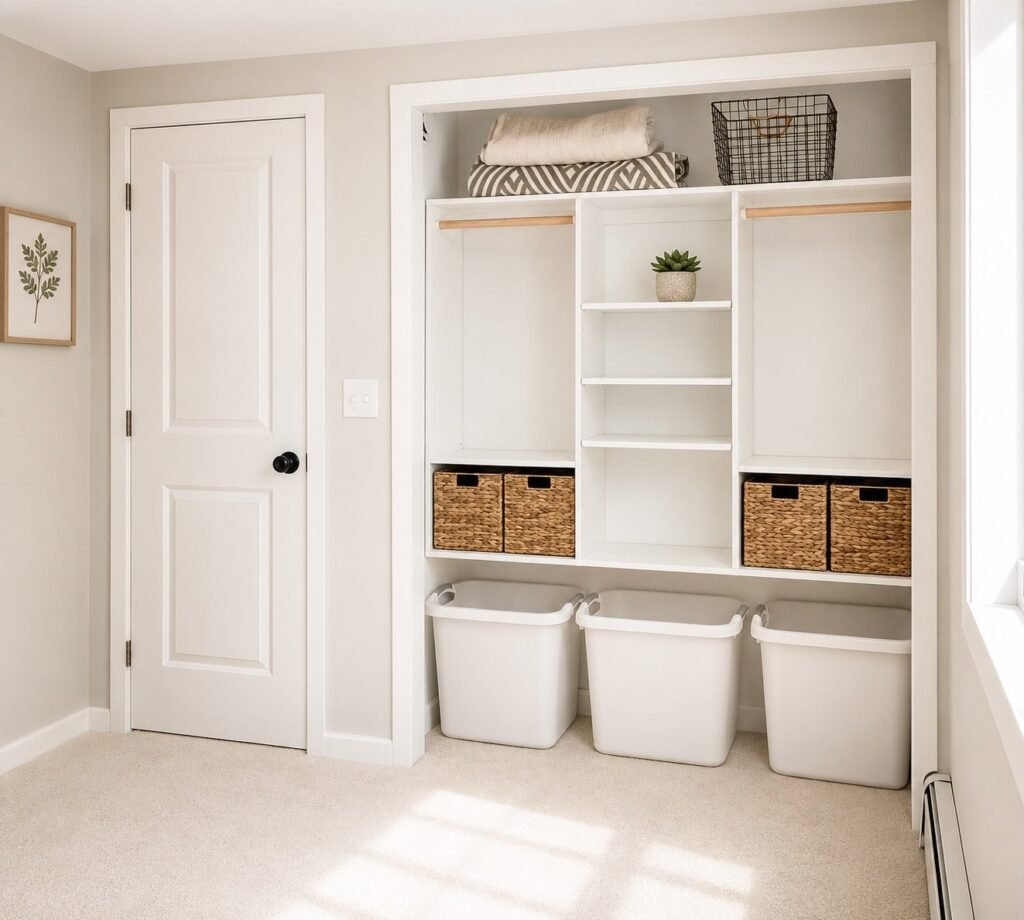
You don’t need a custom closet to get the benefits of one. The before is a plain wooden shelving unit. The after is a closet insert with adjustable shelves, bins, and a hanging rod in a painted finish.
Measure your closet carefully, cut the unit to fit, and paint it a bright color so it looks intentional. Wood tends to feel more custom than wire, and I compare the two in wire vs wood closet shelving. For a full plan you can build from scratch, try my DIY closet organization system.
33. Convert an Old Dresser Into a Garage Workbench
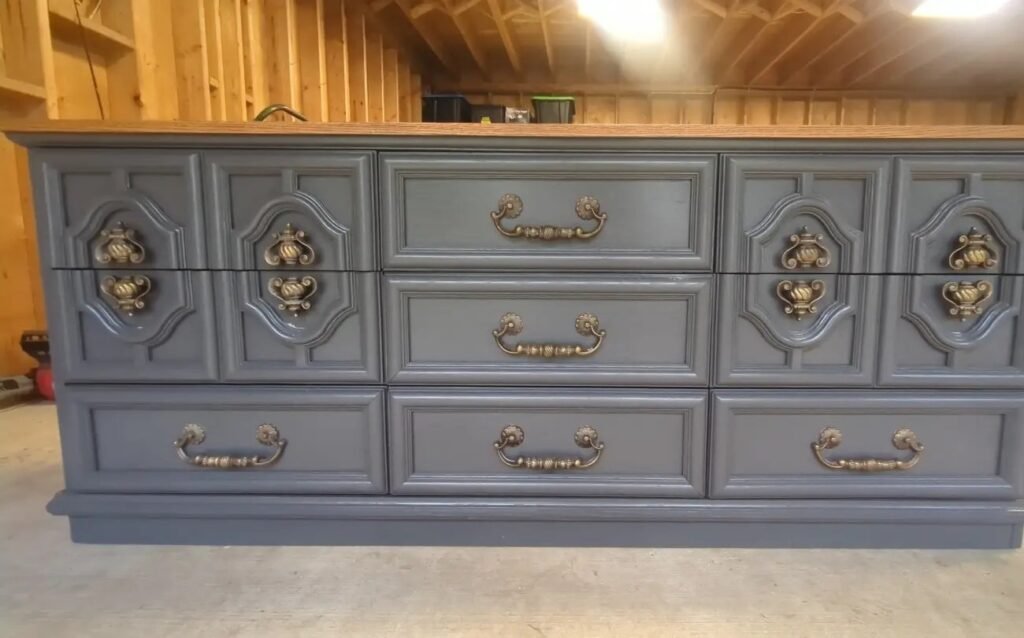
A sturdy dresser that’s too beat up for the bedroom can have a second life in the garage. The before is a chipped dresser with mismatched drawers. The after is a workbench with a solid top and drawers sorted by tool type.
Add a thick plywood or butcher block top, screw down a vise if you need one, and line the drawers with non-slip liner. The drawers hold screws, tape, and small tools better than most plastic organizers. If your garage needs more help, my list of garage storage ideas covers wall systems and shelves.
34. Hang Old Cabinet Doors as a Wall Organizer
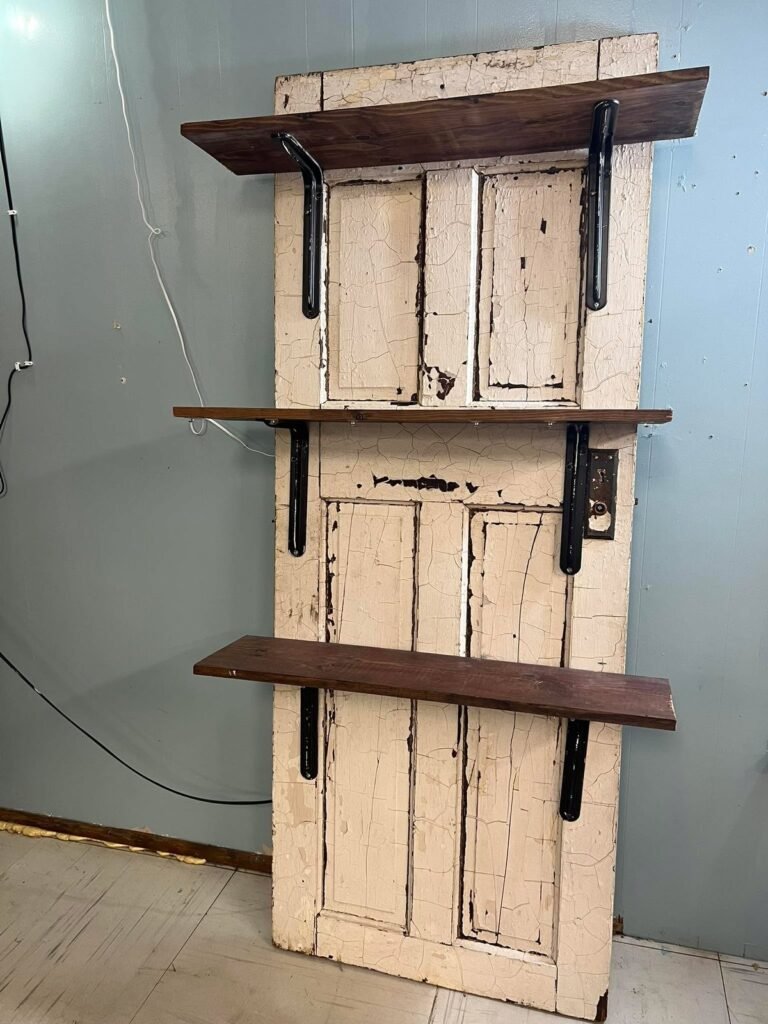
Salvaged cabinet doors are everywhere, especially after kitchen renovations. The before is a stack of mismatched doors. The after is a wall organizer with hooks, small shelves, or a chalkboard panel.
Paint the doors in a coordinated color, add hooks or ledges, and mount them with heavy-duty hangers. Place it by the door for keys and mail, or in the kitchen for towels and utensils. When you’re ready to organize a whole home, my guide to home organization for beginners helps you decide where to start.
How Much Do Upcycled Furniture Projects Really Cost?
One of the best parts of upcycling furniture on a budget is that the cost can scale with you. A basic repaint with new hardware can run under $40, while a full vanity conversion can reach a few hundred dollars once plumbing and a sink are included. Here’s a rough breakdown.
| Budget Tier | Typical Cost | Best Ideas From This List | Time Needed |
|---|---|---|---|
| Quick and cheap | Under $25 | #5 drawer shelves, #10 crate shelves, #22 drawer dividers, #31 chair rescue | 1 to 3 hours |
| Weekend project | $25 to $100 | #1 two-tone dresser, #7 door headboard, #15 chair seats, #20 entry bench, #28 filing cabinet | 1 to 2 days (with drying time) |
| Bigger build | $100 and up | #2 island, #3 vanity, #14 tile table, #26 home bar, #33 workbench | A full weekend or more |
Small-Space Picks vs Larger-Space Picks
| Your Space | Smart Picks | Why They Work |
|---|---|---|
| Studio or tiny apartment | #6 suitcase nightstand, #8 pallet table, #12 sewing desk, #17 storage ottoman | Compact, movable, and storage-forward |
| One-bedroom or larger | #2 island, #21 coffee bar, #26 home bar, #29 nesting tables | Bigger pieces that make sense with extra floor space |
| Rental with strict rules | #4 TV console, #9 ladder shelf, #11 spool table, #27 trunk table | Freestanding, no wall damage, easy to take with you |
What I’d Do First If I Were Starting Over
I’d skip the ambitious stuff and start with one dresser. A thrifted dresser, a good primer, and a gallon of paint will teach you more about upcycled furniture ideas than ten Pinterest boards will. Once you’ve seen a $30 piece transform in your own hands, the bigger projects stop feeling scary.
If I had to pick a single favorite from this list, it would be the tile-top coffee table (#14). It’s the most surprising before and after I’ve done, and it’s the one guests ask about. Before you buy anything else for your home, check my breakdown of common organization mistakes so your new pieces actually solve problems instead of creating new ones.
Upcycled Furniture Ideas FAQs
What is the best paint for upcycling furniture?
It depends on the piece. Chalk-style paint is forgiving for solid wood, while a cabinet enamel holds up better on high-touch surfaces like dressers and kitchen islands. For laminate, always use a bonding primer first, then your color.
Do I have to sand furniture before painting it?
Not always, but you should at least scuff the surface so paint can grip. Some chalk paints claim no sanding is needed, though I still recommend a light pass and a thorough clean, especially on glossy finishes.
How do I paint laminate furniture so it doesn’t peel?
Clean it well, scuff sand with 220 grit, apply a bonding primer, and then use two thin coats of paint. Finish with a water-based clear topcoat, and let it cure for several days before heavy use.
Is it safe to sand old painted furniture?
Not without testing first. Pieces made before 1978 can have lead-based paint. Use a lead test kit, and if it’s positive, avoid dry sanding and consider professional removal or leaving the finish intact.
How much does it cost to upcycle a piece of furniture?
Most simple makeovers cost between $20 and $75 for paint, primer, and hardware, not counting the piece itself. Larger conversions like a vanity or kitchen island can climb past $150 depending on the top and any plumbing.
How do I get a musty smell out of thrifted furniture?
Wipe it down with a mix of white vinegar and water, then let it dry in sunlight for a day or two. For stubborn smells, put a bowl of baking soda inside drawers, and seal the interior with a stain-blocking primer before painting.
Can I upcycle furniture if I rent?
Yes, as long as the piece is freestanding and you aren’t altering the unit itself. Projects like the dresser TV console, ladder shelf, and trunk coffee table are all renter-friendly and move with you.








Leave a Reply